Monday, November 28, 2016

Peg Doll House

My 3 year old grandson wanted a small doll house for his peg dolls.  I built this small wooden house that fits his peg dolls and playmobil figures.  It's gender neutral - so many doll house plans I found were for 12" fashion doll figures, or were very pink and feminine.


I started by buying 3 boards of 6" wide 1/2" poplar, each of them was 3' long.  I cut two pieces of poplar 15" long, and edge glued and clamped them together to make an 11 x 15 panel.

While that was drying, I cut out all the other pieces from the 1/2 inch poplar, except the base, which I cut from 1/2" plywood.  It was a little larger than the width of the boards I had, so I just used a scrap of plywood I already had.


I sanded all the pieces, rounding off the edges slightly so they weren't sharp for little hands.

To cut the doors and windows, I first drilled a hole and then used a jig saw to cut the shape out.  For the front door, I cut the door out, and saved the piece, adding hinges so his peg dolls can go in and out the front door.


Once I had all the pieces cut out, it was pretty easy to put the basic house together.  There were a few parts that were a little trickier:  the balcony and the stairway.  For the stairway, I cut 3 slots in a curved wall.  I made these so the steps would fit tightly, cutting them the same size (or slightly tighter) than the width of the steps.  For the balcony, the big challenge was lining up the holes that I drilled so the railing would line up.

I'm adding the plans here, in case anyone wants to make this.  I took pictures of all the cut pieces:


And here are 2 documents to print out to trace the pieces.  I used 13 slats cut from the poplar to finish the roof.   Both of these files should print over multiple pages, then taped together.

parts to print 1
parts to print 2


And here's an overall plan with dimensions:


So - hopefully on Christmas morning, Parker will love playing with his new peg doll house and all the peg dolls I am making him!  I might have to make some little furniture pieces if I have time before we leave.

Friday, October 14, 2016

Some shots of the interior

We've been putting "finishing touches" on the interior for awhile, and I realized I never posted any pictures that reflect that. So here are a couple:


We've had a few more good trips lately - the fall is here and it's a great time for us in SoCal to go camping - the temperature is a little more manageable and with any luck, we'll start to get some rain to green things up.  We went last week to Blue Jay Campground in the Cleveland National Forest.  For the first time, we could actually have a campfire!  That was super nice.  We also met a ton of really great folks and gave plenty of tours :)


We are trying to keep the names of all the places we've visited on the side of the vardo, but some place aren't really the type of place that has 'souvenirs' - so I improvised by painting a little logo (some made up) on the end to commemorate those places.

And a few shots from the campground at Blue Jay:


I think we're packing up today for another weekend jaunt!

Saturday, September 24, 2016

Camping Life!

We've taken Stardust out a couple of times this fall, now that we have the interior feeling like home.  Dale and I drove up to the Chico area to visit Lindsay and Andrea over the Labor Day weekend, staying at Woodson Bridge SRA.  No hookups, so we used our water tanks and solar, and instead of using the fridge, we brought our cooler and it was just fine.
We had our pop up shade over the picnic table, and had a nice campfire in the fire pit!  We had a lot of visitors who wanted to stop by and check out our place!  On our last morning, we were laying in bed and all of a sudden we could hear someone outside taking pictures - we had to really stifle a giggle!

The park was super nice, and although Dale was hoping to go camping, we just enjoyed hanging out and going on walks with the dog.  Just great to get away. 

On our drive back, we stopped at a rest stop and got into a conversation with a couple who had their bus conversion, and chatted with them about some electrical questions - they gave Dale some ideas on how to get our inverter working better.  He took their advice and fashioned some new hookups with a heavier gage wire, and now it seems to be working just fine ---

Last weekend, we took another trip and went to Silverwood Lake - a lot closer to home, only about 2 hours away.  Dale was still determined to get out and go fishing, so he chose a lake site this time.  Also this time, we got a site with hookups, so we had water and electrical hookups.  We probably could have done without them, because it seems that the fridge is working just fine with the batteries and the solar, but we decided it wouldn't hurt to have it all.

This was really a pretty place to go.  We were able to totally get relaxed with no agenda and we slept in, cooked on our portable stove, and just enjoyed our camper.  Gave a ton of tours! Every park ranger came by and loved the camper.

Dale got to go fishing!  bad news, he never got a single bite!  But at least he had a chance to try!


Silverwood Lake is right along the Pacific Crest Trail.  We didn't get as much hiking/walking in as we would have liked, I would have liked to go along the trail a bit, but since we plan to go out at least once a month, I know we'll get our chances.


We already have found our camp ground for next weekend -- we want to try out a lot of the southern California state parks - one nice thing is that due to Dale's disability status, we get 1/2 price on campsites, so trying all kinds of new places is an easy and inexpensive.  I am looking forward to going some of the places that are winter only - Death Valley, the Mojave, and Joshua Tree will be great in December and January!  There are also a number of campsites directly on the ocean, and I need to get those spots reserved early.  So far, we've done everything kind of last minute, which is fine, but we need to look a little further on and make our plans early!

Friday, July 22, 2016

More interiors

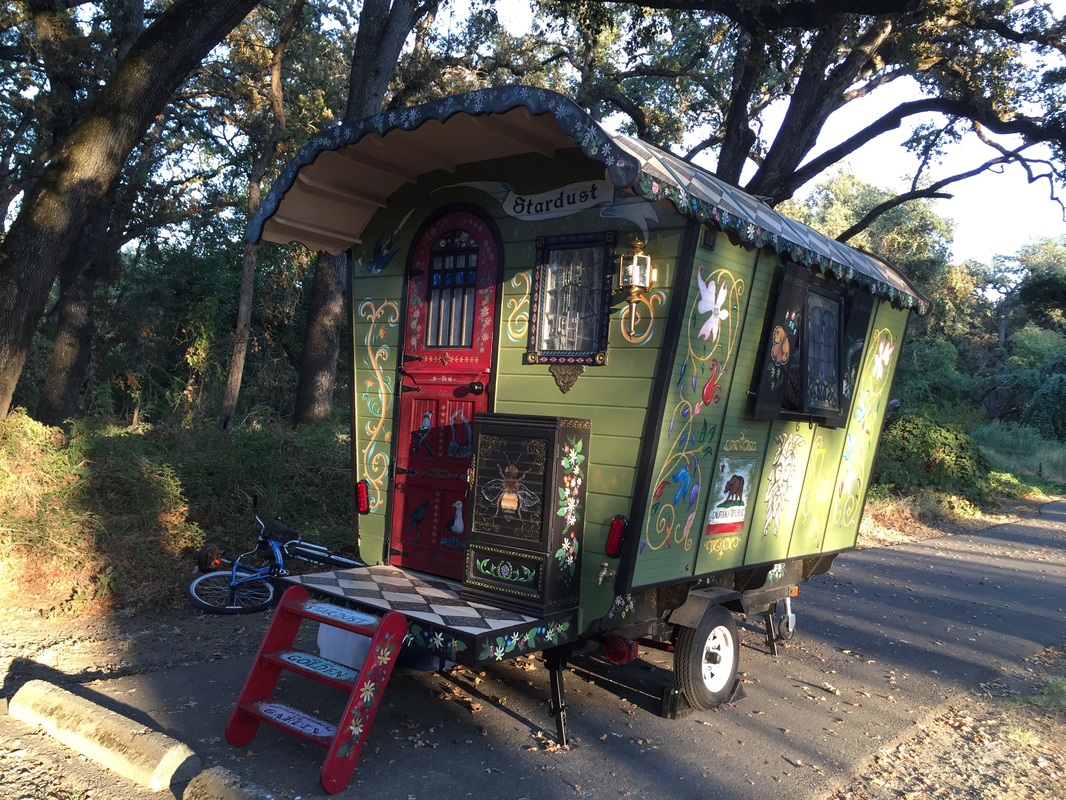
We've come a long way with the interior --shortly after I posted the last update, we went on a "shakedown trip" - usually these are a short camping trip of a weekend to see how things work - ours ended up being 1024 miles with friends.  But Stardust performed beautifully, and we found out a few things that we know we want to do.

First of all, we took the camper to get it weighed. We wanted to be sure we weren't overloading it - it came in at 1520#.  I was hoping for 1200#, so a little heavier than I wanted. But I was also thinking that we had a limit of 1720, which our camper payload is listed at.  Then I got reading, and realized that the trailer itself weighs around 270#, and our total can be closer to 2000# when you combine the payload + trailer weight.  So we are closer to our 1200# than I thought. So all is good.  Which was nice, because I still had things to add --

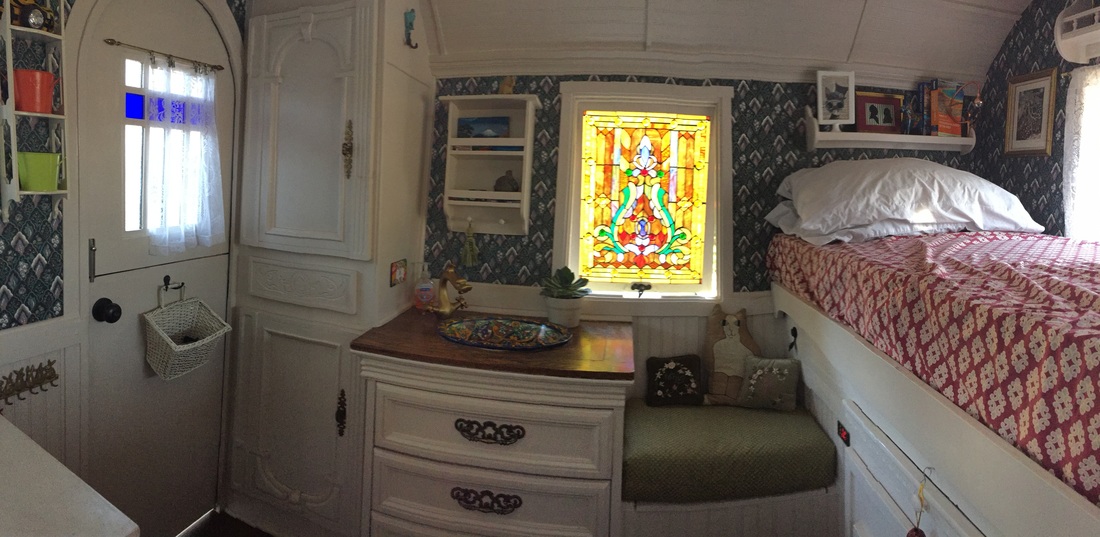
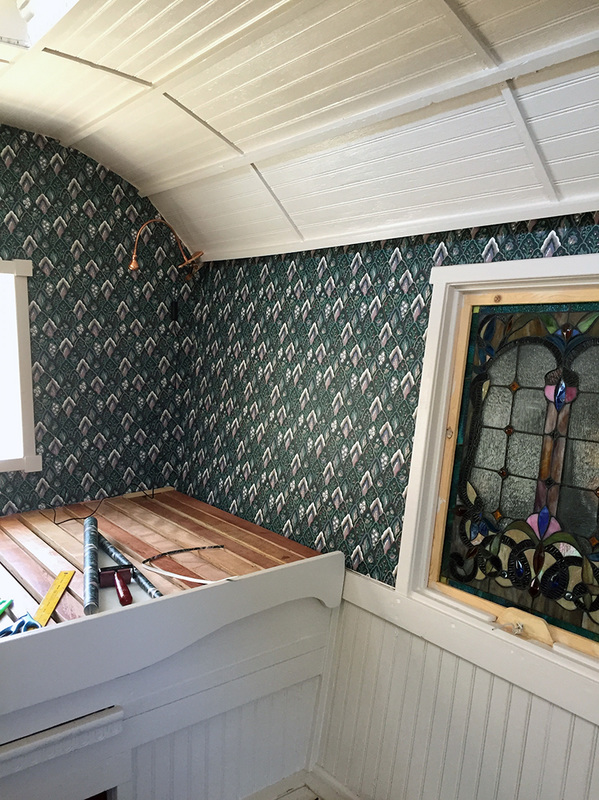
So in the time since we returned, I've wallpapered:
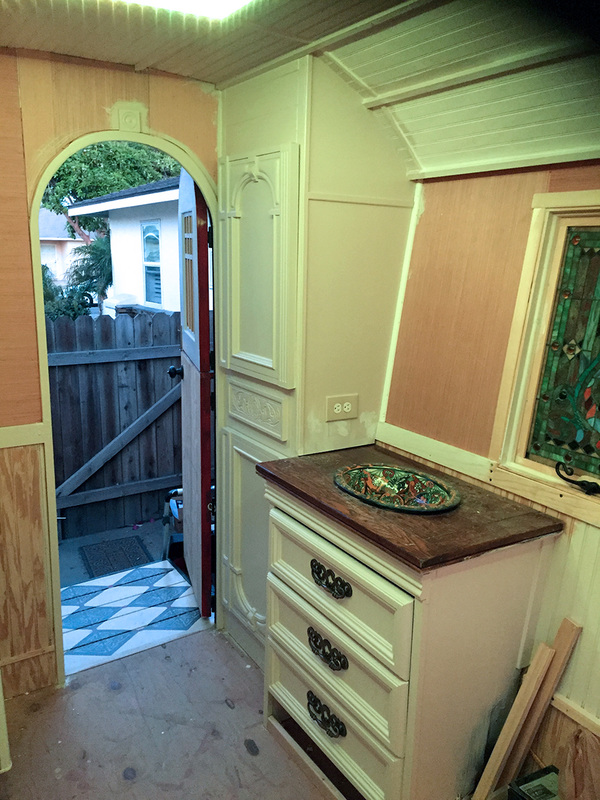
this was some 1990s wallpaper I got in Indiana at a thrift store.  It's a dark hunter green, which works well with our general theme.  It also keeps it from being overly bright inside -- since all the woodwork is a creamy off-white.

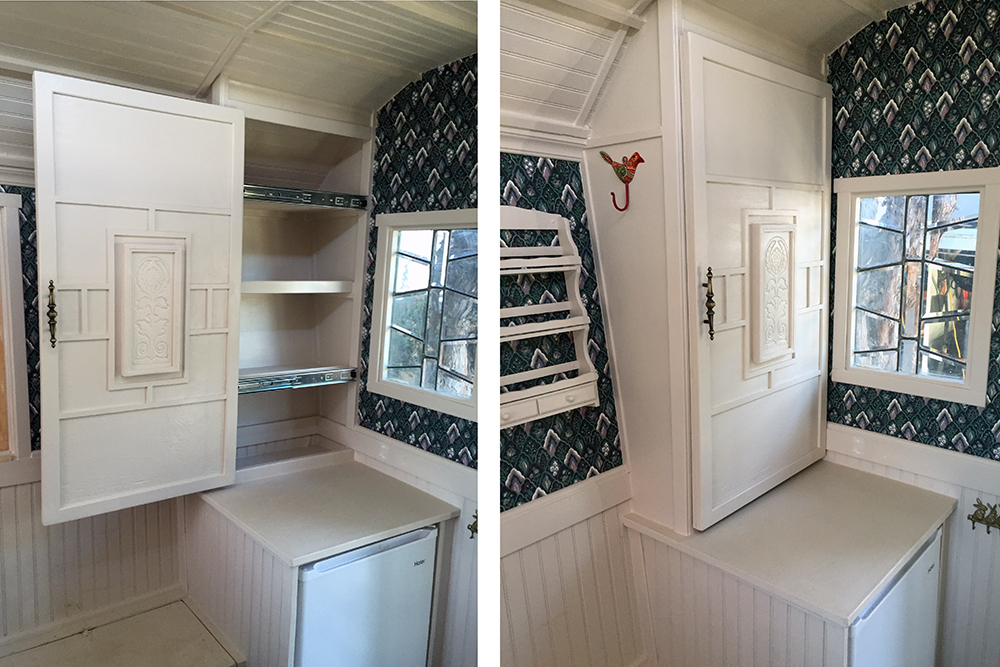
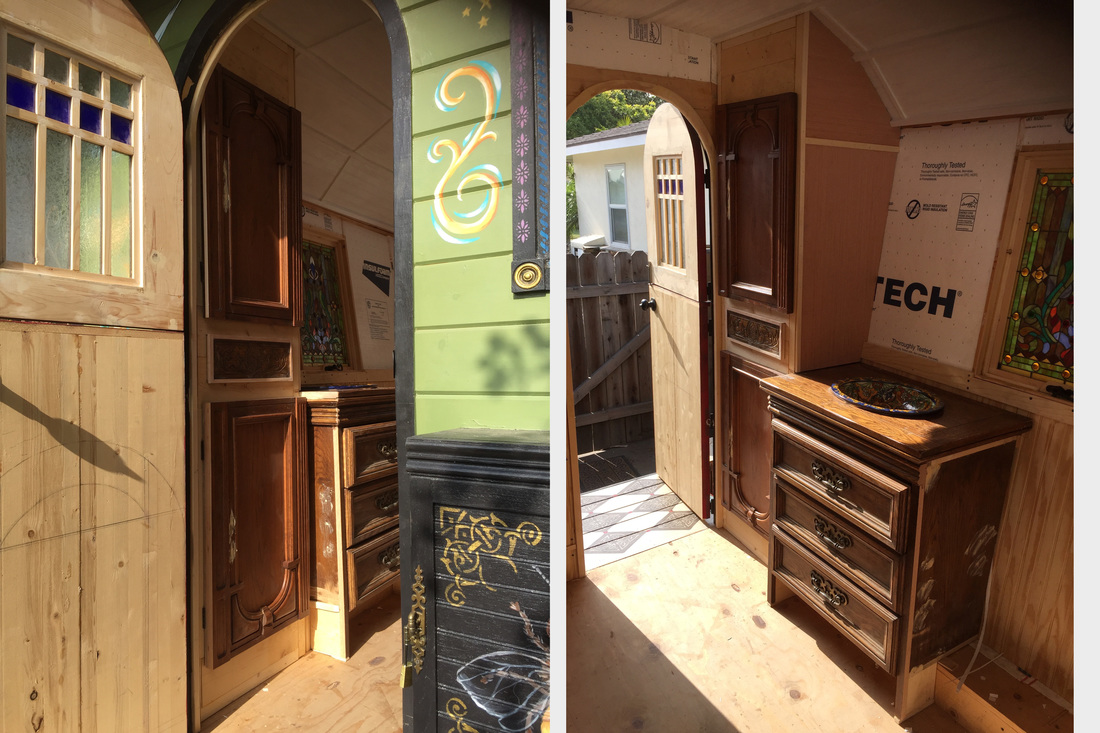
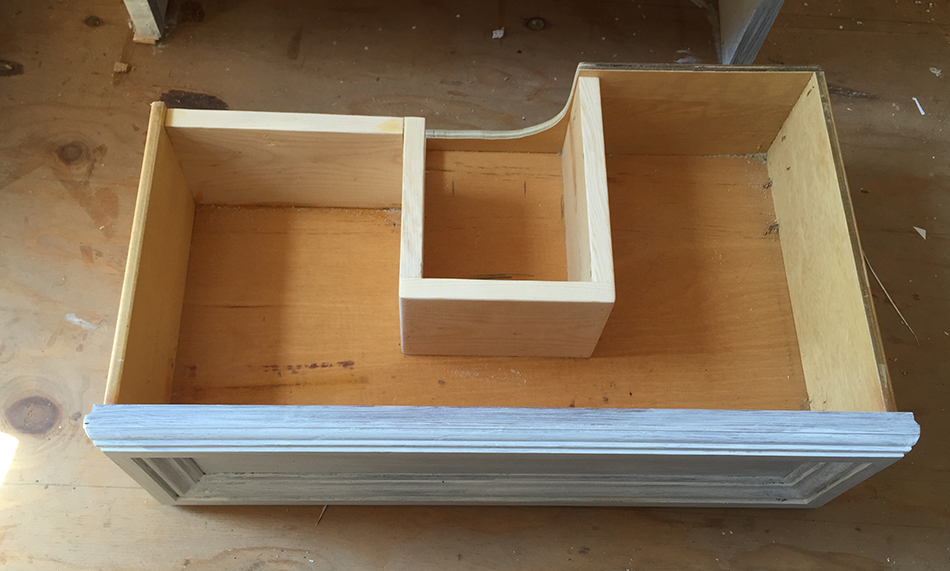
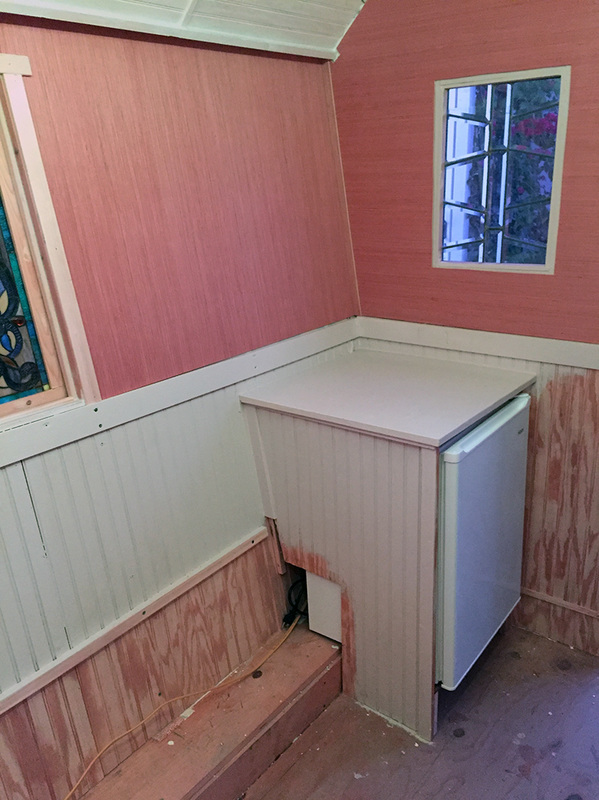
Then I built in some more cabinets.  We realized that it's nice to have things back near the door, and the refrigerator counter was becoming a catch-all.  Building in a shallower shelf there made sense, so I added that.  When it came time to put the door on, I was concerned that it would: a. hit the curtain rod (that I haven't put up yet) and b. cause us to clear off the counter every time we needed to open the cabinet door.  Dale suggested using a slide, which was a great idea.  So that's what I did:

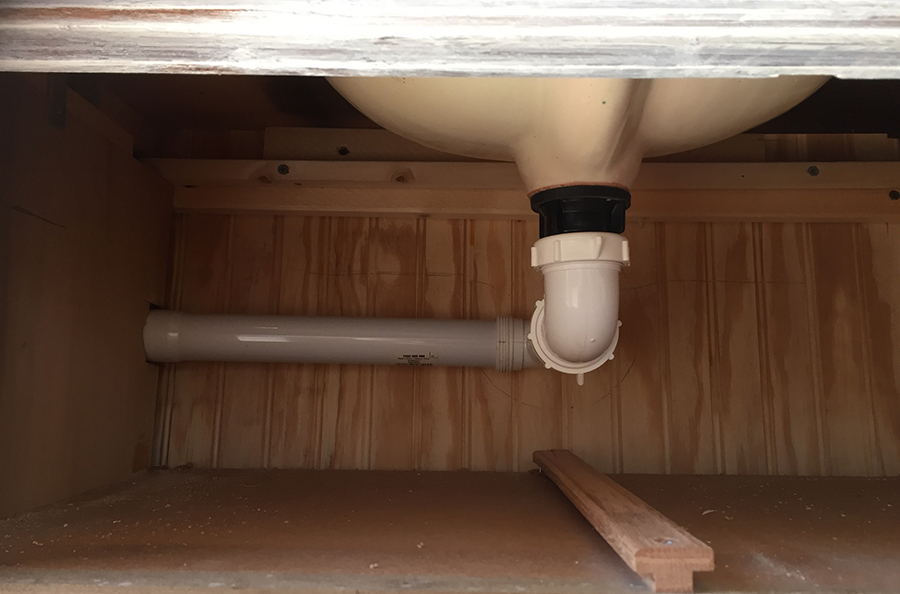
We had just changed out all the drawer slides under the sink - the wooden ones were not working well, even though we waxed them, they kept sticking, so we replaced them with drawer slides.  So we were happy with the slide action, and the new cabinet door works great.


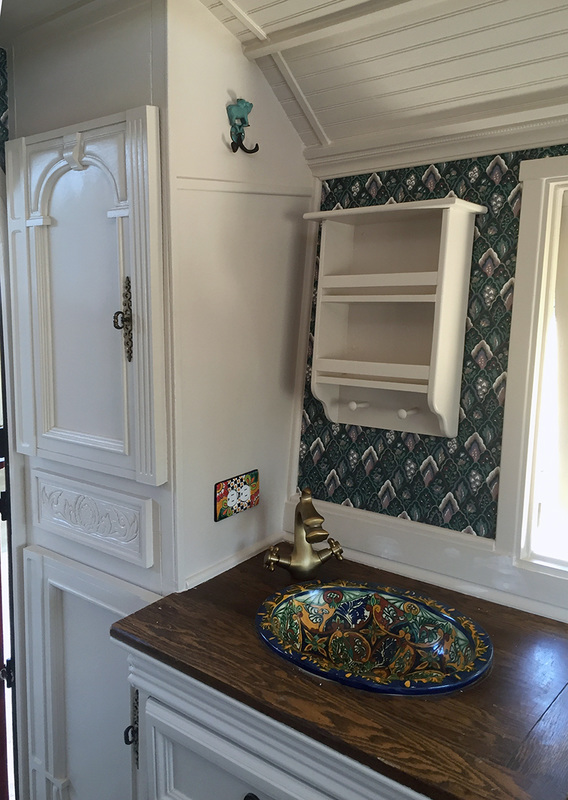
I also picked up some small shelves - one from my friend Stacy, pictured above -- that will hold small bottles of paint -- and the one  over the sink, from a thrift store in Utah.


The sink area looks good - the shelf will hold hand soap, washcloths, other 'sink stuff" or anything else I can think of. I like the hooks also, for holding a variety of hats, towels, etc.


We also added a hook inside the door to hold keys for all the locks - the battery box, the "bee box" lock, the lock for the hitch, etc. This way, they're all right there inside the door.  The door itself needs some detailing - I'm thinking of adding a couple of shallow long bins for misc. things that we can just reach over and get -- putting our phones in, things we don't want to climb all the way in for.


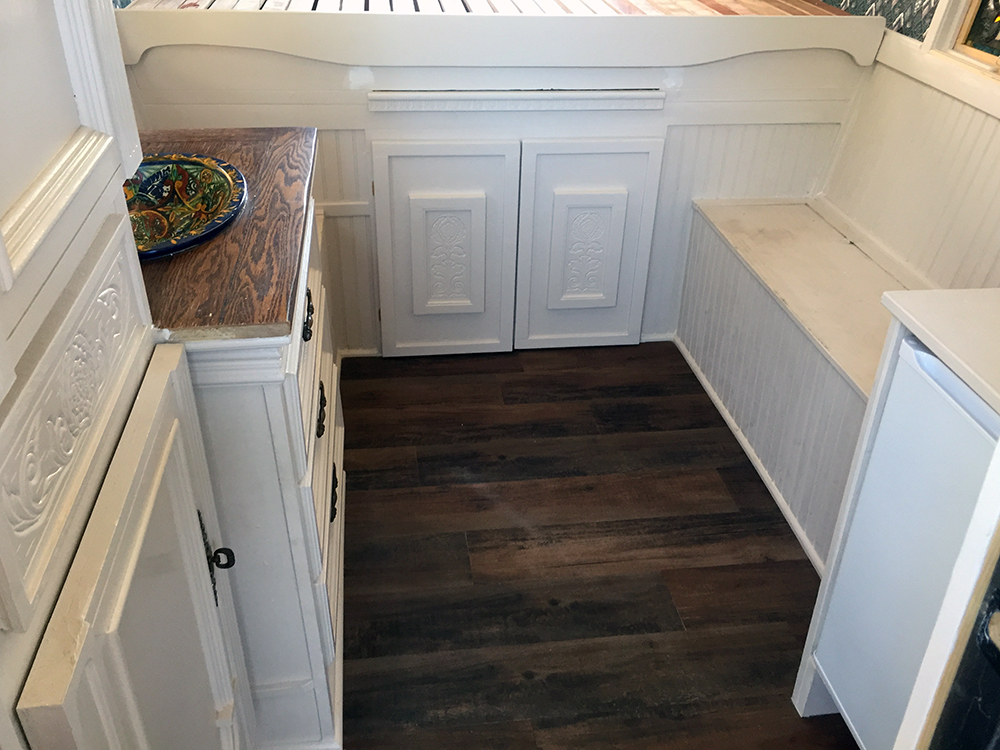
I got the doors under the bed made finally -- and now the cabinetry is pretty much complete.  I still need to add knobs and touch up the paint.  The benches are dirty from us climbing on them to get various bits painted, patched, nailed  - they need another coat of paint.  I picked up some foam to make seat cushions, and I got fabric this week so I can get those sewed up. The lids on both seats lift for more storage underneath.  Under the bed we will be putting in our water tank - it's small, I think only 5 gallons, and then we'll run plumbing.  Mostly, it will be used to store our major large items, like chairs, blankets, canopy, etc.  I want to get a piece of carpet to fit the floor under there so things won't slide around too much.  


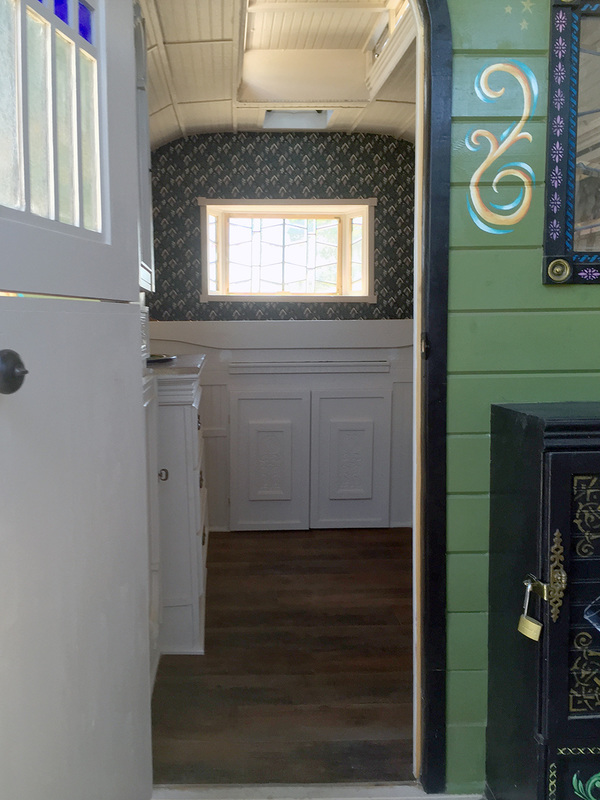
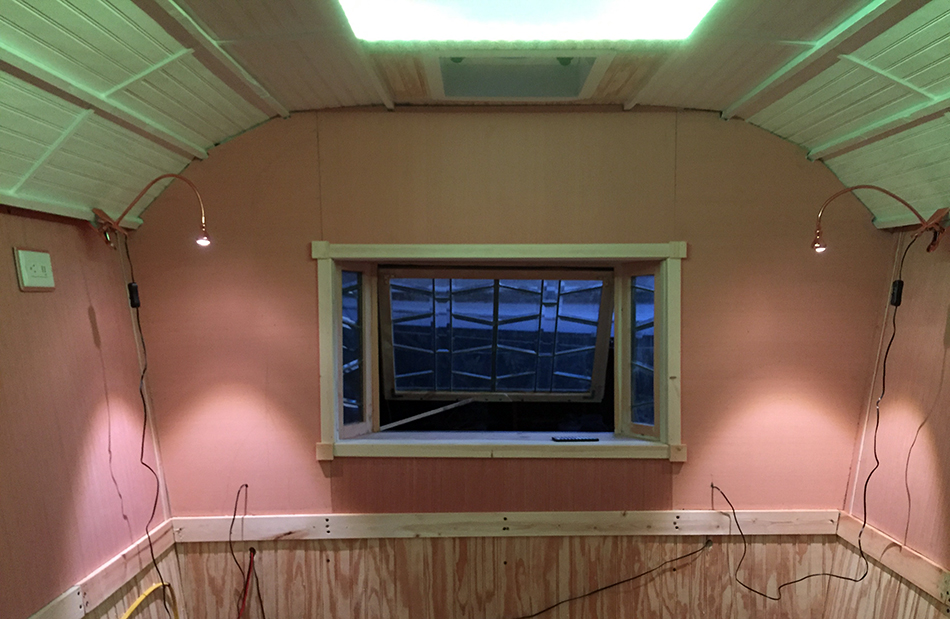
The view from the doorway is looking good:


Still a bit to go. I have some shelves to make for over the back window and over each side of the bed, I need to paint the inside of the window frames and some trim around the back window  I need to add curtains on this window as well, as well as make screens for all the windows.  I also need to add a threshhold.


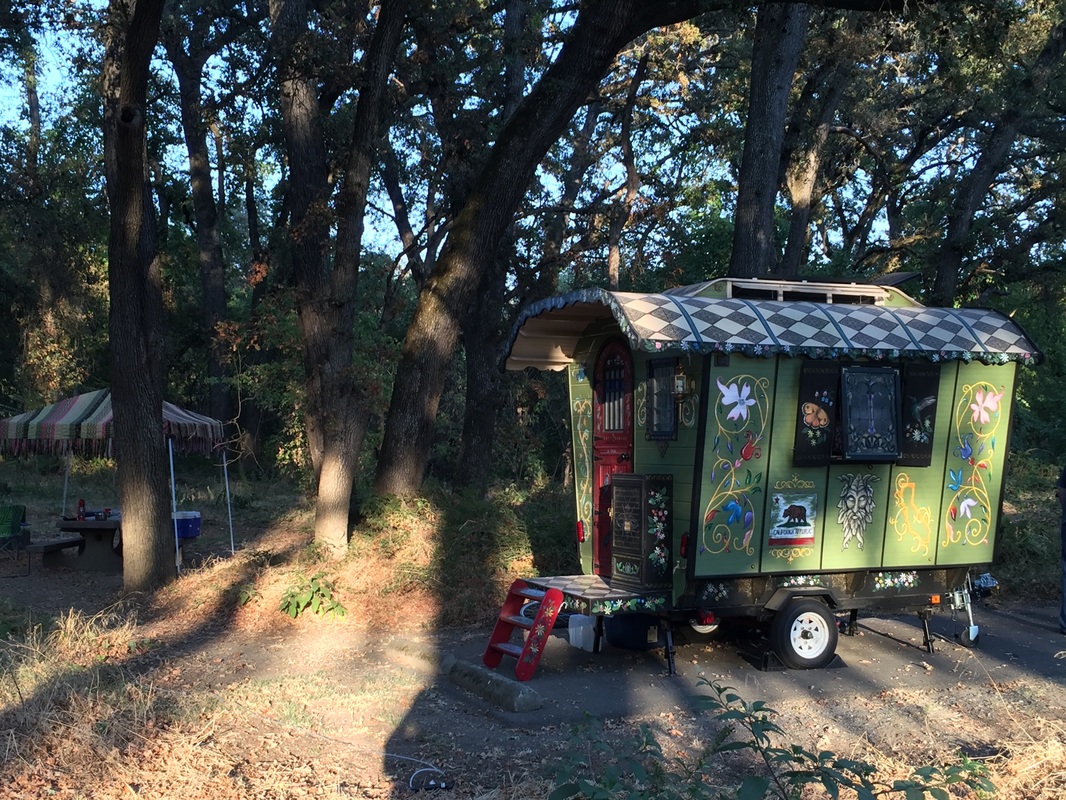
We also have more bits and pieces for the outside - I picked up bumper stickers at all of the places we've gone to so far, and they are above the electrical box outside.  I think that'll be fun to add to as we go.  I also picked up a carriage style lamp for the outside, and I have to get that wired for 12v.


And of course, I have a ton of flowers, butterflies, birds and other nature stuff to paint inside!  Now that everything is all clean and white, it's my perfect blank canvas.  The inside will get as decorated as the outside soon!

So the inside is coming along. I am looking forward to some trips with just Dale and I - it's really a great size for just the two of us!  Another thing we want to do is have an 'open house' - our neighbors have been wondering what the heck we have been working on in the backyard, and I think having it open for a tour would be a lot of fun!

Saturday, June 04, 2016

Interior progress

We have several big projects in getting the interior going:  getting the 'furniture' installed, getting the electrical working, and adding plumbing.  We're trying to do all 3 things at once, and while nothing's completely done, we're making good progress on most of it!

I started working on getting the cabinets and walls done at the tail end while Dale worked on the electrical from the other end.  That way we weren't tripping over each other.  First, I cut down some of the furniture we had picked up free off craigslist and built around it --
On the left is a storage cabinet with shelves, and then there is a sink built into a cabinet.  This is how I started off, then I got them mostly painted:


I started off with white primer, but the white looked a little too stark for me (Dale liked it, but he likes pretty bright colors), so I tinted the white more like an ivory, and I like it better.


I got a hand-painted Mexican sink on Craigslist for $25, and so I set that into the cabinet top.  To run the plumbing, I ran the PVC pipes towards the rear of the cabinet and out the left side:


and then I cut down the top drawer so that it doesn't hit the piping.


on the other side of the vardo, I built in a box for our mini-fridge, which we'll be able to use if we're hooked up to 'shore' power -- plugged in at a RV site or campground:


The opening at the bottom is to help circulate air for the fridge - it will go into a storage compartment that will serve as a bench.  You can see the part that is unpainted, it will be inside the bench.  I have the parts cut, but I have to get the bed cabinet installed first,  and then I'll get the two benches put in.


While I was working on woodworking, Dale was working on the electrical.  We got 4 outlets put in the 110v system, which will work when we are hooked up to shore power, and then we got the lights, fan and water pump, along with some USB charging ports, hooked into the 12v system.  We picked up a couple of 12v lights at IKEA - they came with a adapter for 110v, but we just threw that away and hard wired them into the panel.  We also added a LED row of lights along the top of the skylight -- they are programmable to run different colors and effects, and they have a remote to turn them on and off.


Here's the fan, it works great.  We had to modify the installation because it came in at an angle, but we made a nice adaptation, just needs a little caulk and it's complete.  It'll make sleeping great with a nice breeze that will blow down on us.  The outlet on the top left has a plug and 2 USB ports to charge our phones.  We're going to add a shelf there, so that's why it's up so high.  


So - that's where we are.  We're working hard to get it ready for a trip next week!


The wiring is kind of all over the place, but we'll get it corralled before we get the bed cabinet done.

So I have a lot of caulking and painting to do -- the walls will remain plywood until later int he summer when I have more time to work - I have wallpaper for the walls, and I want to build a lot of shelves and other features, but right now, we're just getting it ready to get out on the road!

Thursday, May 26, 2016

Back to the vardo -- and back to the garden!

We are working on our vardo again - - now that the school year is finished, I am looking forward to summer and going out exploring, and I want our little vardo complete.  We got the truck lights installed the other day, and this week I've been working on the outside, hoping to get the paint job finished and a few more outside details.  But first, juts got this ladder done this morning:
This is where our name for the vardo - "Stardust" - comes from.  It's a line from Joni Mitchell's song 'Woodstock' - and this is the refrain.  I also have Hoagy Carmichael's song "Stardust" in mind, but this is the one I think of first.

Besides this little ladder that will help us get in, I also built a couple of pieces this week for storage, first, a battery box that looks like a barrel:


It has a shelf that you can't see, and the batteries fit inside easily.  I want to get a couple of leather belts to make straps across the ends, and I've still got to get this one painted with some flowers and stencils, but it's good to go.

The other thing I made was a box on the deck for cooking supplies:  it'll hold a propane camp stove, a couple of bottles of propane, and some skillets and utensils.  Here's how that looks:

That one was made with leftover furniture parts.  It will hold a lot.

After I got that done, I decided to work on the paint job on the outside, and also the back deck.  Got that done this morning (the deck, the sides needs a couple more days).  So it looks pretty spiffy from the back:


(Luna enjoys laying on the deck)

The sides still need work but they're getting there:

The green man on both sides looked a little stark, so I gave them a green glaze and now they fit in much better, but this picture I took before that.  

So today, we begin working on the inside!  I need to get us a nice comfy place to sleep!

Tuesday, April 12, 2016

Solar power!

We've been just doing a ton of things around the house - no real big projects, mostly small maintenance things.  But we are trying to focus on making life easier on us down the line when I retire, and so one thing we just finished (today!) was refinancing our house so we will have it paid off in 15 years.  Got a fantastic interest rate - we feel good about that.

one other thing we looked at was installing solar panels on the roof.  We looked at the leasing program, which is a no-money-down kind of thing.  Actually, no money out of pocket, which is nice.  But the downside to that is that you sign a 20 year lease with the solar company to pay a fixed rate for power to the solar company instead of the utility company.  The 20 year lease doesn't sound good -- so we decided to do the purchase approach with another company.

First we had to take down most of the catio:
                            

We stacked the panels and set them aside until we redo the tunnel off the catio.  For now, they have the top section that they like the best anyways.


Then the solar company sent out workers to dig a trench.  We have a set of panels on the garage as well as the house, so they needed to run wire connecting the two.


The trench is still uncovered (a week later) becuase Dale wants to run a second line out to the garage while they have it opened.  While they were digging the trench, they hit the water line - oops! - but fixed it right away. 

Then they came out and put the panels on ---


 It took them 2 days to get it all set, and now we just have to wait until SCE (Southern California Edison, our power company) gives us the OK to switch it over. 

This is all the power hookups, the stuff we don't really understand!  The meter on the far left is the two way meter that goes backwards when we are producing more power than we are using, which will pretty much be every day.  At night, the meter will go the other day as we use power from the utility company.

We had an energy audit to see if we could make the panel count match as closely as possible the needs we have.  So the number of panels (22) will produce somewhere between 98-103% of the power we currently use. 

Because we wanted to know these things, I am going to talk about how much this all cost and what kind of benefits/cost that we incurred.  I think it might be helpful to someone who is considering the switch to solar.

We used SunRun, and we found out about them through Costco.  We just got a membership earlier this spring, there was a great groupon deal that gave us a lot of rebates to get the upper level membership.  We refinanced our house through the Costco program and got a fantastic rate and the cost was minimal, and included a $1250 bonus that they paid towards closing costs.  With SunRun, we get a 2% cashback, which comes to $450, a $650 Costco card, and they give a discount on the equipment.  Our 22 panels installed came to $22,250.00.  We will get a 30% tax credit, which means a dollar for dollar refund of any taxes we owe.  That's just over $7,000 - and we won't be able to use all that this year, so it will roll over to next year's taxes.  That gives us a net cost of $14, 450 after all those rebates come into effect.

Our average monthly electric bill is $157 mo.  That's average, some months (like this month), it might be as low as 68.00, and during the middle of summer with the AC going, or the middle of the winter with the space heaters going, it goes up to $230.00 per month.  Our hot tub costs quite a bit.  So - once this solar gets going, we anticipate a simple $10 per month bill from the utility company for the non-energy costs of lines, hookup, etc.  So we will save an average of 147 a month, and over the course of the next 8 years and 3 months we will be paying this off.  In less than 9 years, we will be fully paid off and basically paying ourselves. 

Although we haven't got the meter going yet (it takes 2-5 weeks to get the utility to process the switch), we are extremely happy with the company.  They were great about informing us all along the way, and answered all our questions and concerns really fast.  So far, I would totally recommend them.  I understand not all people have cash on hand to pay for something like this, but they offer a 15 year financing plan that never exceeds what you're actually paying for your current utility bills.  In other words, if we had financed, our montly payment would have been 150 a month, still allowing us to be paying out less per month than we were paying for our electric bill.  Which made it a no-brainer.  I mean, you're already paying out the money each month, why not be buying something while you're doing it?

Anyway, I hope to keep more caught up on my blog this year.  We want to get pictures of our vardo up and we have plans for the summer, of course!
Blogging tips