
Background Stamp How-to
This is a step-by-step tutorial on how to made stamps that are great for backgrounds for journals or Altered Books (or stationary, or other art projects!)
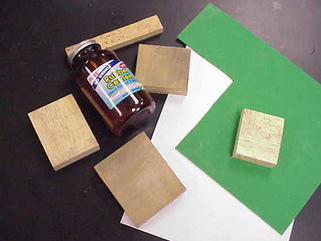
1. What You Need to Have:
You'll need some wooden blocks (I cut these from wood scraps, you can also use kids' blocks), some thin craft foam, rubber cement and some cutting tools.
1. What You Need to Have:
You'll need some wooden blocks (I cut these from wood scraps, you can also use kids' blocks), some thin craft foam, rubber cement and some cutting tools.
2. Cutting the Foam
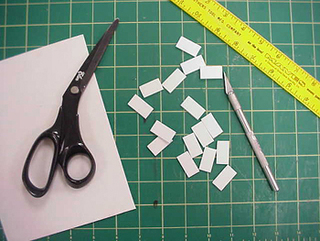
Cut the foam into the shapes you want. I decided to make a brick background with this stamp, so I cut 'bricks' that were 1" long, and 1/2" wide. I like using an exacto knife but also use scissors.
3. Apply Rubber Cement
Apply a smooth coat of rubber cement to the wooden block. On this block, I first drew pencil lines to guide the placement of my bricks. The rubber cement may soak into the wood, so apply two coats. Let it dry well.
4. Apply Rubber Cement to foam, also
Two coats of rubber cement go on the back of the foam pieces, too. Again, two coats since it will soak in. Let them dry. Apply the dried pieces onto the dried wood block. Careful, because you can't easily reposition them. After you've got them in place, press them all down firmly to be sure they are attached well.
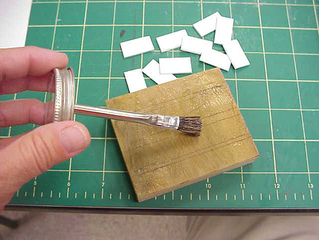
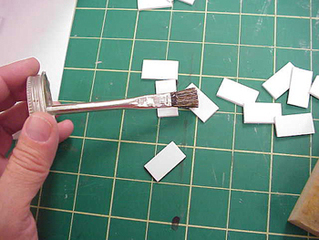
5. Using your stamps
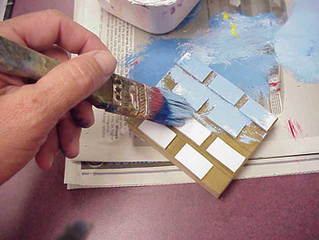
Apply a very thin coat of paint all over the stamp. If you put too much paint on, you'll get a lot of mushy paint oozing out -- so apply sparingly, brushing it in well. You'll get the hang of this. Practice on a sheet of newspaper if you need to gauge how much paint goes on. The first time you apply paint to the stamp you need to apply a little more since some soaks into the foam -- but each additional stamping just needs a quick brush-up.
6. Stamp the page
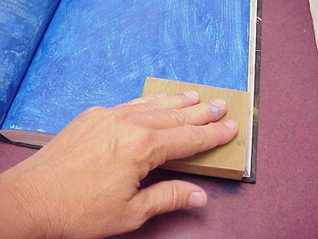
Lay the stamp down on the page, then press down firmly and evenly.
7. Continue Stamping the entire page
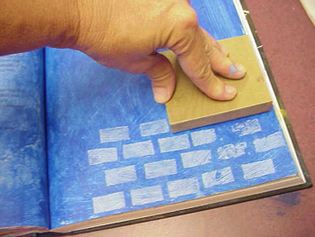
Continue lightly brushing the stamp and then aligning it to cover the whole page -- or use it as a border or do half the page. Lots of possibilities!
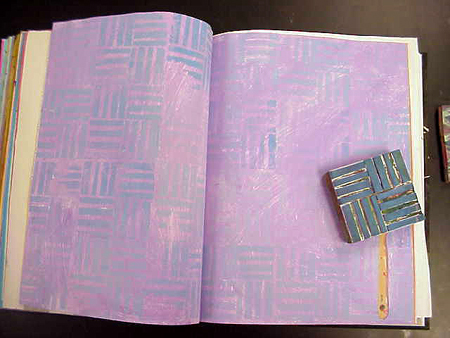
8. Finished Page
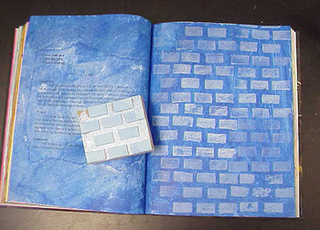
Here's what the whole page looks like. I like the way the blocks are slightly different in both color and value (lightness/darkness). It gives some visual interest. Often I vary the color slightly, too -- maybe a bit more purple or green or whatever added to the base color. To clean the stamps, run them under water and use the paintbrush you applied paint with to lightly scrub the leftover paint off. Don't scrub too hard or you'll scrub the foam off! It's ok to let a little paint stain the wood -- it will help waterproof the stamp.
9. Border Stamps
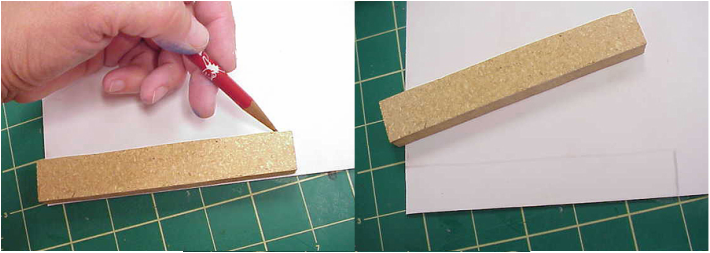
To make a border stamp, I used a long narrow piece of wood, tracing the size onto the foam.
10. Border Stamp
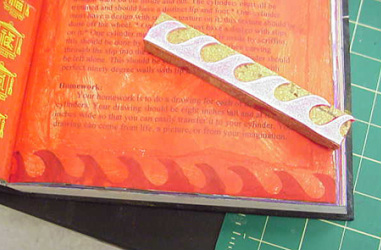
This is the finished stamp -- I drew a repeating wave pattern, and applied it to the wood following the above instructions.
11. Other Stamps
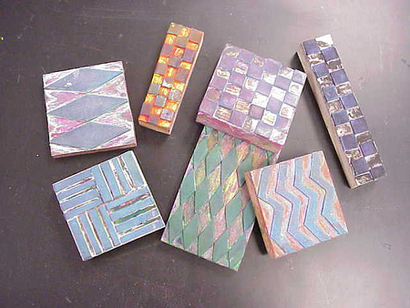
Here are a few of my favorite background stamps. I use the diamonds and basketweave stamps a lot!
Here are more stamps and how they look on the pages:


Pop-Up Box How-to
This is a step-by-step instruction sheet to make a center fold pop-up box in a book or card.
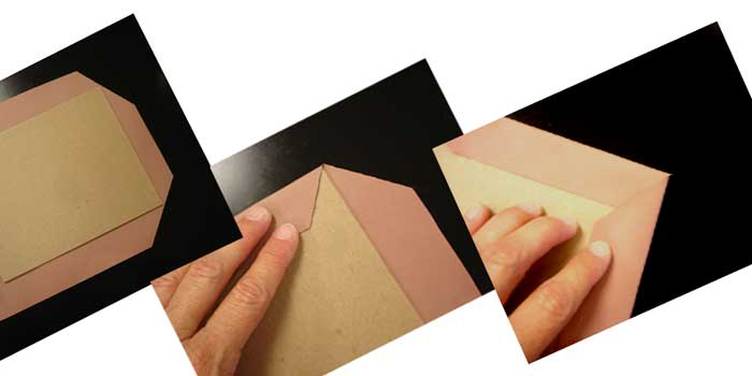
1. Cut the 2 Box parts
Cut these pieces from cardstock. Dashed lines are fold lines, solid lines are cutting lines.
2. Connect the two box parts
Overlap and glue the two parts together to make one piece.
3. Prepare the book
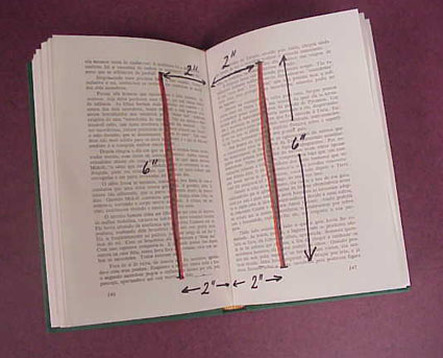
Cut two slits in the book as diagrammed. Cut only through one page.
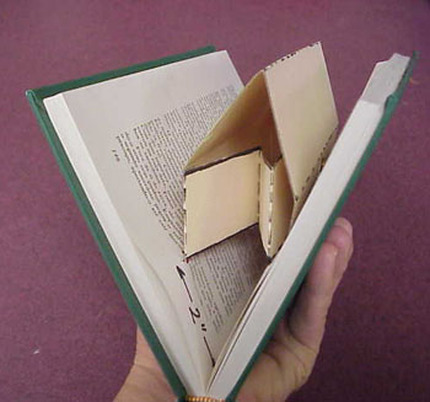
4. Fold the box
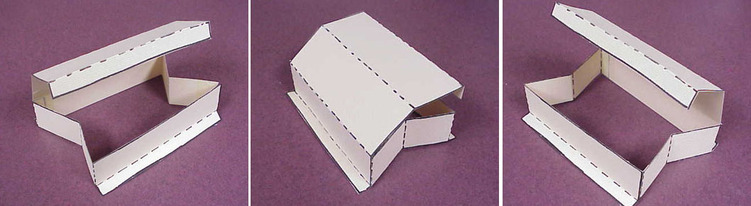
Score along the dashed lines and fold the box as shown. To score, use an exacto knife and lightly press along the dashed lines -- or you can use a dull butter knife. This gives very sharp creases and allows the box to fold easily at the right places. Connect the box at the small tab so that it is continuous. This is the time to decorate the box with paints, etc.
5. Insert Box into Page
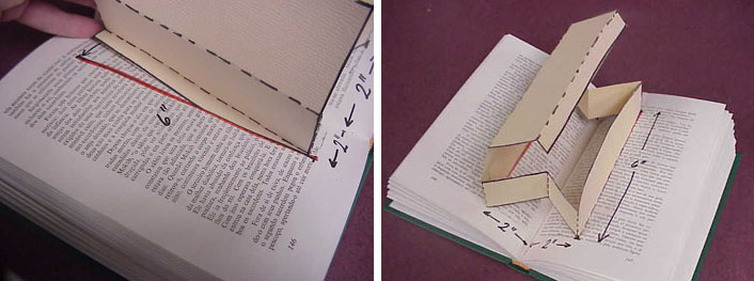
Slip the lower flaps on the box into each slit as shown. Apply glue and let box dry.
6. Create a latch
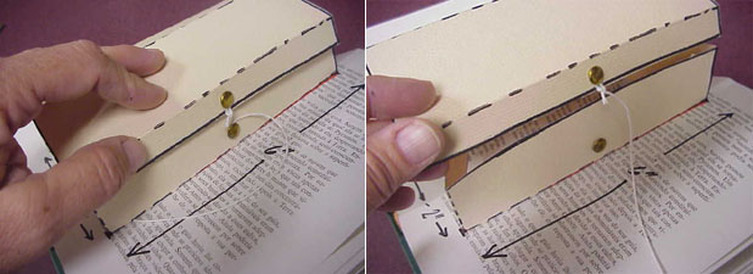
Create some type of latch or closure for the box. For this example, I used two brads and a piece of string.
7. Fold up the book
When closed, the box should fold flat as you close the book. Be sure to glue another page to the base for strength.
8. Example
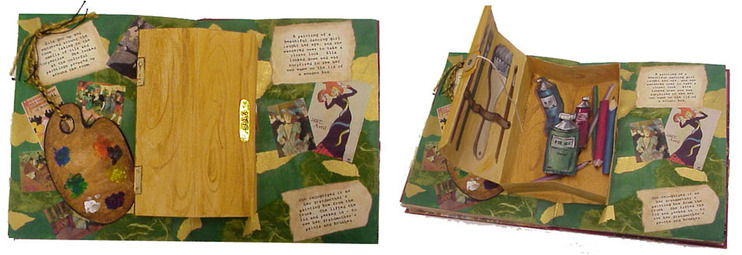
When closed, the box should fold flat as you close the book. Be sure to glue another page to the base for strength.
Spinner How-To
Here is a step-by-step tutorial on how to make a simple spinner to add to your altered book.
1. Cut the spinner circle
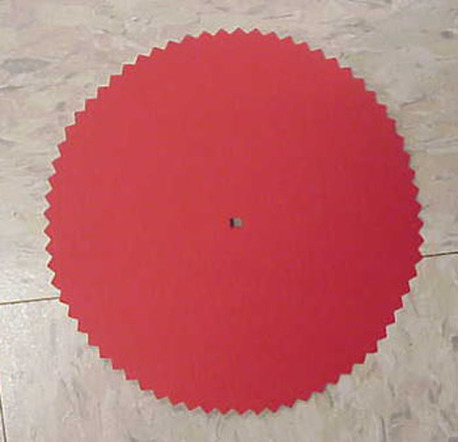
I cut a 5" circle out of red construction paper. I cut it out with pinking shears -- the textured edge makes it easy to turn the wheel, although you can certainly cut them out smooth with regular scissors, too! Punch or cut a hole in the exact center.
2. Mark the Page
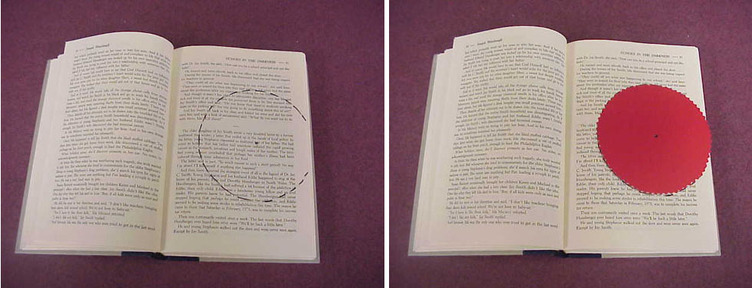
Lay the circle on top of the page where you want it, making sure the outside edge hangs over just a bit so you can turn the wheel. Mark the outside edge as well as the center hole.
3. Mark the Window
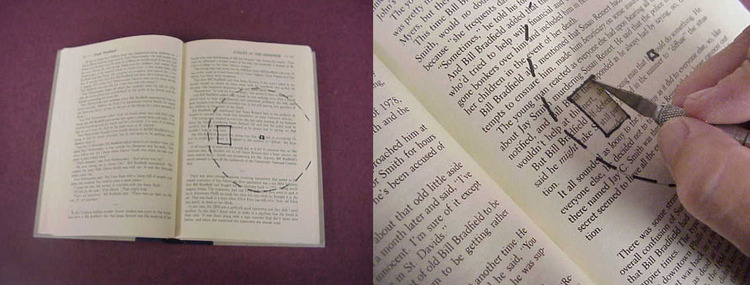
Mark the window the size and placement you need it. Cut the window out with a sharp knife -- also punch through or cut out the center hole.
4. Attach the Spinner
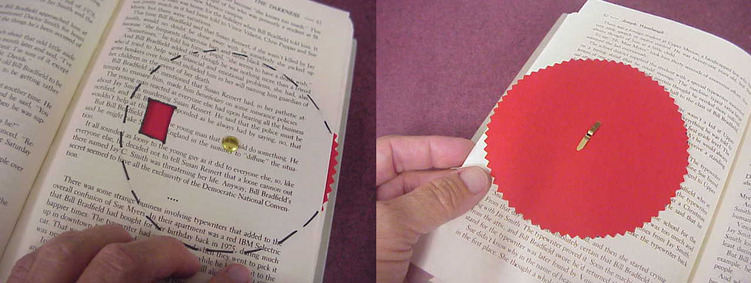
Using a brad fastener, temporarily attach the spinnner behind the page so you can see it through the window.
5. Mark Areas
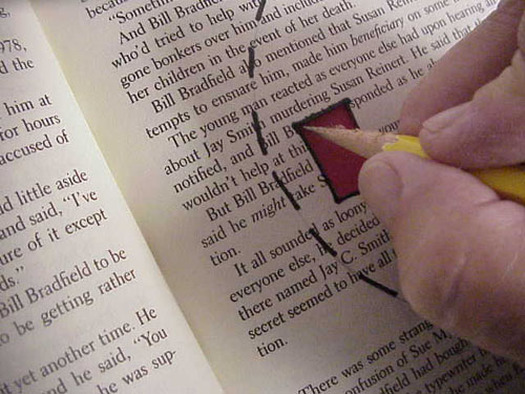
Through the window, mark a line around the hole onto the spinner. Turn until the mark is gone, then mark another area. Continue around until you begin to see the first marking.
6. Remove the Spinner
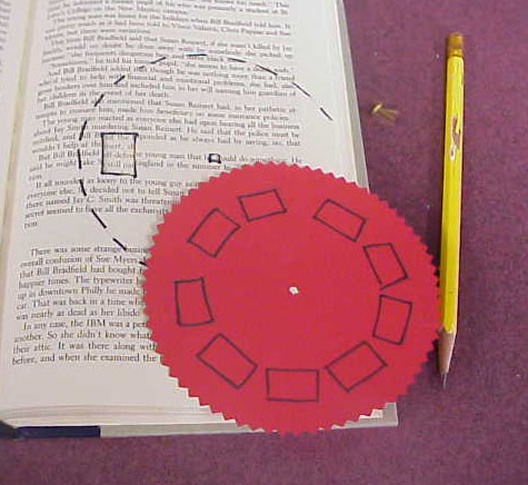
Take the spinner back out of the book. Your marks should look somewhat like this on your spinner. You can glue images within the boxes, or even slightly overlapping them for a neater look. You could also put text in each space, or alternate. When the glue is dry, replace the spinner in and attach with the brad fastener.
7. Finishing

To finish the page, spread glue in the areas indicated on the back of the page, and glue it to the next page in your book. Be sure to leave clear areas around the spinner so it will spin easily - you don't want it to stick after all this work!
Creating your own sketchbook
Here are step-by-step instructions to help you create your own sketchbook with watercolor pages.
1. Collect the Materials

Here's what you need: 3 - 4 pieces of 18 x 24 watercolor paper. 2 boards for cover, each 6.5" x 9.5." Some papers or fabric for the covers (enough to cover one side of each board). 3 - 4 lengths of ribbon, fabric strips, fabric tapes, etc., for the straps that go across the spine. A darning needle and about 2 yards of heavy cotton warp thread. Elmer's glue. Some scissors, a bone folder, paint -- other miscellaneous things as they occur to you!
2. Prepare the pages
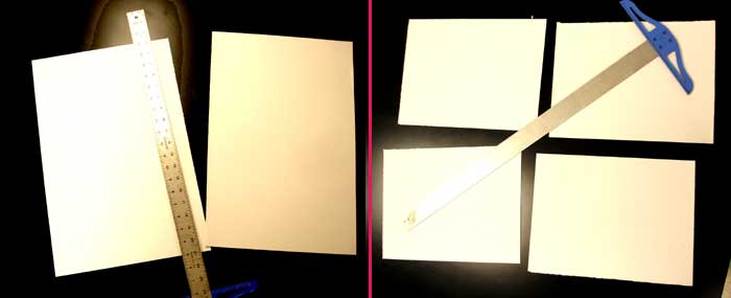
Tear the paper into quadrants using a ruler (or you can cut them). This is a great time to do a light wash of color over each page if you want colored pages -- or you can leave them white. When they are completely dry, you can use the bone folder to fold them in half.
3. Align the signatures

Place sets of pages one inside the other, so that you have 5 - 6 'signatures' of pages. Stack them and check for order if you've colored the pages, so that they're pleasing to the eye. Be sure to keep these signatures in order, a rubber band around the group is a good idea.
4. Figuring out the Binding
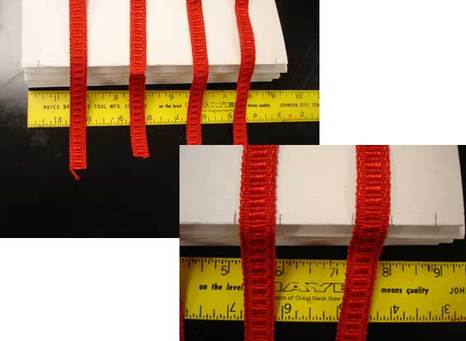
On the top signature, mark a pencil line 1/2" from each end, then lay the tapes or ribbons across the spine evenly in between the marked ends. Make a pencil mark on each side of the tapes along the spine on the top signature.
5. Piercing stations
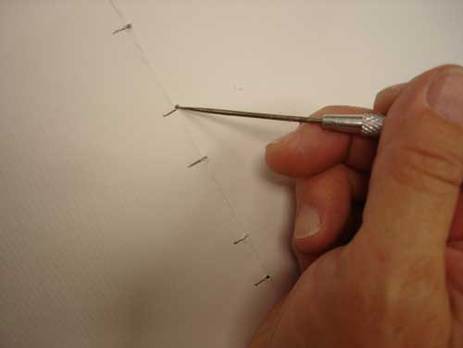
Using a needle tool or the darning needle, you are going to pierce through the fold on each signature. Use the first signature as your guide -- pierce through all pages along the fold using the pencil marks as your guide. For each additional signature, place the first signature inside the fold, with pages open, and pierce all pages at the same time. Be sure to keep your signatures in order, so that all holes will line up when you're done.
6. Get the pages lined up
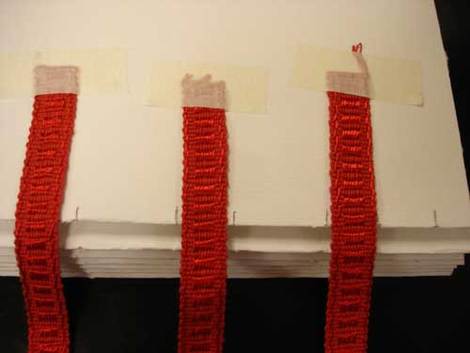
Using masking tape, lay tapes and attach them over the stations so that they align between the holes. They only need to be taped to the first signature. Thread your needle, leaving a tail about 8" long -- no knots!
7. Starting the sewing
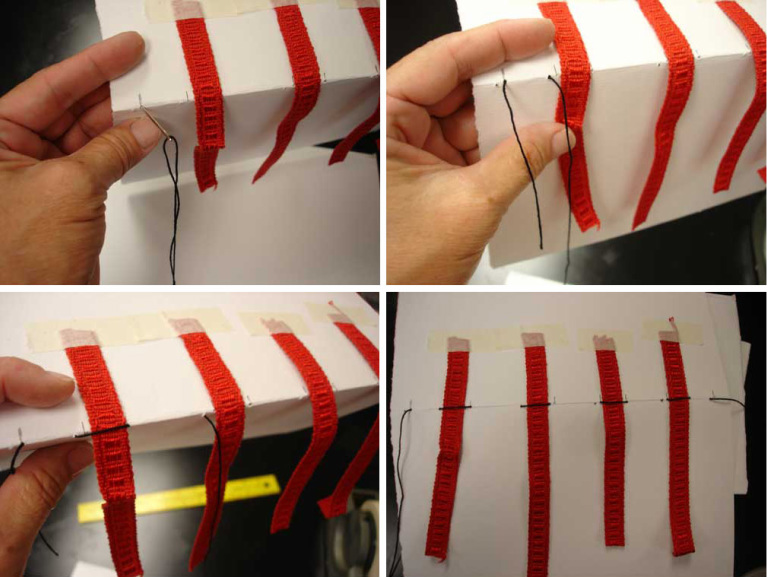
You'll be working one signature to begin with. Start with the first hole on the left -- go from the OUTSIDE to the inside, then come out the next hole. Go over the tape, then into the next hole. Pull the thread through, leaving a tail about 6" long. Continue this way across the folded edge, ending up coming out of the last hole on the right.
8. Second Section
Close the section. Be sure to pull the thread tight -- pulling parallel with the spine (if you pull straight up, you'll tear your paper!). Pick up another section and put it below the first section. Hold the second section open as shown, then sew into the first hole on the right, then come out the next hole. Continue across like you did for the first section, going over the tapes all across the second section.
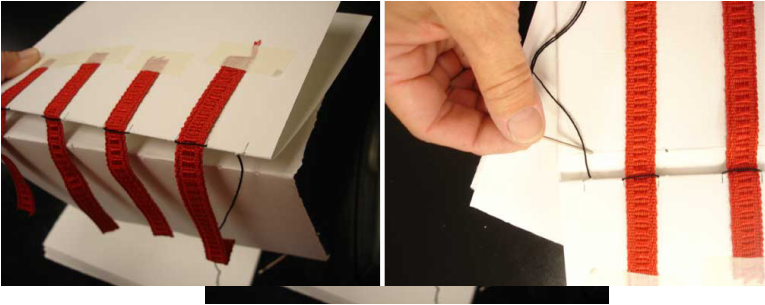
9. Tying off the first two sections
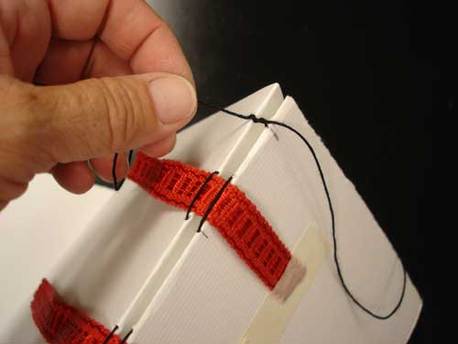
Pull your thread tight again. The tighter the threads, the tighter the binding will be! Tie the tail end to your thread as shown to pull the two sections together. Then add a new section below the second, and begin by going into the first hole on the left again. Work across the signature.
10. Kettle Stitches at the end of the rows
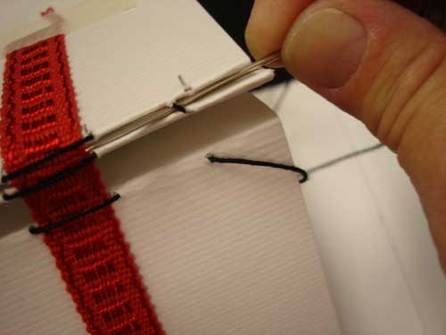
When you get to the end of this row, before you start the next signature, take the needle and loop through the stitch above. This will form a small chain stitch and will tie all the sections together. Continue adding signatures the same way, tying off when you get to the last one!
11. Adding the covers
The cover boards have been covered with paper -- and it extends over the edge to the inside, about 1" all around. This will make for a nice neat cover. The raw edges on the inside will be covered with the first page. There are several ways to attach the spine tapes to the cover. First -- remove the masking tape holding the ribbons down. Then tighten the spine by sliding all the stitches over the ribbon close together. You can tug on each end of the ribbon to get this part tight. You can glue the tapes directly to the first and last page, then attach the covers. Or you can pierce the cover boards and thread the tapes through the holes, then glue the cover down. Either way, be sure to take your thread tails and glue them to the first and last pages (wherever they fit best) so that you will not have loose threads hanging out. Then spread glue all over the first page, right up to the edges. Align the book covers so that the edge fits exactly along the spine (rather than the outside edge), centering the block of pages. Weight the whole book down with a couple of heavy books until it dries. Your book is ready to work in!

1 comment:
I wish your daughter had some of these rad skills!Dangit!
Post a Comment