Friday, August 15, 2014

Patio lights

When we first moved out here in 2010, we went for a walk along the canals in Venice, and we came upon this house that had all these vintage pendant lamps hanging from a huge tree, over their patio.

The lamps they had were all amber glass, which was beautiful, but not my favorite color of glass.  Anyway, we started picking up random 70s pendant lamps for a few bucks here and there, thinking I'd put them in a tree in our yard.  We were thinking of putting them in the avocado tree, but I decided I'd really like them closer to the house.  So this week I put them up, and this afternoon we finished running the electric.


We have 6 lights, all wired so they are all on one plug.  The wires are tacked up on the back side of the pergola, and will be painted in the spring when we paint the pergola top.  We installed electrical boxes along the back joist, and then ran the electric along the back of the house.  We also added an outlet down low for any kind of power we might need, then the outlet for the hanging lights is up high, where it will eventually be hidden a little by the bougainvillea.


With 6 lights, we can get plenty of light for sitting out and reading or talking.  Along with the light on the garage, we have the backyard pretty well lit for now.  I woudln't mind picking up a few more pendants if I see something that looks fun!

Wednesday, August 13, 2014

Coffee table for patio

We made our patio furniture a while back, but one thing we kept looking for was a table that we could use to set drinks on, put our feet upon, etc.  We really liked this vintage cart look:


But we couldn't find a good source for the wheels - and all those we did find looked kind of cheap.  So I found some other ideas on Pinterest, and ended up liking this:
(except for the white legs).  I know I see  lot of "farm tables" on free Craigslist, so I just waited for one of them to show up -- and this weekend, there it was.  In fact, it wasn't a kitchen table, but a coffee table already!  It did, however, have a terrible shiny "maple" top with a country style edge.


So I bought a few 1 x 4s and made a new top.  Stained it, put a coat of poly and a coat of wax on it, repainted the base black and now we have a nice little outdoor coffee table for the patio.


I think it needs some plants on it, and I want to get a tray to put them on.  So that'll give me something to shop for. 


Also, we put up a light fixture on the garage.  We did have a motion sensor light out there that was useless, I took that down last week and yesterday, we installed one of the two lights that my sister-in-law gave us.  It's great--


and we hooked it up with a remote on/off switch -- I got this on amazon.com, and I'm really happy with how well it works.  You basically plug any light in to an outlet, program the remote, and it works up to 100 feet away (even through multiple walls).  It came with two outlet units, and we're going to hook up the electric for the patio this afternoon.  I've got a bunch of lights I want to hang there --

So, hopefully, those will be done for my next post!


Saturday, August 09, 2014

Pergola

So, for the last week or two we've been slowly working on our backyard pergola.  First, we had to clear out some of the plants growing along the back of the house (the creeping fig that covers the brick fireplace, and the bougainvillea that we are in the middle of training up high).  We actually started working on the bougainvillea last year, when we stripped most of the smaller branches and thorns on the  bottom 6', and we had zip tied them together straight up, so they were pretty ready to go.  The creeping fig needed to be trimmed in a nice straight line so we could put one of our ledger boards along the brick wall.


We had to keep bending our group of bougainvillea off to one side - they have really vicious thorns!  The part we were dreading was drilling through the stucco and into the house supports - just a lot of dusty, messy work, but we got that done, and then it was just a matter of hanging our ledger boards and the joist hangers.  We're using redwood, it's naturally weather resistant without having any chemicals added.  We plan to let it age for a year before we paint it --


At the other side, we measured off 15 feet and marked off the spaces for our three posts.  We had to use the hammer drill to set these into the concrete, another chore we didn't look forward to, but it actually went rather quickly.  Here the posts are leveled and braced.  We used 4 x 4s, but I will be building out the posts later, and adding detail.


After we got the posts up we ran our beams across, and bolted them together.  We also added some diagonal braces, but I didn't get a close up of those.


 Then it was a matter of hanging the joists in the hangers and screwing them in.  We also got the other ends measured and toenailed in.


Then came our dilemma.  We are going to top the pergola with 1 x 2s for shade, but since we want to let the redwood age (and dry) before we stain, we don't want to attach all the 1 x 2s, because they'd be easier to paint flat instead of after we put it up, so we instead added a covering of inexpensive bamboo.  We like the way it looks, but it probably won't age well. 


We also want to put some clear acrylic panels on top of the 1 x 2s, to keep it dry on our furniture.  So that's what's going to happen later in the year/earlier in the spring.  But for now, we're really  happy with the way it looks and the shade it provides both outside and in the house during the late afternoon.


From the inside of the house, it casts a slightly yellow light, probably due to the bamboo.  I like how it makes our yard look greener, because it can use all the help it can get.  If you look closely, you can see we have no grass, just dirt and plants.  Our backyard is in survival mode - just plants in a holding pattern.  We have big plans for the backyard, and we'll be working on it over the fall and winter.


 We still have electricity to run to our outdoor lights, but we got a lot of the really sweaty, tiring work done.  I am not looking forward to painting it next year, but hopefully by then, I'll be rested :). 

Our next project might be building a nice new set of steps from the sliding glass door -- we have a short set of concrete steps that are entirely too narrow - -we'd like them to run the length of the door, and to have a wider top so that we walk out of the house first, then down the steps.  By running them the width of the door, they can also serve as a bench for when we have company over.  We are going to make them out of redwood, too, and just put a clear finish on them.  Hopefully we'll get those done in the next few weeks.  We still have lots of small projects for the patio, but we'll work on them bit by bit.


Monday, July 28, 2014

Small projects

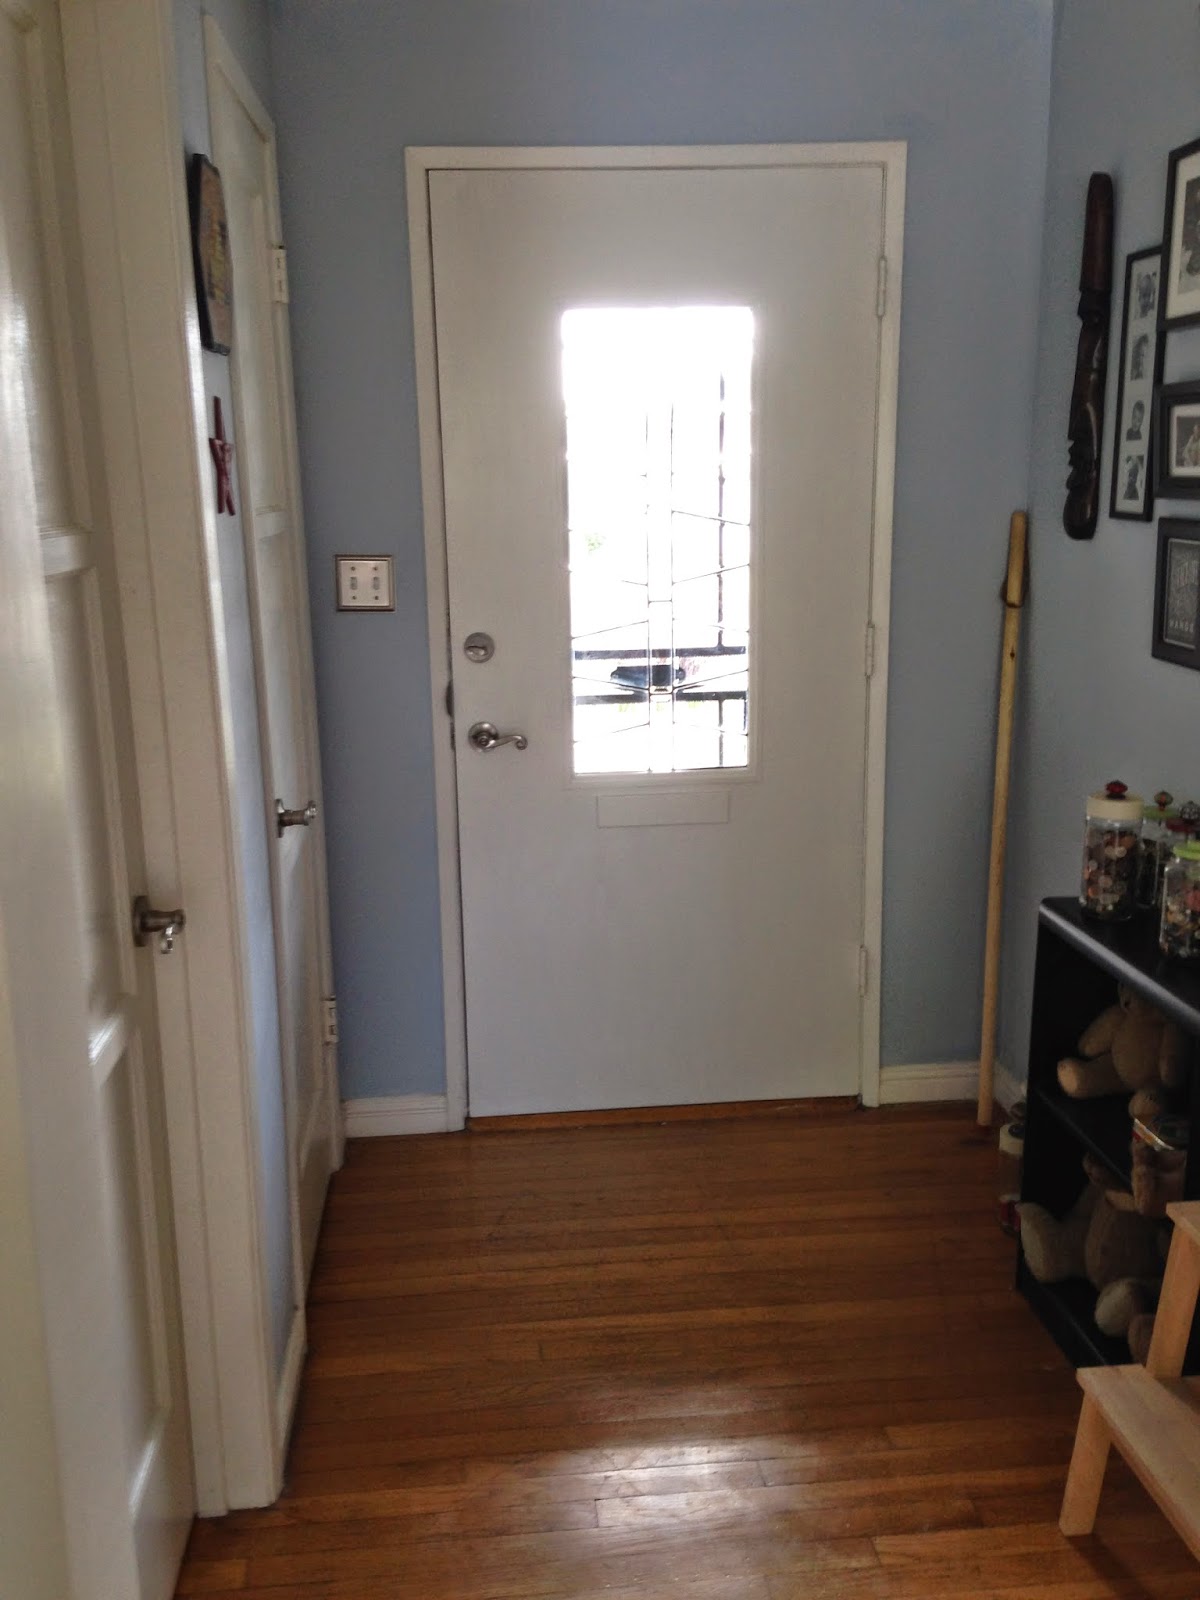
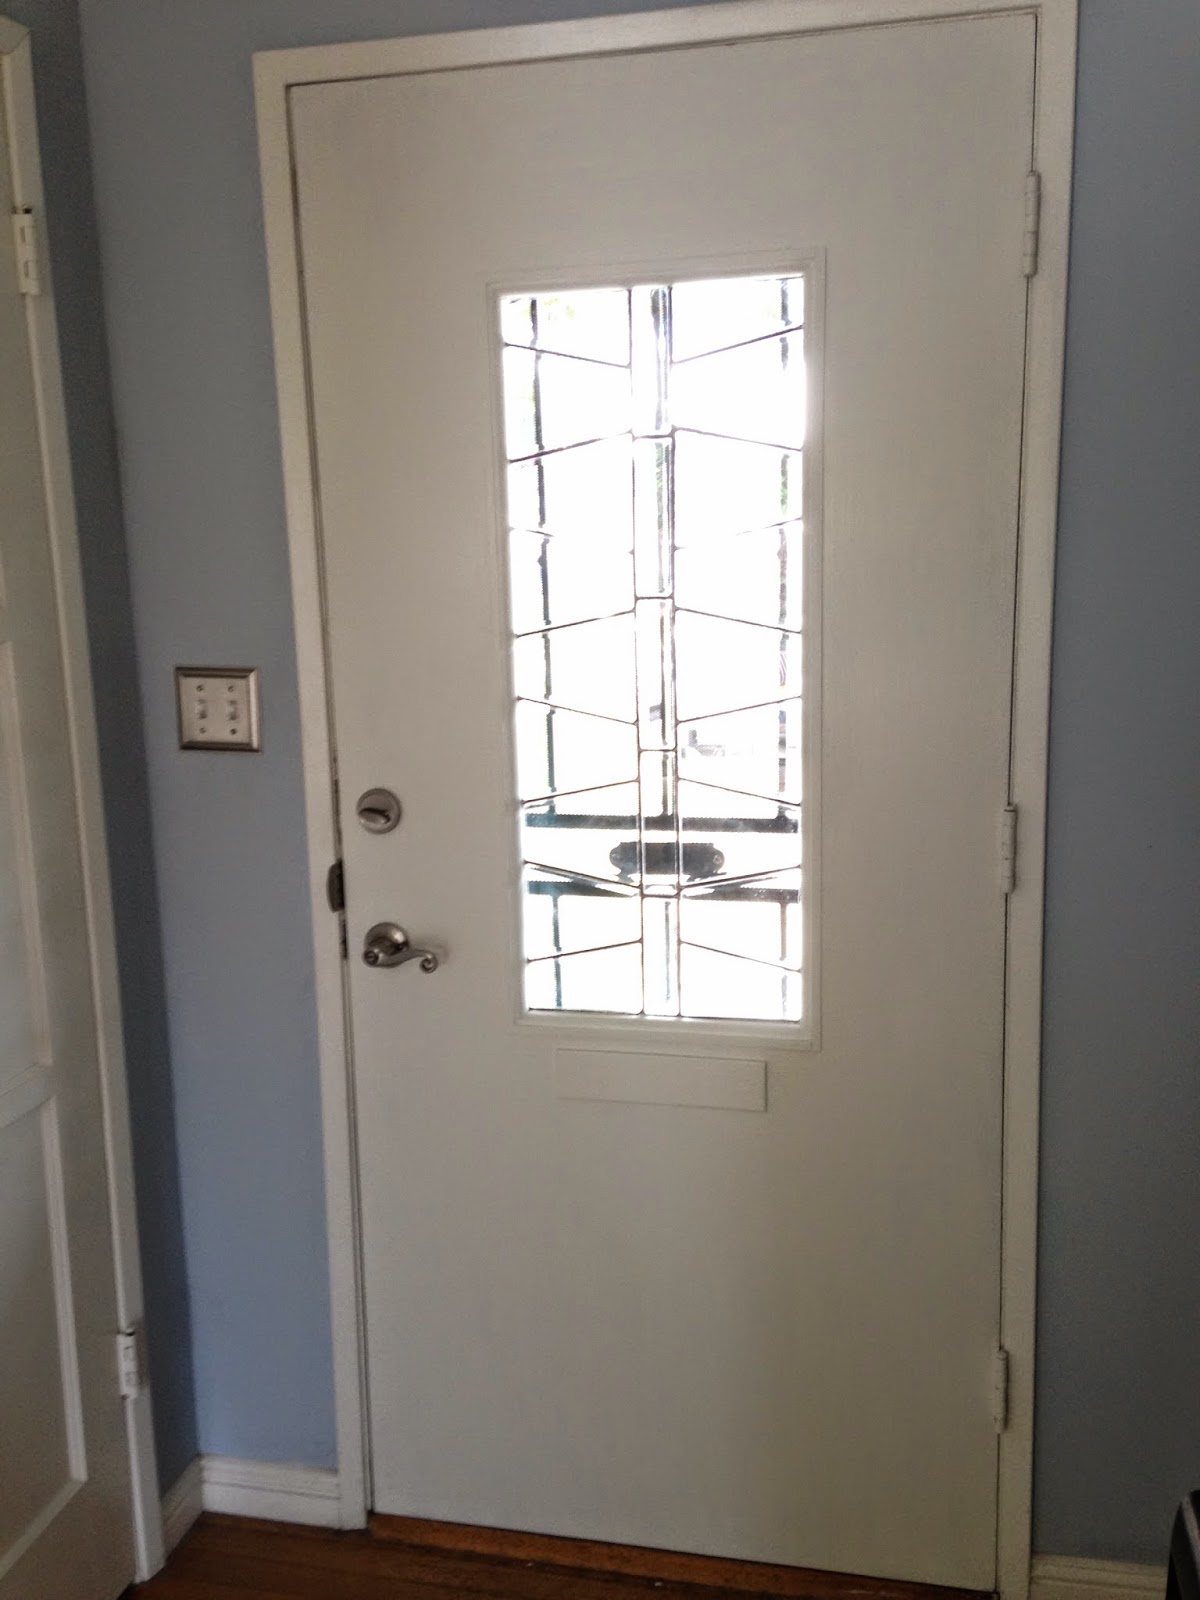
Although I really want to get started on the pergola, I have to teach this week, and so we had to content ourselves with some small projects.  The first one is a door makeover - which I've been wanting to do forever.  This is how our front door looked:
Not so bad, except that we didn't need a peephole, the mailbox slot is unusable, and the kick plate on the bottom has several missing screws, and I hate the color, it gets really hot when the sun beats down on it.  So - other than the fact that it fits the door frame, we kinda hate it.

But what I really hated was the inside.  It still had the old paneling attached to it, and we have the peephole and useless mail slot in it. 

Finally, what I hated the most was that it made this whole area dark.  What I wanted was something that was more attractive and let light in.  But I don't want to buy a new door (too much $$$!) and I don't want the hassle of hanging a new door, drilling new holes for locksets, etc.  So the part where it actually fit was kinda important.

So I was checking out CL (my favorite place to shop) and someone had these great leaded glass inserts for the bargain price of 25 bucks for four.  I only needed one, but I can sell the others and recoup my 25 bucks.  One has a cracked piece of glass, but I might be able to salvage that one for another project.

So what we did was take the door down off the hinges - simple, just pull out the three pins from the three hinges - and bring it into the backyard.  I took off the locksets, the mailbox, kickplate and peephole so I could remove the glued-on paneling.  Yuck. I have removed SO MUCH DRIED contact cement from this house!  That was a messy job and yet somehow, I forgot to take pics. 

After we cleaned off all the glue, we measured the glass insert, and centered it from each side.  We used the measurement in from the sides (9.5 inches from each side), and measured that much down from the top.  Then we added 5/8" all around, and cut the hole out of the door.  It's a hollow core door -- cheapo!--so we had to put in a few supports so we could attach a 2" wide frame inside the hole.  Again, forgot to take pictures!  What a doofus.

Next, we attached mitered 3/4" quarter round on the front with the brad nailer. 
OK, this i have pics of --


You can see the supports in the mailbox slot.


And then we could attach the glass panel.  We ran a bead of silicone along the corner of the "ledge" created by the quarter round, and then lowered the glass panel in.  We added another bead of silicone, and added another layer of mitered quarter round, nailed in.  So we sandwiched the glass in between the layers of quarter round.  Then I caulked all the gaps and painted the door.


I also added a small rectangle over the mail slot.  This placement really gave me pause - if I moved the glass down to cover the hole, it would be oddly centered, so I opted to cover the slot inside and out with a small flat panel. I think I'll get a "welcome" sign or something to put on here, but it actually doesn't bother me as much as I thought it would.  So - turquoise for the front, and white for the inside.  I used one of those small sample paint pots from Lowe's -- it's the perfect amount for 3 coats of paint for my door front.

I'm really happy with the amount of light it lets into our entryway.  It's hard to capture the look since the sun comes in so brightly, but I'm very happy with it.


The leaded glass panel we got had beveled glass, and it really sparkles without looking too "fancy" -- the 50s look of the panel goes well with the house.

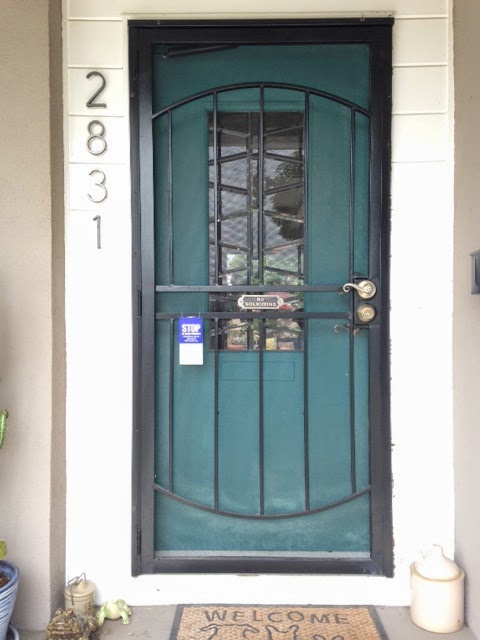
Because we have a black screen door over the front door, taking a picture of the outside doesn't come out fabulous - but here we go:

 from the inside (so you can see the color accurately!)

and through the screen door.  It was a long one day project - if I hadn't had to remove all that glue with stripper and sanding, it would have only taken a few hours, but it looks great, and I'm really happy with the light it provides in our house!

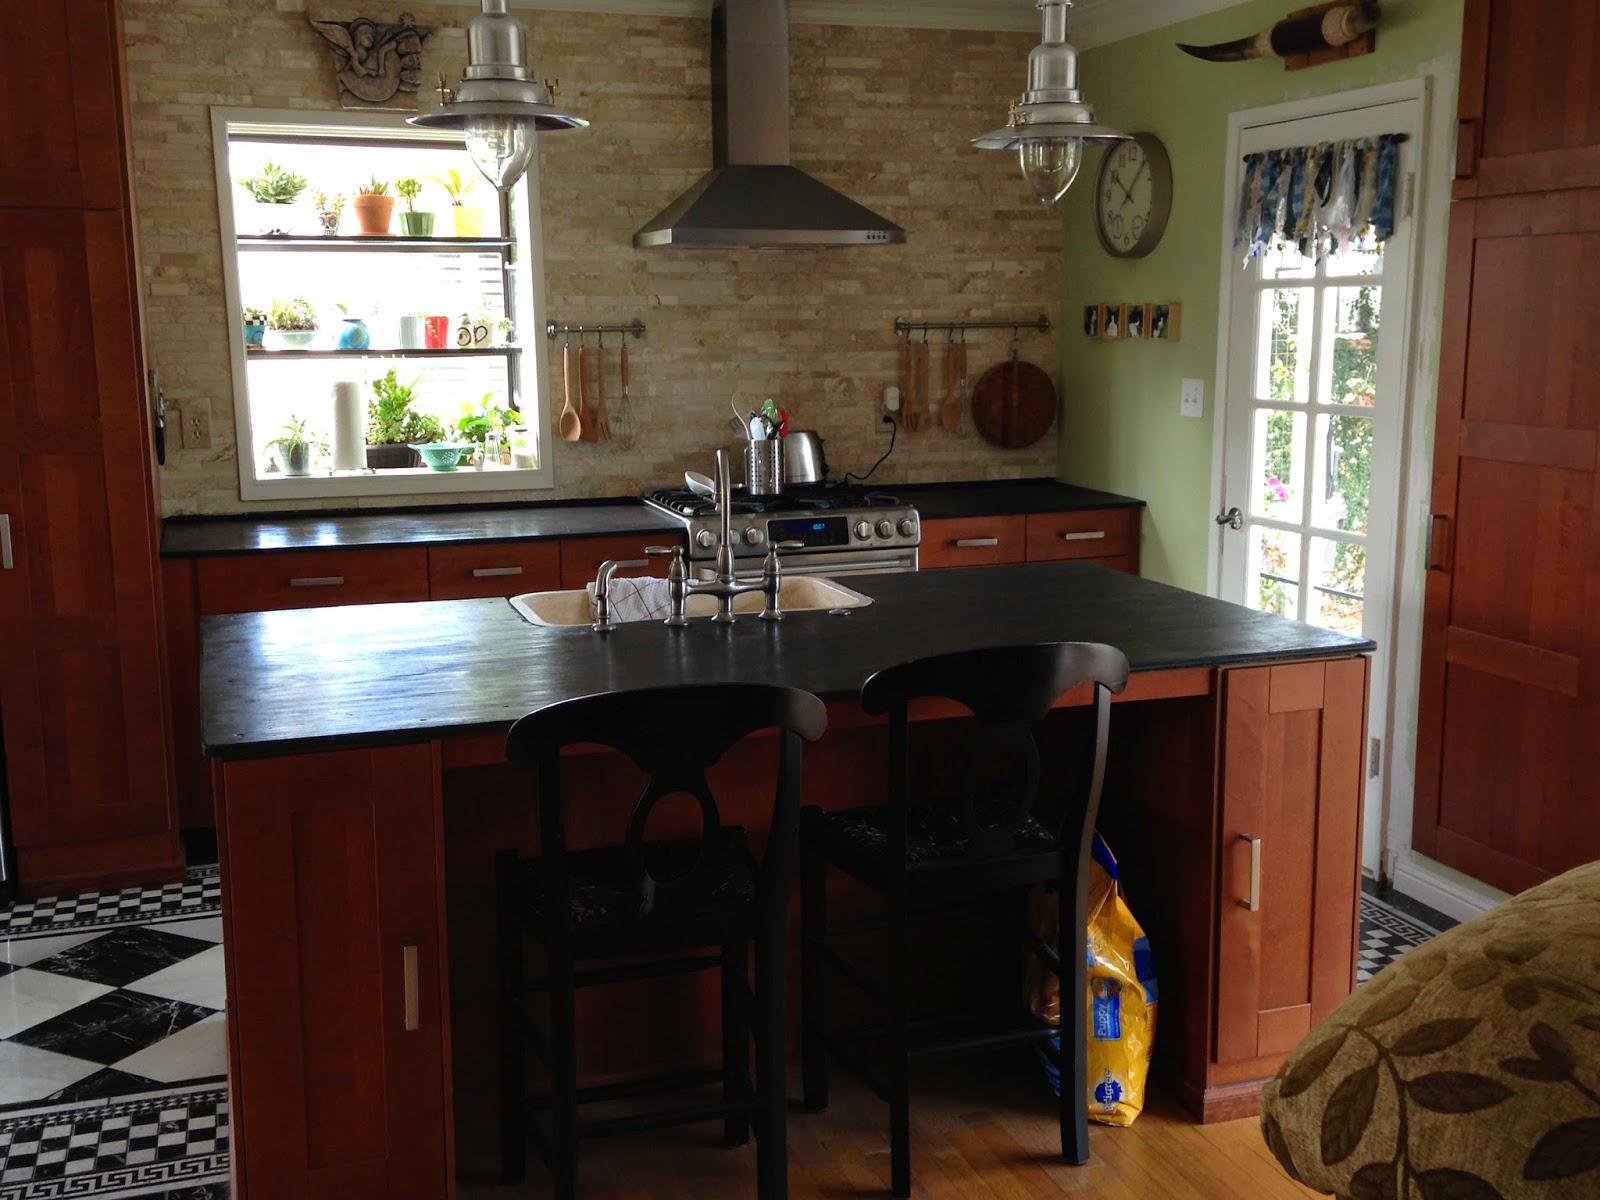
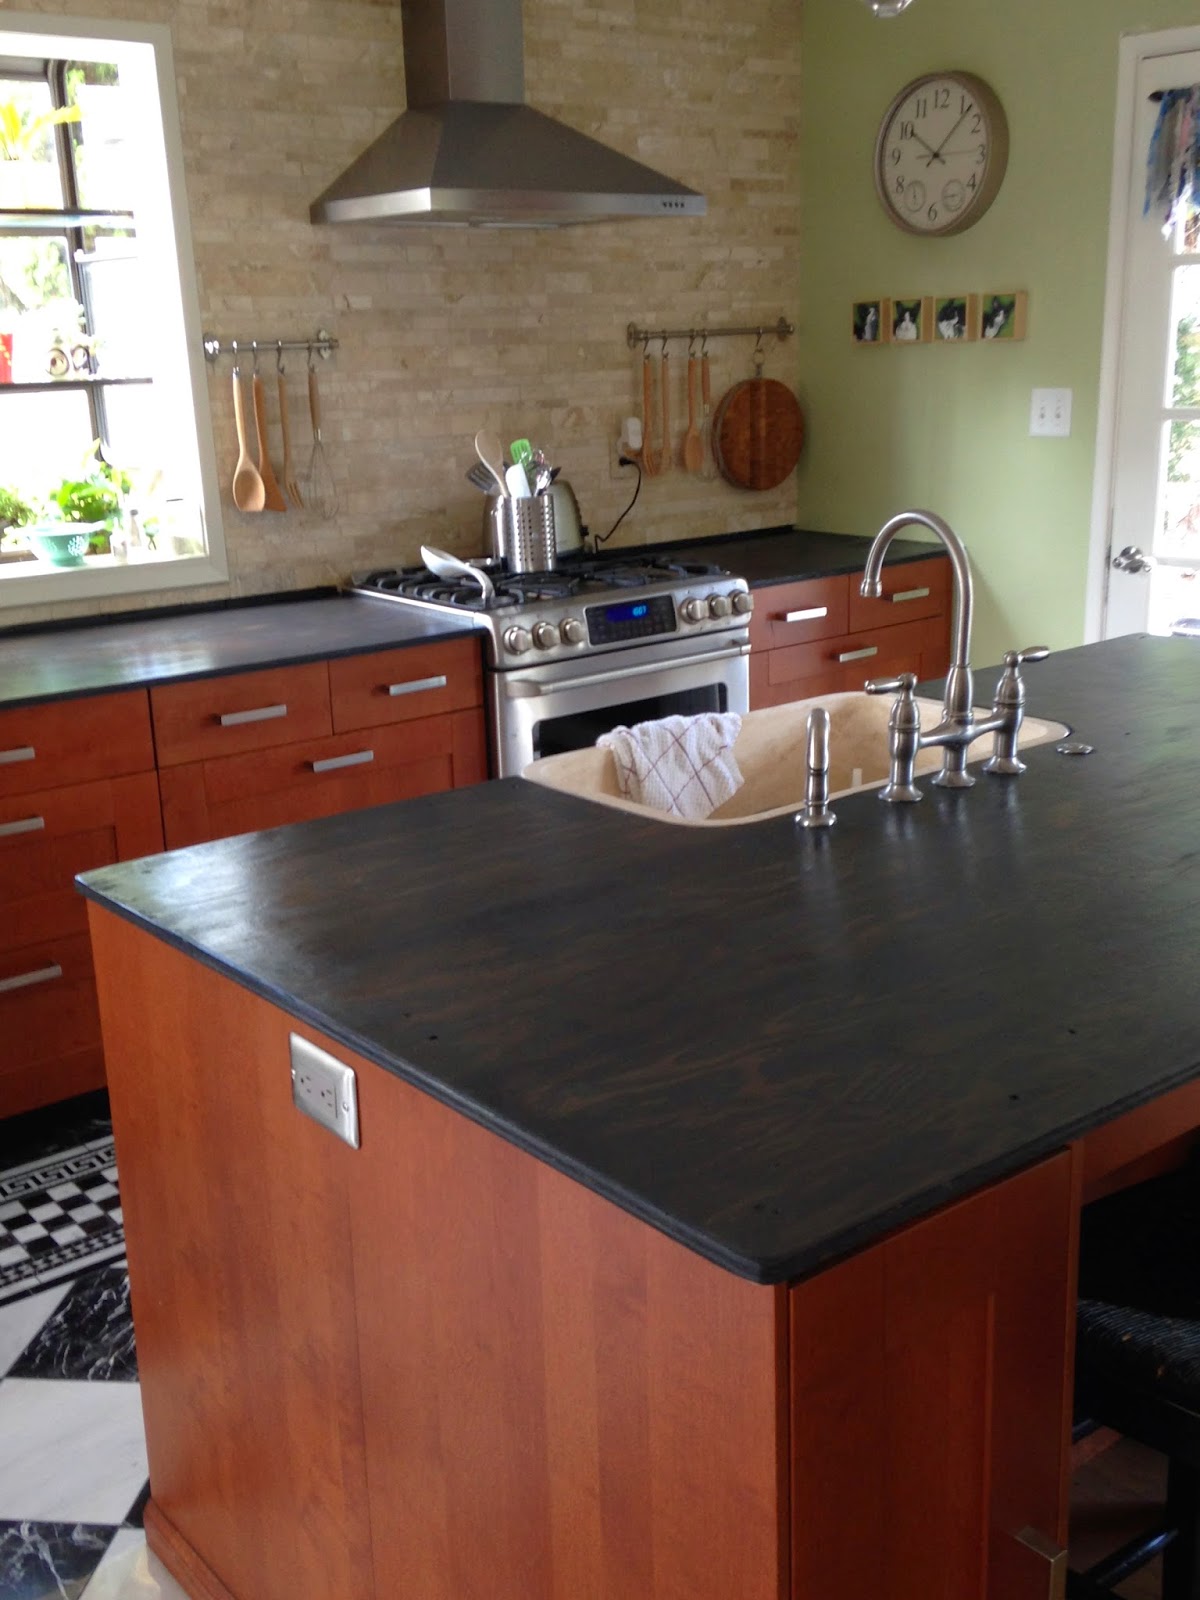
Another thing I did this weekend was a quick stain job on our temporary kitchen counter tops.  We've got plywood serving as a counter, and they were looking pretty gross.  So I decided to water down some black paint I had leftover from painting my patio furniture, and did a fairly light coat over the plywood. 


I then added a coat of polycrylic, and then a layer of paste wax.  I'm really happy with how nice they look and feel - and they feel more durable to work on.  Maybe they'll last us a  year -- plus, they give me an idea of how black or very dark gray countertops will look.


It only took a couple of hours, and it really looks great.  So those are my two quick projects this week!


Saturday, July 19, 2014

New Puppy!

One of the things I planned on doing this summer was to get a dog.  Although we were traveling quite a bit in the past few years, I would love to cut back on that.  Also, we would love to get into a more healthy lifestyle, and having a dog to walk several times a day is a great reminder to get out and about.  So we started looking after all the summer work was done.  We went to the animal shelter, and checked out all the possible candidates.  We also looked on Craigslist, but we decided we'd rather go through the shelter, so we knew we were not just putting money into someone's pocket not knowing how the dog's backgrounds were.

Our first few choices were these:
I really had my heart set on the first one above -- so we showed up at 10am the day he was available, met up with him, played with him -- then found out he was actually 2 years old instead of the 6mo old he was listed -- which was a bit of a problem for us since we wanted a younger dog (so we could get them integrated with our cats).  Then they did a cat test, and he failed that pretty clearly -- barking and jumping around.  So we sadly had to pass on him.  Second dog was also 2 years old - same problem, but we actually thought she was too little, since we want a dog that can jump in the car or truck to go places with us.  The third one was already adopted, but we had played with a cute little terrier and had forgotten to take pics of her - her name was Triscuit when we met her --


And she's the one we chose!

Here she is at the shelter, pretty shaggy but happy!


We brought her home, and took her shopping -- she got lots of fun toys and a nice new crate and bed: (she was really well behaved at the store!)

We decided to call her Luna.


She's a happy little dog!


The cats are not impressed:


But they will get used to her.  Today, she got her coat clipped and she looks a little less shaggy:


She's got a few habits we need to work on - she likes to chew, so we have to be sure to give her chew toys and keep her busy, and she also wants to bark a little when the front door is open and she can see out the screen, but she is responding really well to commands.  Dale's a great animal trainer, so I know she'll have her manners in place soon.  We're really glad to welcome her into our family!


Tuesday, July 08, 2014

Saturday, June 07, 2014

Day 12 - Roadside attractions!

We found a great site to locate kitschy roadside attractions, and decided to map a bunch of fun photo ops since our original plan (which was to tour some interesting architectural sites: Frank Lloyd Wright's Taliesen and Mies Van Der Rohe's Farnsworth House) couldn't work out for us due to travel times.  It was also our one really rainy day, and so as we drove from Minneapolis towards Wisconsin, we stopped at some fun roadside sites.


We also saw a cool giant spam can we wanted to take a picture of, but it was inside the fence at the Hormel processing plant.  We drove in and set up our camera, but a security guard came out and chased us off.  So sadly, we missed that opportunity!

Tomorrow is our final day of this fun trip -- we have a few more sites to hit on the way home, but it'll be good to get back to our normal, relaxed pace!

Friday, June 06, 2014

Day 11 - Judy Garland Musuem and the beginning of our tour of American Kitsch

We arrived in Grand Rapids, MN to view the Judy Garland home and museum.   This destination was Eric's choice, the Wizard of Oz is his favorite movie and Judy Garland is one of his very favorite celebrities (along with Liza Minnelli and Madonna).  The home was great - restored to it's original state (it had been moved from another site), and the memorabilia was fun.


and of course, we saw this photo op and knew we couldn't pass it up!

Minnesota is also famous for it's Paul Bunyan and Babe the Big Blue Ox roadside attractions, and this became our theme for the next part of our trip:


I downloaded an app called TimerCam and we can set the camera for about a 15 second timer so we can all get into place and ready - it makes a loud beep on the last 3 seconds.  We started getting pretty invested in making our pics look even more fabulous!

And also: we have been collecting these flattened pennies with the stamping of local sites, and we kept that up for this trip.  Here are some of our pennies from this trip:


Blogging tips