Monday, June 08, 2015

our summer adventure plan

Last summer, we had a fantastic trip across the US with our best friends Eric and Herbert.  This year, our travel plans are a little more local - we would like to visit a few parks in CA and also, we plan on visiting all of the 21 missions in California.  Up until this year, we'd only visited one, the Mission San Juan Capistrano, which is a really beautiful place ---


This is the mission that the swallows come back to every year in March.  We haven't had the opportunity to witness that yet, but maybe this next year.  We did see swallows last month on our way down to San Diego, but not at the mission.

We visited this mission way back in 2012, but we still counted it for our total.  For this summer, that still leaves us with 20 to go.

We took a day trip down to San Diego and visited the two down south - the first mission in the California mission chain, Mission San Diego de Alcala.


Beautiful garden, and of course, those iconic bells.   At each mission, we're taking the tours, picking up a few souvenirs and taking lots of pictures.  I have an art project in mind that I'm going to work on....

Next up was Mission San Luis Rey de Francia, which is in Oceanside.  This mission was pretty massive, with an extensive cemetery which was pretty cool. 


One of things that caught our eye was the cemetery gate, in the picture above, just to the right of the church.  Here's a closeup -- a cool skull and cross bones above the arch. 

At this mission, there was a lot of historical sites - original adobe barracks and the lavendaria (washing site) down by the river. 


We also took a day to go see the two missions in the Los Angeles area -- Mission San Fernando Rey de España in LA (mission hills).  This one had two weddings going on, so we didnt get a lot of pictures.  This mission also doesn't have some of the more classic looks ---


There were various outer buildings to look at, and this shot shows off the difference in size of people in this region -- Dale is 6'2"  and clearly he doesn't fit under the doorway arch!


The strangest (to me) aspect of this mission is that Bob Hope was a big financial supporter of the restoration.  He and his wife are buried on the grounds, as are other members of his family.  There's a little Bob Hope Garden, which was just so odd to us.

That's their grave on the right.


The other LA area mission is Mission San Gabriel Arcángel. 

This one looks a little imposing from the outside, kind of jail-like, but it was calm and cool inside. 


Saint Gabriel the Arcangel is in the center top over the altar, with his wings holding him aloft.  The carvings in this church were in great shape.

The thing that fascinated us, for some reason, was the opening/closing system of the windows. The windows are high up for a couple reasons - security and because the adobe walls are incredibly heavy and thick at the base, so the window openings have to be high so the wall remains supported.  So the windows are kind of unreachable, but they have glass frames that are on a pivot - they can pull one side of the chain and it pivots open, pull the other way, and it closes.  The adobe buildings are really cool and usually a little dark inside, but this church felt light because it's extra tall.


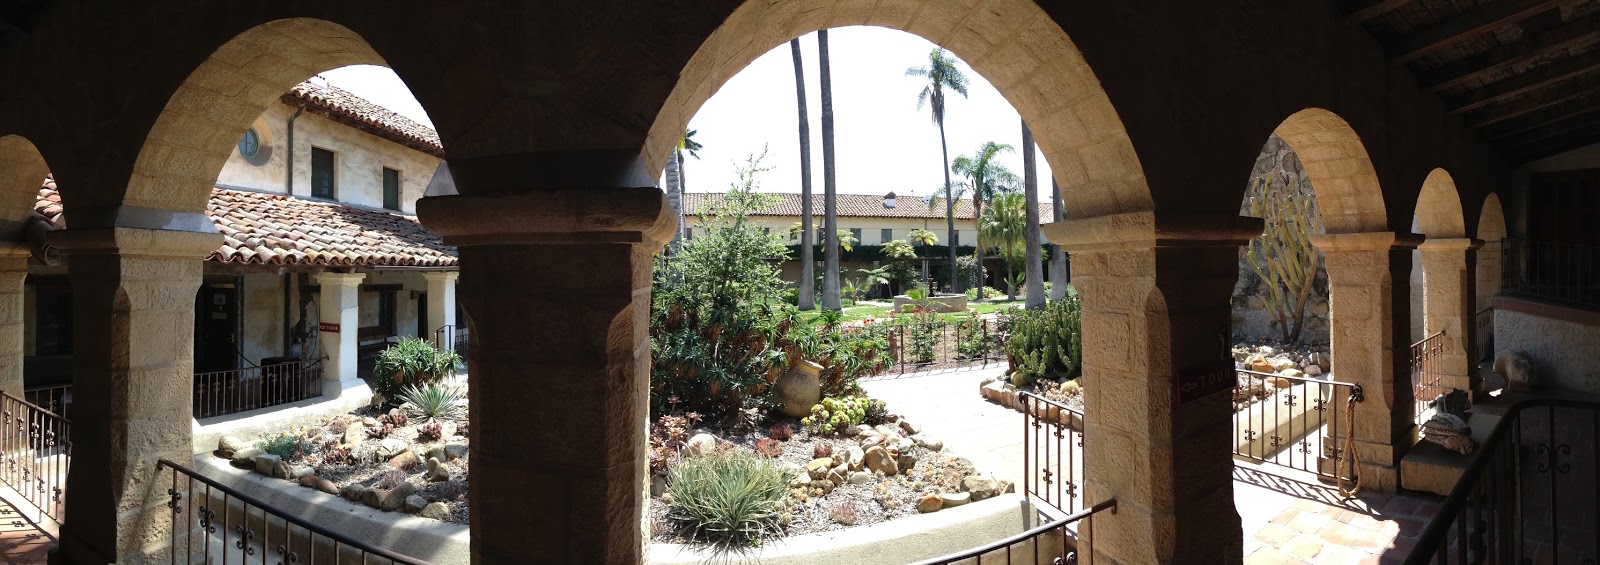
The other mission we've visited so far is Mission Santa Barbara. Every year, this mission is the site of a sidewalk drawing competition/exhibition/fundraiser for the locals arts groups, and we went during that event.  There were big crowds, and we got to see not only the mission, which is beautiful, but a lot of really cool art, listen to some live music, and eat some yummy pasta.

It was really crowded, but fun!


 The gardens were really beautiful, and peaceful. 


These are just a couple of the chalk drawings - it was really fun to watch the artists drawing.  The one above is on it's way to being one of those cool 3-D looking things - there's a certain place you stand to get the full effect.  There were several of these in progress, and some of them had a tape X or footsteps drawn in where you should stand to take a picture.

So that's where we are so far -- we have 6 visited, 15 to go.  They extend up as far as just above San Francisco, (mission San Rafael) so we'll have to go on a multi-day trip later this month to check out those.  I'll share what I'm doing with all these later!


Sunday, June 07, 2015

Catching up -- part II

I've simply gotten out of the habit of blogging. So I am going to do yet another catch-up post and highlight a few of the smaller projects we've been doing in the past year.  Even with my best intentions from January, I didn't continue, so now that it's summer and I don't have as many things on my plate, let's see if I can get back in the swing of things.

To get ready to look at catching up, I looked through the past couple of years of posts, and realized that I did a lot of little things that I never added in.  One thing that made a big difference was taking out the last two big, ugly air conditioners.  We do have one still in the bedroom, but the other two (one in the kitchen and one in the guest room) were not only ancient, but didn't even work.


The first one I took out was in the kitchen -- just had HAD it one day and I had a large sheet of glass, so we wiggled and jiggled the old behemoth out of there and reframed the open space.  I thought I had taken pictures.....but here's one of the end result.


It's so nice to have more light coming in, and to not have that unsightly AC unit there.


The other one we replaced was in the guest room.  We did this one later,  and we decided to use one of the other two glass panels that we got when we updated the front door.  So I like this one a little more.


I still have one more glass panel, and may replace the kitchen window with it, especially since sometime this spring one of the panes in the current window developed a crack somehow.  So I need to either replace that panel or just replace the whole thing.


The other big thing that we've done in the past year is to paint our bedroom.  Our bedroom is the last room that had the original beige paint.  We have a lot we want to do in here, but most of it involves adding a bathroom on and reconfiguring the room. So we were thinking that doing anything in it's current state would be a waste of time.  Then we were lying in bed, thinking yet again how much we hate the beige, and decided we should just paint since it's only 20 bucks or so and we'd feel better about it.


We wanted something fun and bright, so these are the two samples we got.  We did a quick poll on Facebook and we ended up using the one on the right.  I'd looked through a lot of Pinterest pics to see how each color would look in a room with furniture similar to ours, and we decided to go with the brighter color.


Here's what the room looked like before we got started:

Dreary, even during daytime.  We pulled all the furniture out, scrubbed everything down, then got it painted.  Soon enough - it looked so much better!

It's so much more fun to wake up to this!

One thing we did differently than in the other rooms was to not add the crown up along the top -- because we are going to redo this room eventually, I didn't want to go through the expense and hassle of putting crown molding up, but we did run a piece of molding all along the top edge about 5" down (the same as we've done in all the other rooms), and paint it and everything above white and glossy, so it has a bit of a look of a finished molding.

You can see it along the top edge here.  I also took both of the bedside lamps outside and spray painted them, from the brassy finish they had from our house on Bosart, to a nice flat black that looks more like the bedframe.

This isn't a very large room, and we've got a king sized bed in it.  So just putting this brighter color of paint has made a huge difference and made it feel so much fresher!


The other thing we did when we fixed up the room was to put a box over the ridiculously large cable unit. We built a box from some leftover plywood, then painted it to match the wall.  Not only is it large and bulky looking, it has an orange flashing light that is irritating, so this way, the box covers the whole thing and it's not as noticeable.


I would also love to take the AC unit out of the window, but with the past two summers, we're grateful to have it on hot days.  I talked with Dale about taking it out of the window and embedding it in the wall so we aren't taking up one of the windows (and maybe enlarging the window), but again, since the long-term plan for this room is to add on and make half of this room a bathroom, we don't want to put any big work into it.


Other small things we've done around the house ---
Added a ceiling fan in the living room (to replace the stupid "boob" light we had in there),


Added curtains to the patio pergola -- we got these at IKEA - some inexpensive 9.99 panels, and a wire system to hang them on.  These have been great to keep the sun at bay, and makes it really nice in the afternoons when we want to kick back and relax on the sofas --


and we got a hot tub! 

We were keeping an eye on Craigslist and one day someone had one for free -- it's a Softub, and I read into them and realized that it would be perfect for our situation - our electrical box is full and we can't add a 220.  Softubs take a regular 110 outlet, and they're super lightweight to move and take care of.  So we missed out on the one for free, but we kept our eye out and ended up getting this one for $300.  We use it pretty much every day!  We did have the motor go out last month, and that was the real test -- the repair to rebuilt the motor was $600 -- did we really want it - and we decided that yes, it was completely worth it.   I love going out there first thing in the morning and getting caught up on FB and email and everything else before getting in the shower and getting ready for the day.  And I think it's also helped my skin feel so much better.  We have the water treatment schedule down and feel great about the whole thing - so we're really glad we got this!

OK -- so that's a lot of catch up  to do.  I have more things that I've been doing, and this week, we've been working in the yard, so I can do an update on how our front yard looks two years after our initial lawn to garden conversion.  I'll also get caught up on vacations and projects -- lots to write about!

Saturday, January 10, 2015

Oops! how did that happen?

Soo....August  until January, eh?  apparently I was doing NOTHING.  Well,  not exactly true --

I did finish a lot of projects, but so many of the were for Christmas gifts that I couldn't share them here since the recipients check in.  (hello family).  Maybe a short recap and then I can get back into the swing of things....

Knitting.  I spent a lot of time knitting things - some successful, some not so much.  My daughter Leslie sent me an image of a rather cool vest she wanted - based on what Katniss wore in the Hunger Games movie.  This was a lot of fun, although I had to rework it to personalize the fit after I got to Indiana (more on that annual winter trip later).


This is what the pattern she really fell in love with looked like.  But she wanted it in an oatmeal color.


What a slacker I've been about taking pictures since I've been a slacker about blogging --- I only have a couple of progress shots ---


I somehow neglected to take a picture of her wearing it.  sigh.  It went fast, I learned a couple of new techniques, and while I was in Indiana, I made another for my youngest daughter Hilary, using a lighter weight yarn.  The one I made Leslie used a super bulky yarn and it's very warm.  In fact, I had to remake the rings around the neck because although they looked nice, when you put it on, it feels like you're wearing a dog cone.


I also made what looked like it would be a cute fox cowl -- and this one turned out large, shapeless and altogether a failure.  I think it was my yarn choice - I chose something soft and cuddly, and it just lacked the body needed for the pattern to be a success.

And finally, I am still making version 4.0 of a pair of legwarmers for my oldest daughter.  She had a simple request, although she had some specific size requirements that I just couldn't get right.  I knitted and frogged 3 pairs, and I am on my fourth and this one looks like it might be right.  They were supposed to be Christmas gifts but looks like they're running late!


I also made Luna  a little coat to wear to keep her warm on our trip to the midwest. She looks good in red :)


Right now, besides knitting, I was inspired by a friend who posted a 365 challenge she's doing - she is drawing daily on a desk size calendar - it is really awesome, she's an awesome artist - and I like the daily habit as well, so instead of buying a calendar , I went looking for a calendar journal (I do love me some books!).  I didn't like any of them I saw -- and I did love her large calendar - so I made myself a large book to use. 

I just want to use this book to do a short doodle -- nothing too incredibly complex - I've got some other books I can work on for that.  I actually considered doing only zentangles in it -- which might be more interesting.  I did one of those for the last two days, so maybe a short stretch here and there.  I enjoy the mindless linework sometimes.  This book is big - the open pages measure 22" across by 15" high.  Each square is around 2.75 x 3.  So anyway, I look forward to working in this all through the year to keep my hand in.


And now that that little bit is done, I'm going to put together a couple of grandkid posts.  Now, THAT, I have lots of pictures of!

Friday, August 15, 2014

Patio lights

When we first moved out here in 2010, we went for a walk along the canals in Venice, and we came upon this house that had all these vintage pendant lamps hanging from a huge tree, over their patio.

The lamps they had were all amber glass, which was beautiful, but not my favorite color of glass.  Anyway, we started picking up random 70s pendant lamps for a few bucks here and there, thinking I'd put them in a tree in our yard.  We were thinking of putting them in the avocado tree, but I decided I'd really like them closer to the house.  So this week I put them up, and this afternoon we finished running the electric.


We have 6 lights, all wired so they are all on one plug.  The wires are tacked up on the back side of the pergola, and will be painted in the spring when we paint the pergola top.  We installed electrical boxes along the back joist, and then ran the electric along the back of the house.  We also added an outlet down low for any kind of power we might need, then the outlet for the hanging lights is up high, where it will eventually be hidden a little by the bougainvillea.


With 6 lights, we can get plenty of light for sitting out and reading or talking.  Along with the light on the garage, we have the backyard pretty well lit for now.  I woudln't mind picking up a few more pendants if I see something that looks fun!

Wednesday, August 13, 2014

Coffee table for patio

We made our patio furniture a while back, but one thing we kept looking for was a table that we could use to set drinks on, put our feet upon, etc.  We really liked this vintage cart look:


But we couldn't find a good source for the wheels - and all those we did find looked kind of cheap.  So I found some other ideas on Pinterest, and ended up liking this:
(except for the white legs).  I know I see  lot of "farm tables" on free Craigslist, so I just waited for one of them to show up -- and this weekend, there it was.  In fact, it wasn't a kitchen table, but a coffee table already!  It did, however, have a terrible shiny "maple" top with a country style edge.


So I bought a few 1 x 4s and made a new top.  Stained it, put a coat of poly and a coat of wax on it, repainted the base black and now we have a nice little outdoor coffee table for the patio.


I think it needs some plants on it, and I want to get a tray to put them on.  So that'll give me something to shop for. 


Also, we put up a light fixture on the garage.  We did have a motion sensor light out there that was useless, I took that down last week and yesterday, we installed one of the two lights that my sister-in-law gave us.  It's great--


and we hooked it up with a remote on/off switch -- I got this on amazon.com, and I'm really happy with how well it works.  You basically plug any light in to an outlet, program the remote, and it works up to 100 feet away (even through multiple walls).  It came with two outlet units, and we're going to hook up the electric for the patio this afternoon.  I've got a bunch of lights I want to hang there --

So, hopefully, those will be done for my next post!


Saturday, August 09, 2014

Pergola

So, for the last week or two we've been slowly working on our backyard pergola.  First, we had to clear out some of the plants growing along the back of the house (the creeping fig that covers the brick fireplace, and the bougainvillea that we are in the middle of training up high).  We actually started working on the bougainvillea last year, when we stripped most of the smaller branches and thorns on the  bottom 6', and we had zip tied them together straight up, so they were pretty ready to go.  The creeping fig needed to be trimmed in a nice straight line so we could put one of our ledger boards along the brick wall.


We had to keep bending our group of bougainvillea off to one side - they have really vicious thorns!  The part we were dreading was drilling through the stucco and into the house supports - just a lot of dusty, messy work, but we got that done, and then it was just a matter of hanging our ledger boards and the joist hangers.  We're using redwood, it's naturally weather resistant without having any chemicals added.  We plan to let it age for a year before we paint it --


At the other side, we measured off 15 feet and marked off the spaces for our three posts.  We had to use the hammer drill to set these into the concrete, another chore we didn't look forward to, but it actually went rather quickly.  Here the posts are leveled and braced.  We used 4 x 4s, but I will be building out the posts later, and adding detail.


After we got the posts up we ran our beams across, and bolted them together.  We also added some diagonal braces, but I didn't get a close up of those.


 Then it was a matter of hanging the joists in the hangers and screwing them in.  We also got the other ends measured and toenailed in.


Then came our dilemma.  We are going to top the pergola with 1 x 2s for shade, but since we want to let the redwood age (and dry) before we stain, we don't want to attach all the 1 x 2s, because they'd be easier to paint flat instead of after we put it up, so we instead added a covering of inexpensive bamboo.  We like the way it looks, but it probably won't age well. 


We also want to put some clear acrylic panels on top of the 1 x 2s, to keep it dry on our furniture.  So that's what's going to happen later in the year/earlier in the spring.  But for now, we're really  happy with the way it looks and the shade it provides both outside and in the house during the late afternoon.


From the inside of the house, it casts a slightly yellow light, probably due to the bamboo.  I like how it makes our yard look greener, because it can use all the help it can get.  If you look closely, you can see we have no grass, just dirt and plants.  Our backyard is in survival mode - just plants in a holding pattern.  We have big plans for the backyard, and we'll be working on it over the fall and winter.


 We still have electricity to run to our outdoor lights, but we got a lot of the really sweaty, tiring work done.  I am not looking forward to painting it next year, but hopefully by then, I'll be rested :). 

Our next project might be building a nice new set of steps from the sliding glass door -- we have a short set of concrete steps that are entirely too narrow - -we'd like them to run the length of the door, and to have a wider top so that we walk out of the house first, then down the steps.  By running them the width of the door, they can also serve as a bench for when we have company over.  We are going to make them out of redwood, too, and just put a clear finish on them.  Hopefully we'll get those done in the next few weeks.  We still have lots of small projects for the patio, but we'll work on them bit by bit.


Blogging tips