Saturday, September 26, 2015

The roof on our vardo

For the past couple of weeks, we've been working off and on, getting the roof on our little vardo.  First, we had filled the spaces between the rafters with rigid styrofoam, glueing it all down.


this is before we added the foam insulation


This is the insulation - it has foil on one side.  The first layer we put in foil side down, the second layer, foil side up.  This should keep it cool in summer, warm in winter.


Then we bent plywood over the roof on each side, attaching to the rafters with glue and nails.


After we got the sheets attached, we cut 2" wide strips of plywood and covered the seams, spreading glue and nailing to cover the seams.


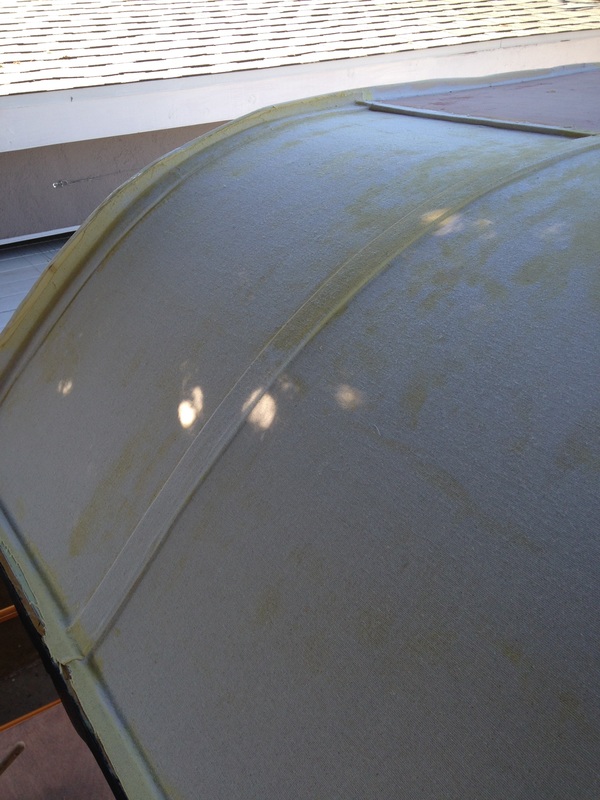
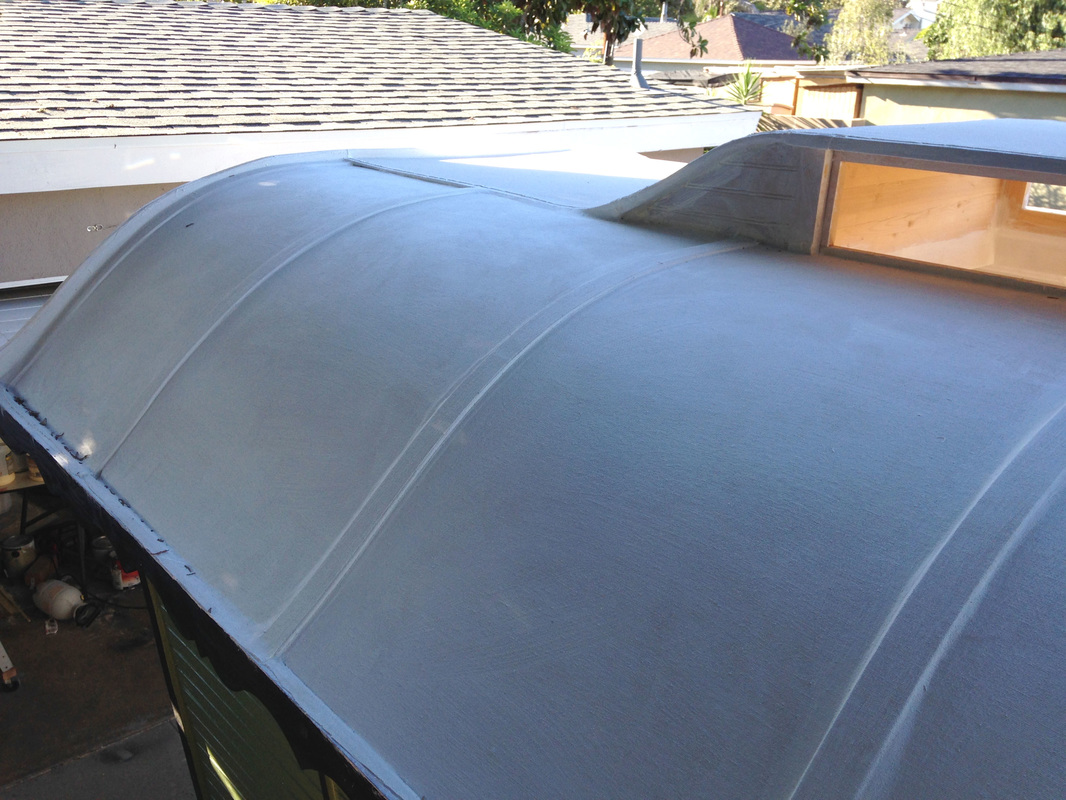
Then came the part where we waterproofed it.  We were using a technique called "poor man's fiberglass" - basically, you glue canvas down tightly to the wood, using Titebond II glue, which creates a water resistant seal.  Then you spread glue over the canvas, then paint over it with several layers of exterior grade paint, making sure the canvas soaks up all the paint and fills the fibers in.  I could tell as I was coating this that each layer will filling the spaces, and evening out the texture.


This is what it looked like after the canvas was glued down.


This is after one coat of house paint.


 More layers of house paint -- a total of 5 layers.
 
 The last layer was a light cream color, which was the background for my design of diamonds.


So, originally this pattern was going to be an all-over pattern of tan diamonds on a cream background.  But I had some nice dark brown paint so I thought I'd use that - and then it seemed kind of stark.  And I liked the way the straps stuck up, so I wanted to accent those.  So then I decided to add some stencils over the whole thing.  So it ended up with many more layers, but now I'm hapy with it.  


I finished it all up with a coat of clear poly to help protect it, although it's had heavy dew on it each night, and in the morning when I come out, there is water dripping off the roof onto the ground, and everything is totally watertight. 

So this took a lot longer than I expected, but that's how I work, so I'm used to it.  Here's a shot of some of my stencils:


Some of them I bought, and some of them I cut.  Can you tell I like a lot of pattern? 

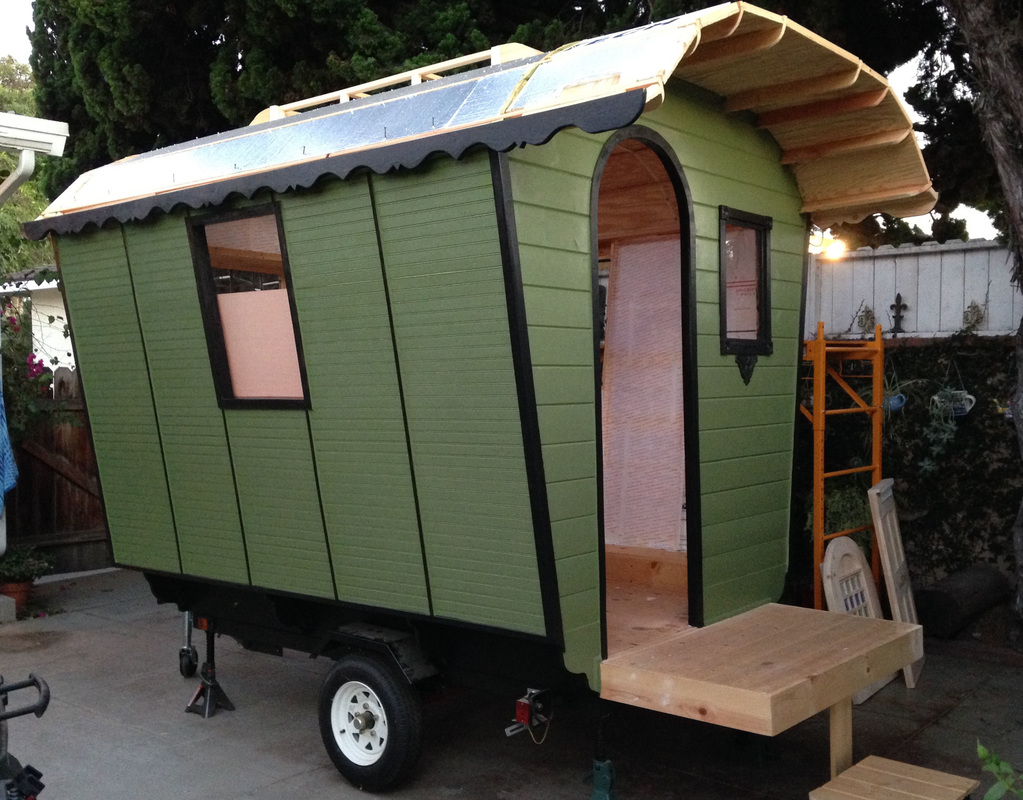
So now I can work on the windows to the skylight, and get the bands around the roof all painted. I got one coat of paint on them this afternoon, but they need two more.  I feel like I've been painting and painting and painting -- because I have!  But we will have this little vardo all weather tight pretty soon!

Saturday, September 12, 2015

Getting a new roof on the house -- and painting doors

The news has been full of predictions for a "godzilla el nino" this year - hopefully meaning that we'll catch up on rain to end this drought we've been in out here in California.  But that's also got a downside for us - we knew we needed a new roof, because we've got a leak right over the patio doors.  Being that it doens't rain but maybe twice a year in the past year, it wasn't a big rush. But if we're looking at a lot of rain.....

So this week the roofers came.  In preparation, we had to empty the garage (the slats on the roof have slight spaces between each slat, and when they take the roof off, it's gonna pour down a lot of dust and crumbs from the roof), and move the vardo. It's been in front of the garage, and that's where they need to dump all the roof they tear off.  So we packed everything up out of the garage, and prepared to roll the vardo into the larger part of the background - only to find that the lemon tree was blocking us.  So we had to cut that down.  It was something we were going to do anyway, but we got that started. 

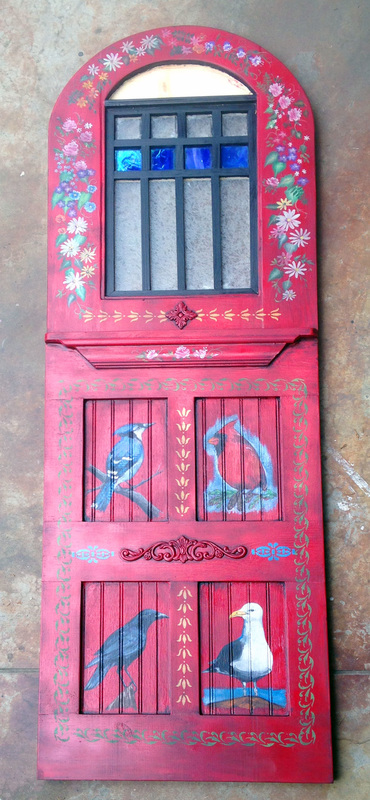
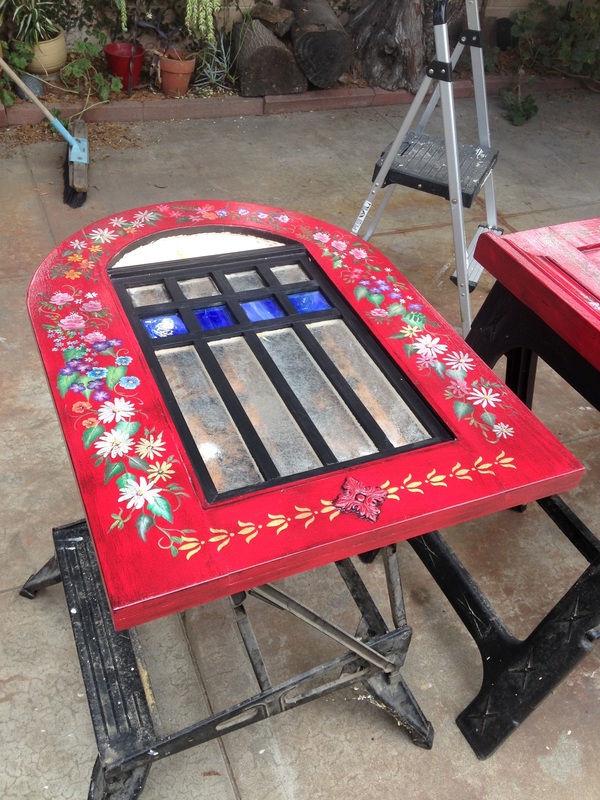
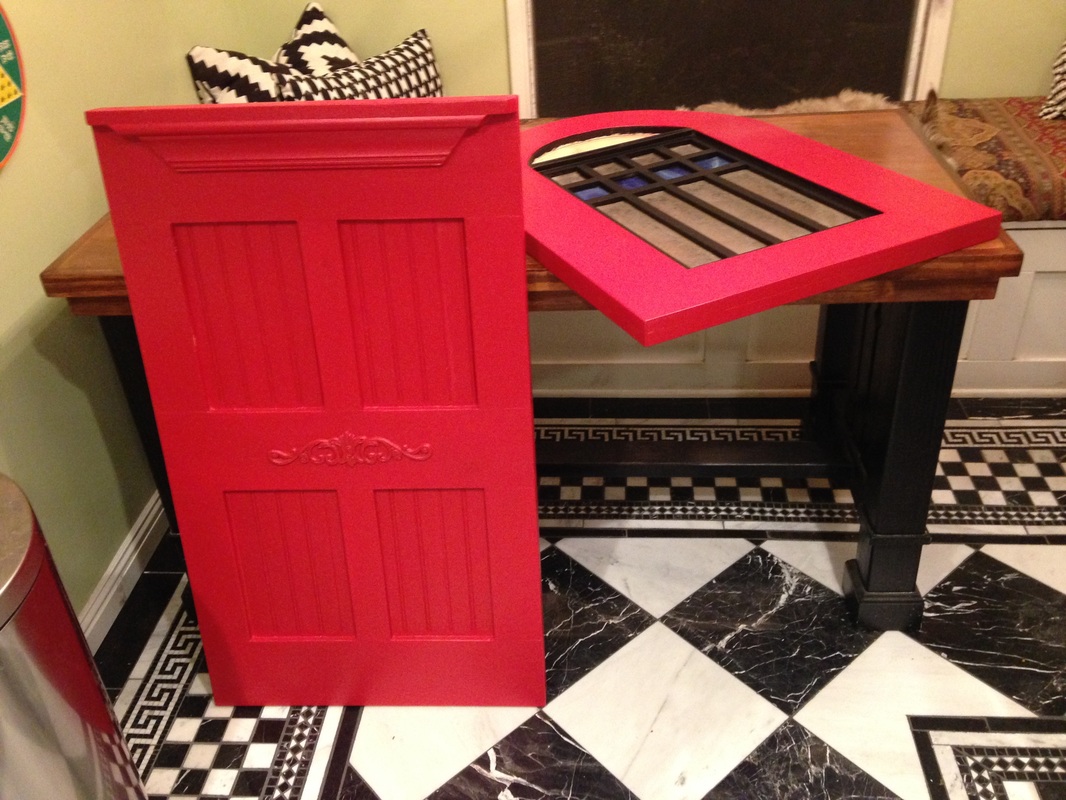
In preparation for having no work to do on that for a week, I gave the door parts three coats of red paint. I bought a sample of a nice, vibrant red -- too red, actually, but I knew I'd be 'antiquing' it, so going a little bright is fine.  My plan was to learn how to do "one stroke" flowers, and also figure out some stencil patterns, along with adding some birds.  I love birds. 


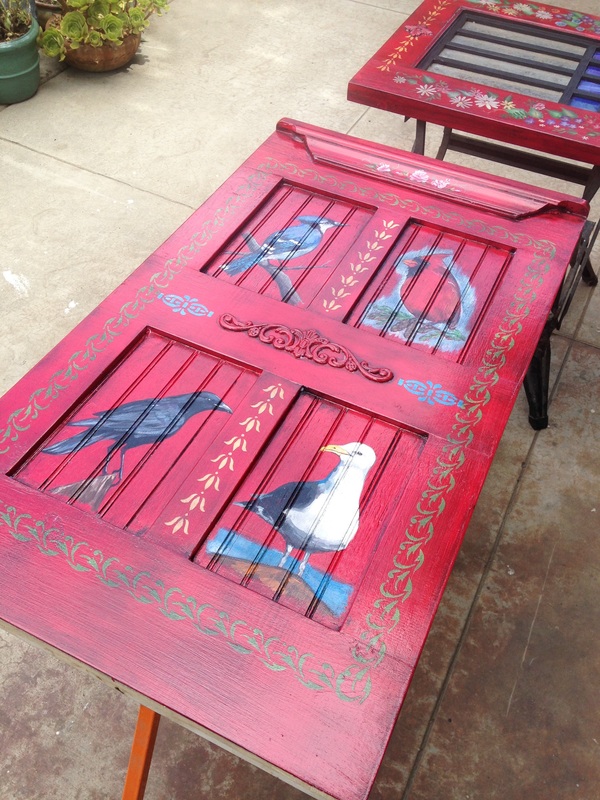
So here it is!  This is after painting all the details, then giving it a coat of varnish to protect the paint, then giving it a coat of black paint, wiping off as I go so that it just collects in the corners and edges, and tones down the vibrant color.  This is both pieces laid out together on the concrete so I could see how they work together.

The blank space above the windows is going to have a mosaic embedded in it -- I'm thinking it'll be buttons, which I have a ton of.


I cut a few stencils from some blank stencil plastic, and I also purchased a few different stencils. I'm going to be covering this whole thing with a ton of embellishment, so having a lot of choices was important.


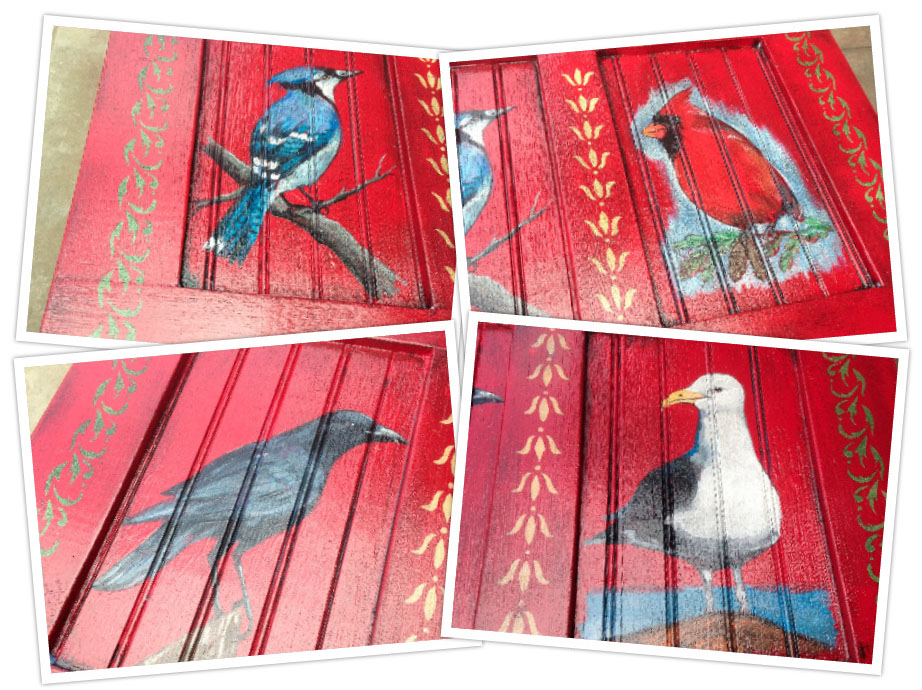
Like I said, I like birds. I gave Dale two choices, he chose blue jay and cardinal, and I chose crow and seagull.  The cardinal posed a little problem - the bird is about the same color red that I painted the doors, so I had to add a blue background.  My favorite is the blue jay, it came out nice, and I really love crows, so that one makes me happy, too.  Both of the stencils on this picture are ones I cut.


On the top, I practiced my flower skills. I have another large area that is going to have flowers, so I wanted to practice a bit on this. I watched some videos and looked at some how-tos online, and got painting.  One night, it was so incredibly hot while I was painting (we had a mini-heat wave), and I was trying to keep a fan on me, but it was drying the paint out so fast.  Anyway, I got that all done.  After I antiqued the red, I gave it two coats of clear poly to protect it against weather and wear.

 
So I still need to drill for a doorknob and get the hinges on -- the hinges will cover some of the flowers and paint, but that's OK -- I wanted it pretty busy so it'll all work out fine!

Monday, September 07, 2015

All painted -- well, at least the base coat

I pretty much painted all week -- two coats of green, two coats of black, and I'm thinking of giving everything a third coat for added protection from the weather!
It looks so different with some paint!  I am not liking how the black made the bottom completely disappear, but I've got some ideas of what to stencil and paint down there, not to mention every other surface on pretty much the whole thing.  So right now it looks a little "goth-y", but with the decorative paint over it, it will brighten up. 


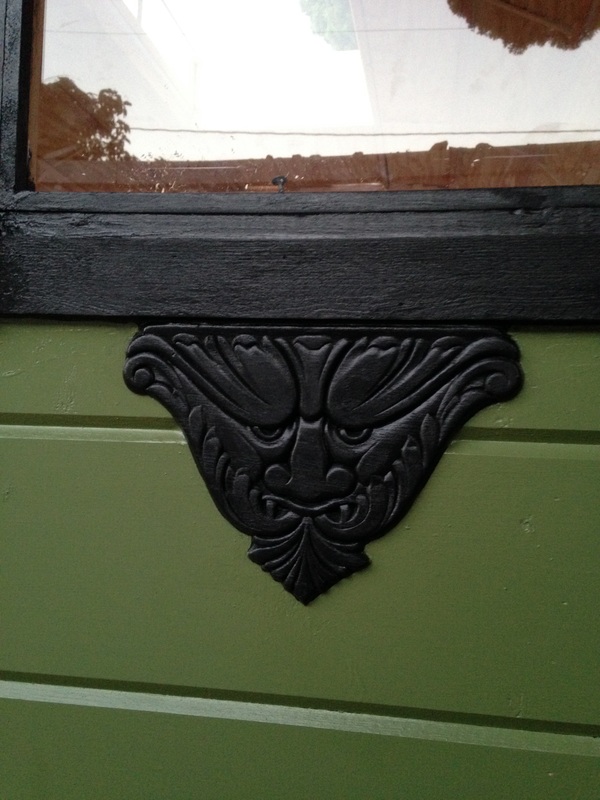
Of course, little touches like this help make this seem more goth!  We went to a cool lumber store, and they had a ton of these pressed wood appliques for a reasonable price - I think this one was something like 4.50.  He's gonna look aweseome with some gold accents (when I can find my gold paint in the chaos that is my studio!)


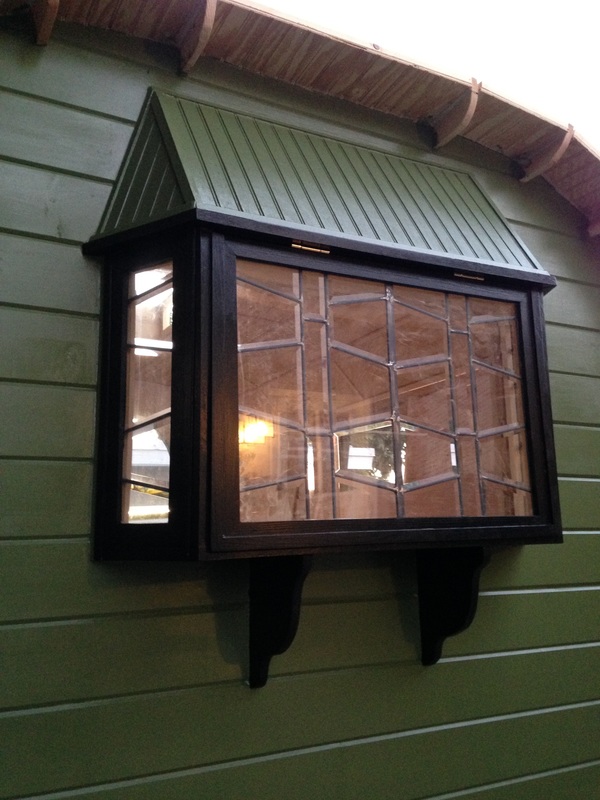
I also got that back window tidied up.  I added a roof, some trim, and changed out the hinges to a hidden version. I like it so much better!

The beveled glass looks great, although I know I'm going to have to add curtains here!


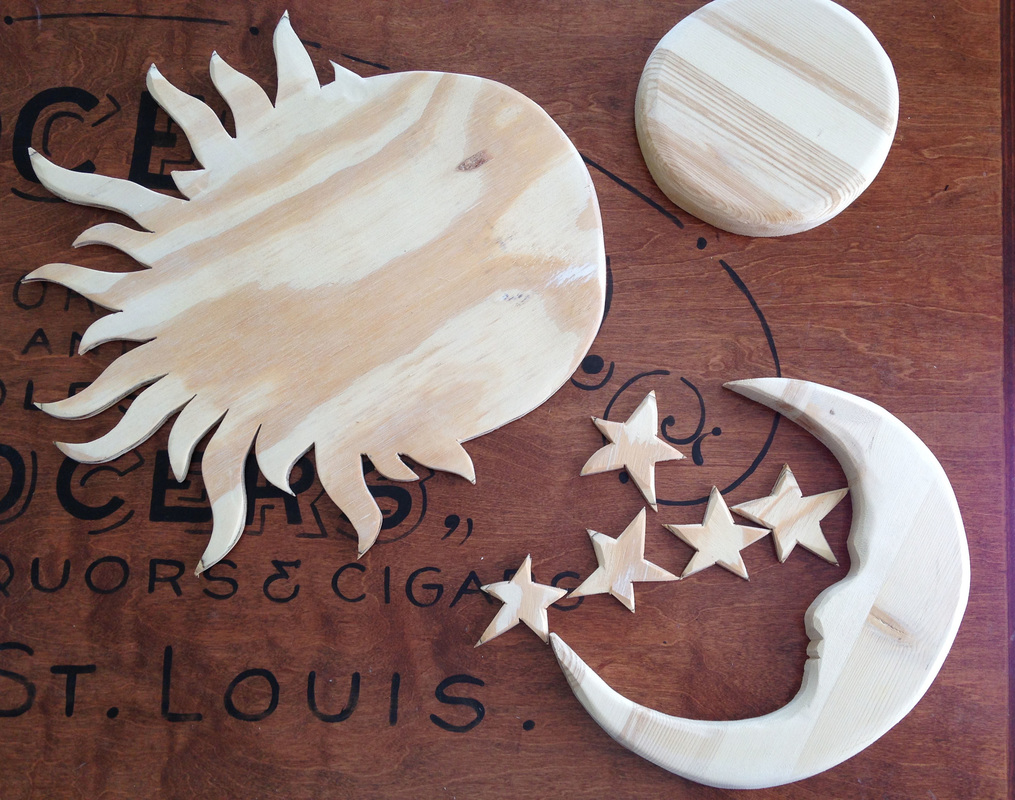
We are getting a new roof on the house, so we had to pack up the tools and the trailer for a few days, but I've got some decorative accents to work on. The first one was a design for over this window:  I found a clip art of a vintage-inspired sun & moon, cut them out of wood with my new jigsaw (oh my goodness can I say how much I love it!)


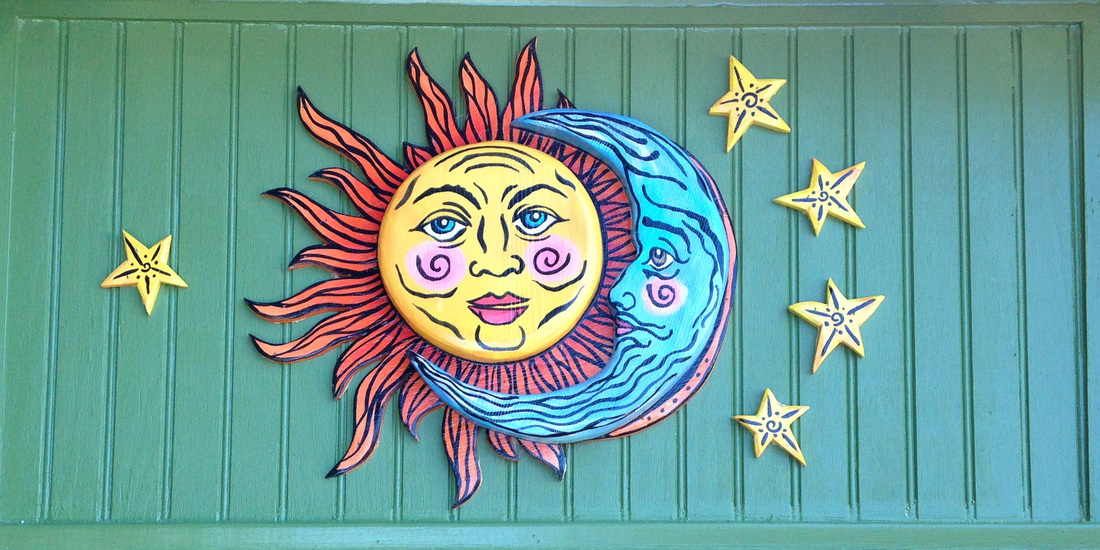
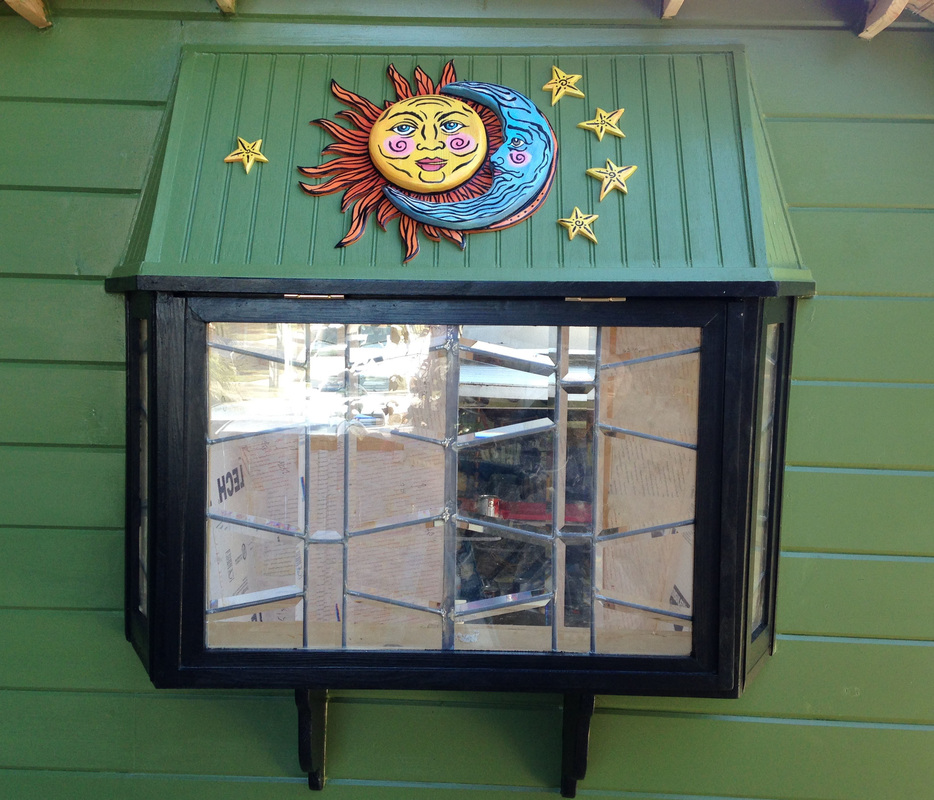
Then I painted it all, gave it 4-5 coats of marine varnish and then glued/nailed it to the bay window roof.  I love it!


I still have more accent designs for around the edge, but this was a fun piece to work on. 

I also painted the doors red - maybe a little TOO red!, but they'll get antiqued with some black to calm them down. I have smoe ideas for some paintings on the panels and edges.  I'll post pics when I get those done, too.


We also got half the roof plywood curved and installed,  added insulation to the walls, and installed the back window by the door, but I forgot to take pics. I'll add those next time!  Pretty soon, we'll have the shell complete (with painting added), we can think about the insides!

Thursday, August 27, 2015

Lots of details

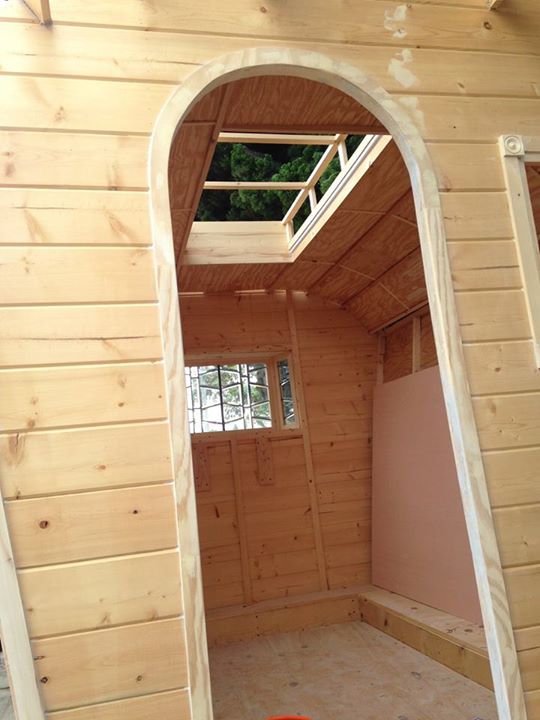
There are so many little details to go into this project!  Dale does the big, major things (like building walls!) and I do all the smaller, precise things, like making trim that fits around the door:
To do this, I used 1/4" plywood, since the trim I cut elsewhere was about 3/8" (cut down from 1 x 3s), and I only had it 1.5" wide.  This way, I could get the nice curve on top without having to piece it from a number of boards.

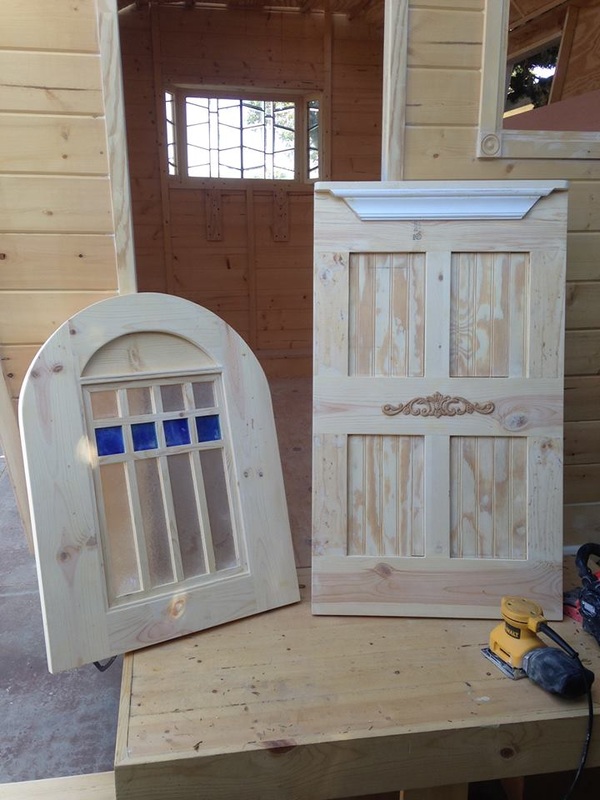
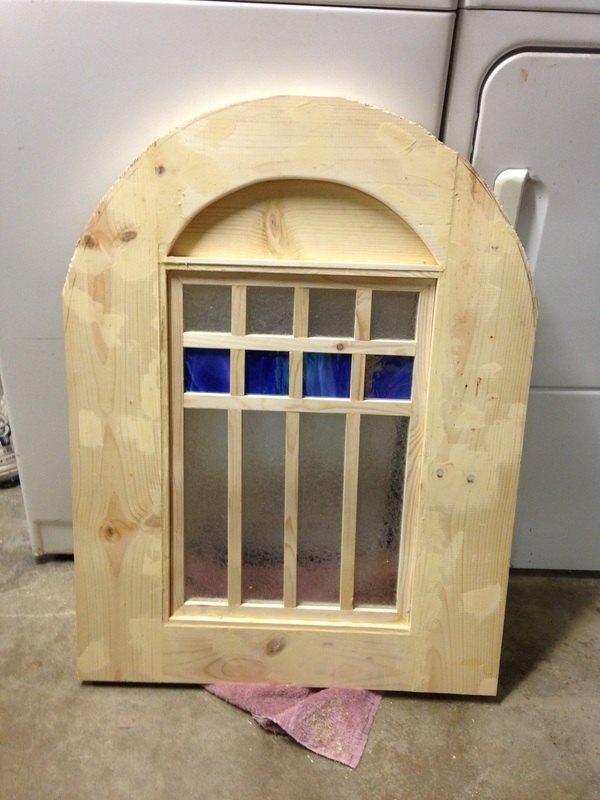
I also made a door:


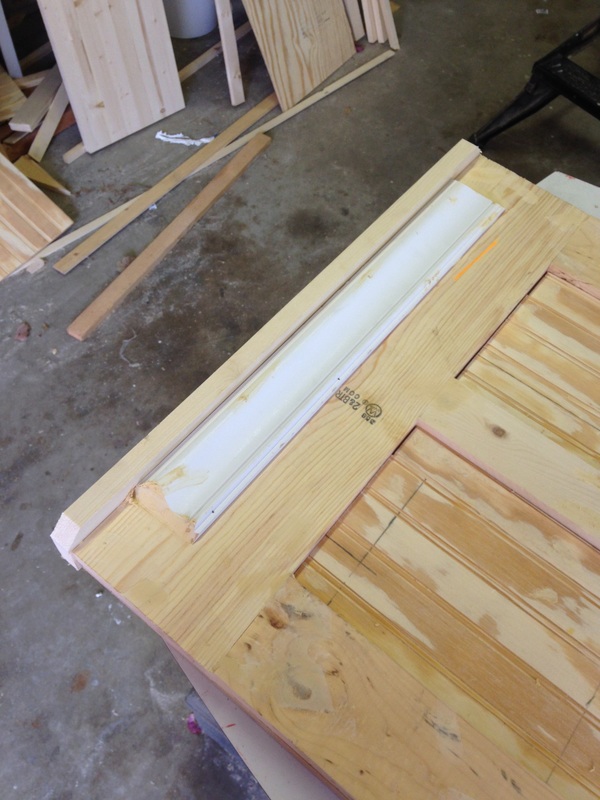
I used regular dimensional lumber here. First, I built the window out of channels I cut from 1 x 2s with stained glass cut to fit.  Then I built the rest of the door around it.


I also built up the window frames by adding trim to the outside, then using bondo to fill any gaps, sanding down so it's smooth. This will make a nice solid window frame.


I also added trim to the four corners and along the bottom edge.


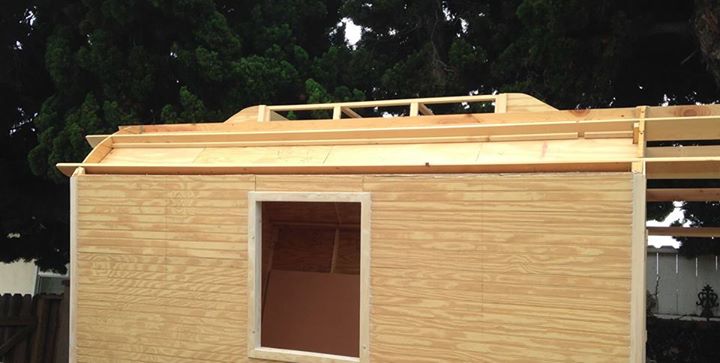
You can also see the mollycroft (or trolley, or skylight) in this angle. It still needs a roof, but we'll get there.  I also added the ceiling along the back rafters.  I had to trim the front rafters, they've been bothering me because I felt they were too long, so I took them down a bit.

Today, I cut the curves on the final rafters, the decorative ones that will go on each side, but I need to get those sanded before I attach them.

Oh,and finally, I added the center panel to the bow window.  But I still haven't got a fastener on the inside, so it's being held in place with a little wedge, which will disappear when I get the handle/hooks installed on the inside.


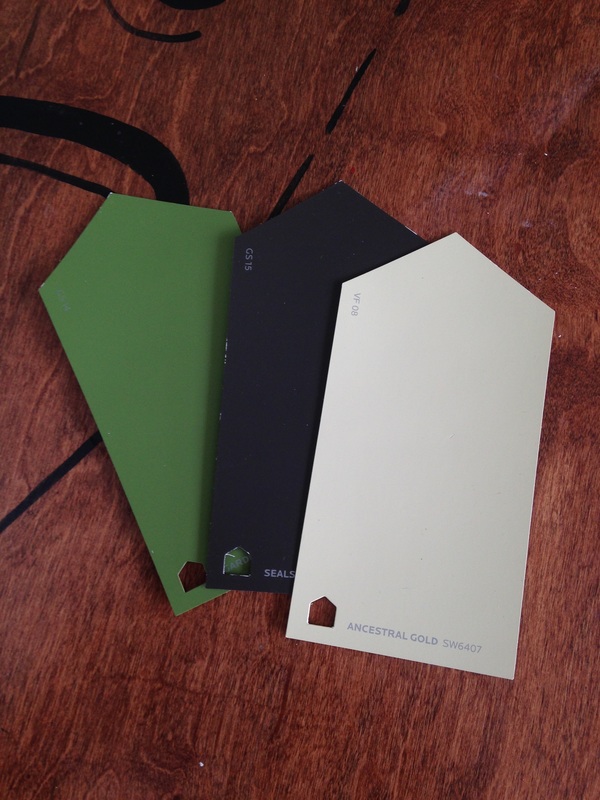
We also chose a color scheme -- which looks rather mundane, but there is going to be a LOT of decorative painting, so having a fairly subdued background will help.  Green for the body, brown/black for the trim and cream for the ceiling and roof.


Now, I'm back at school so I can't work on it as much as I want, but we'll still make progress!


Wednesday, August 12, 2015

Vardo coming along


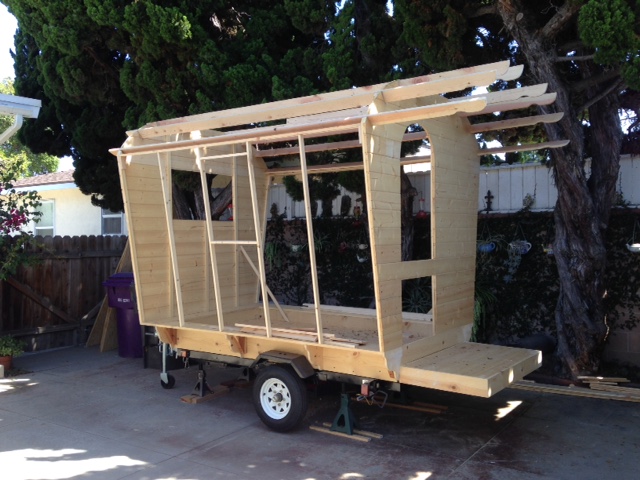
So we've been working slowly but steadily on our little vardo camper.  Last time I posted, we had just begun getting the two end panels on.  Well, we've made a lot of progress since then:
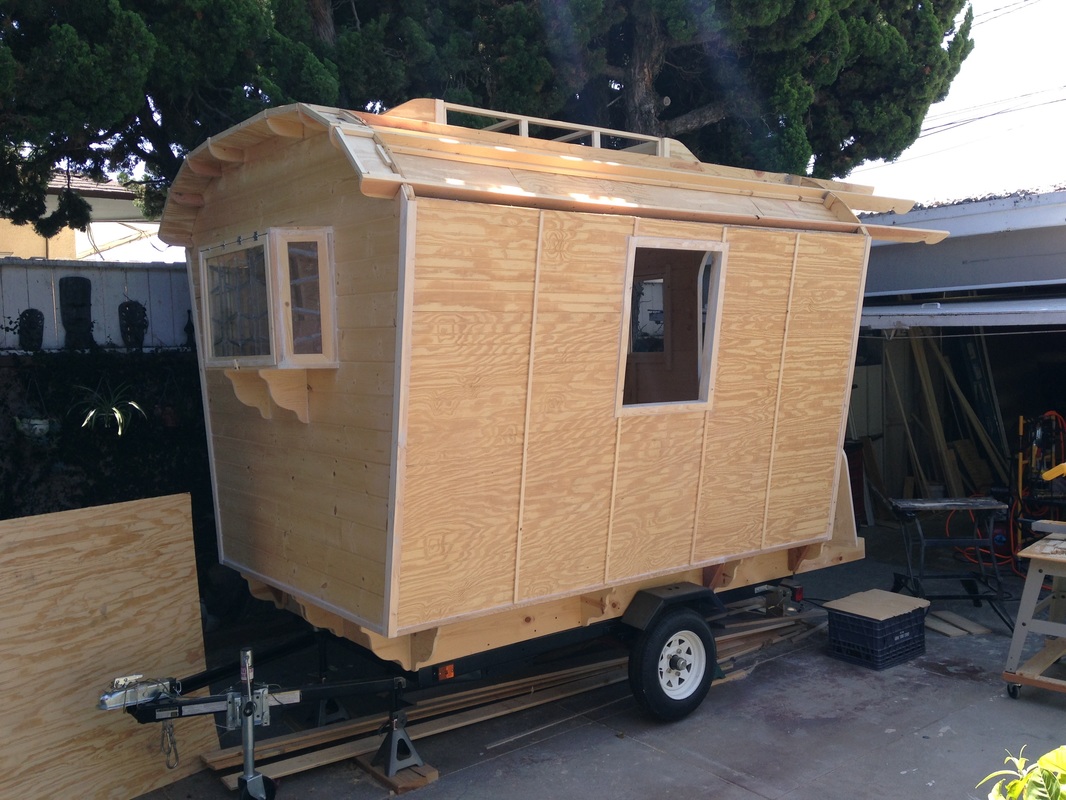
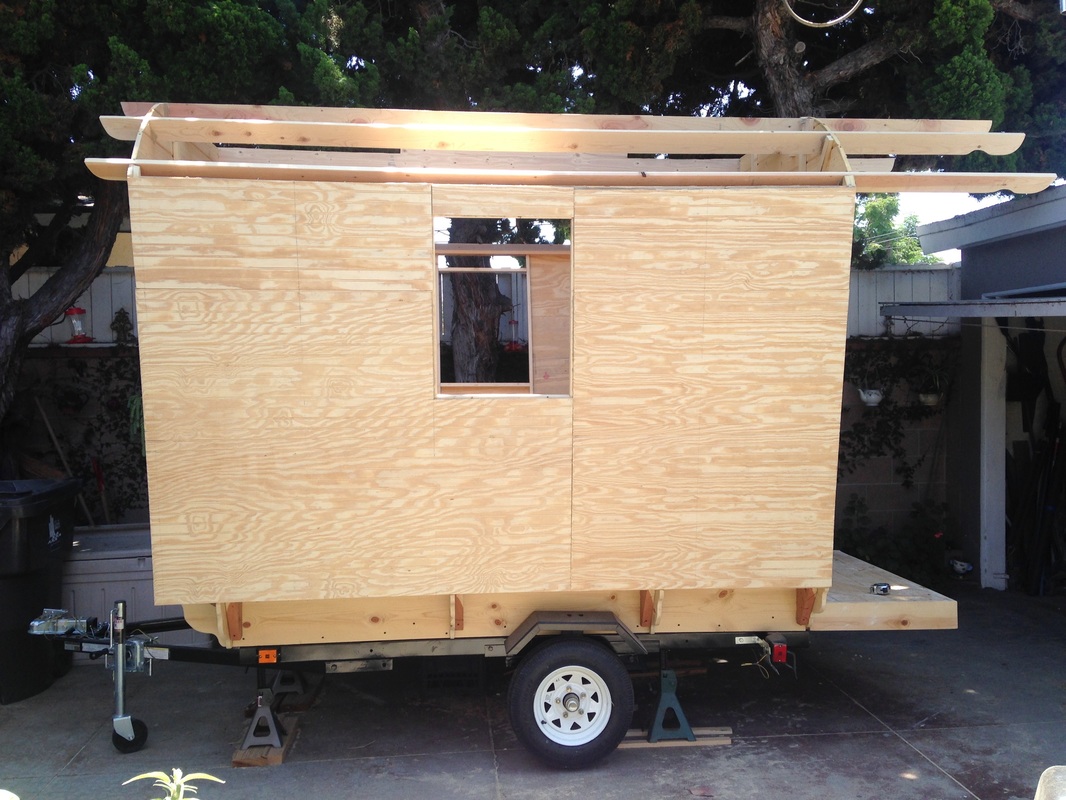
We got both sides framed and added the rafters.  These are notched into the tongue and groove ends for stability.  We also got the sides skinned with beadboard paneling:


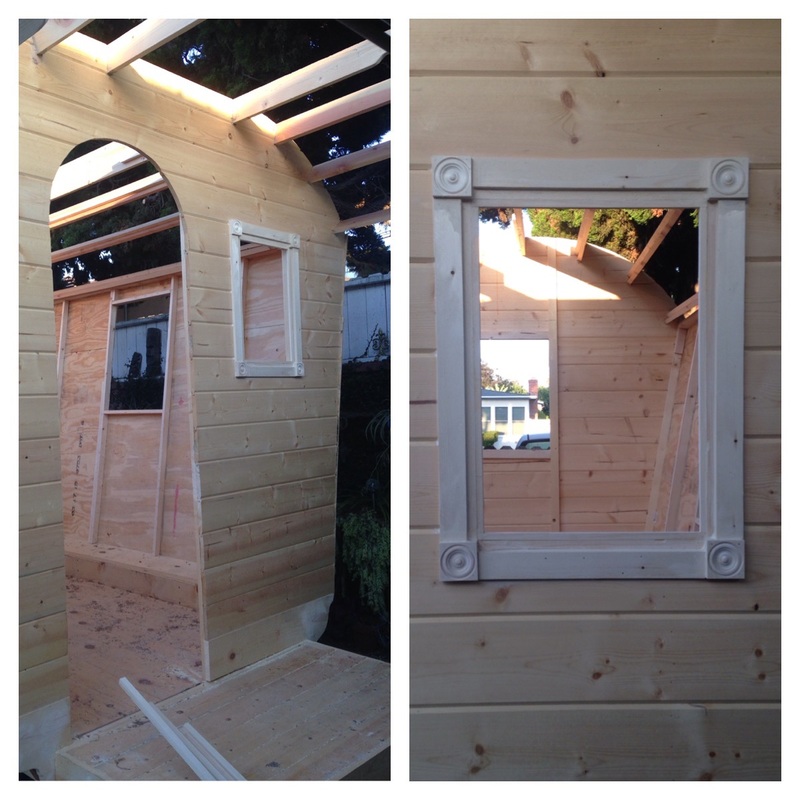
And I got the door and window on the back end cut.  The "back end" is actually the front, but it's the end away from the trailer hitch. 

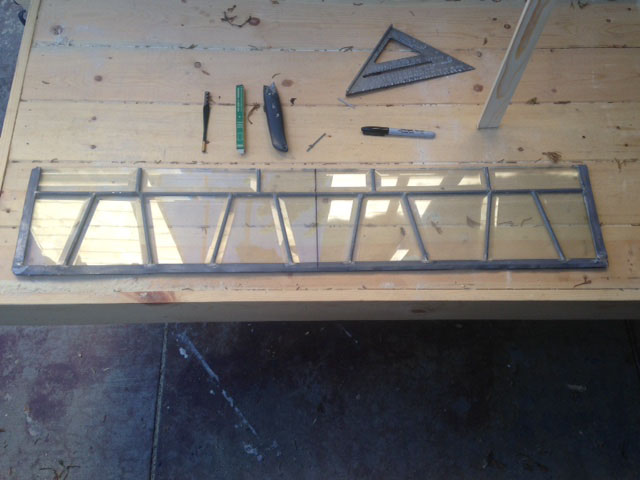
I added a little detail around the window while Dale was doing the plywood attaching on the sides.  For this window, I used the last remaining stained glass panel and had to cut/reassemble it -- here's what I had left:
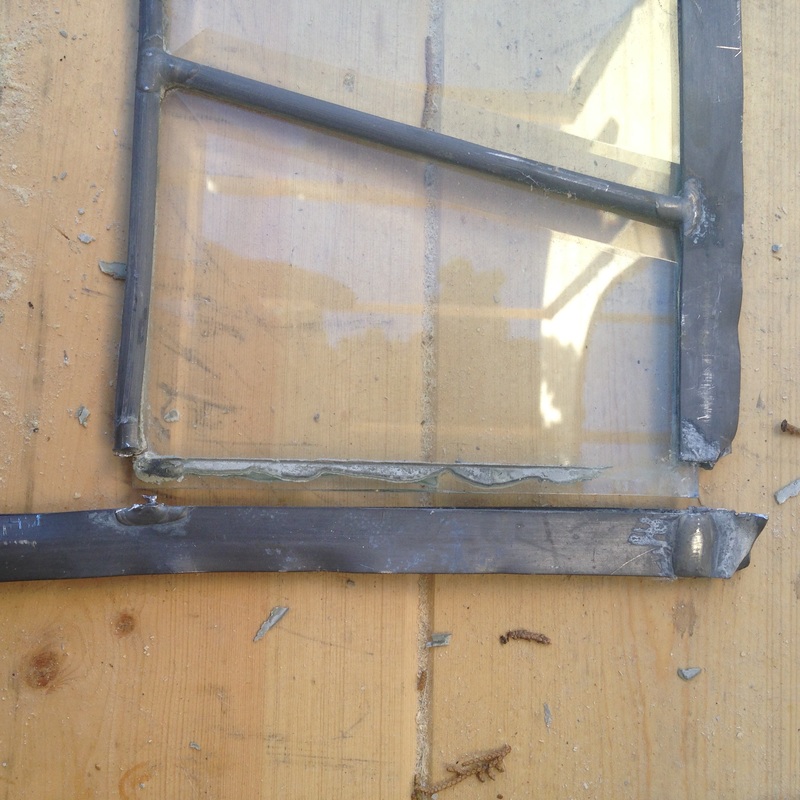
Just a long skinny half.  I cut that in half - you can see where I drew a line with sharpie above -- and then I cut the lead with a utility knife. Lead is super soft and cuts easily.  Then I snapped it in half.


 I cut off some of the extra lead, and then cleaned off the cement that is used to weather proof it. 


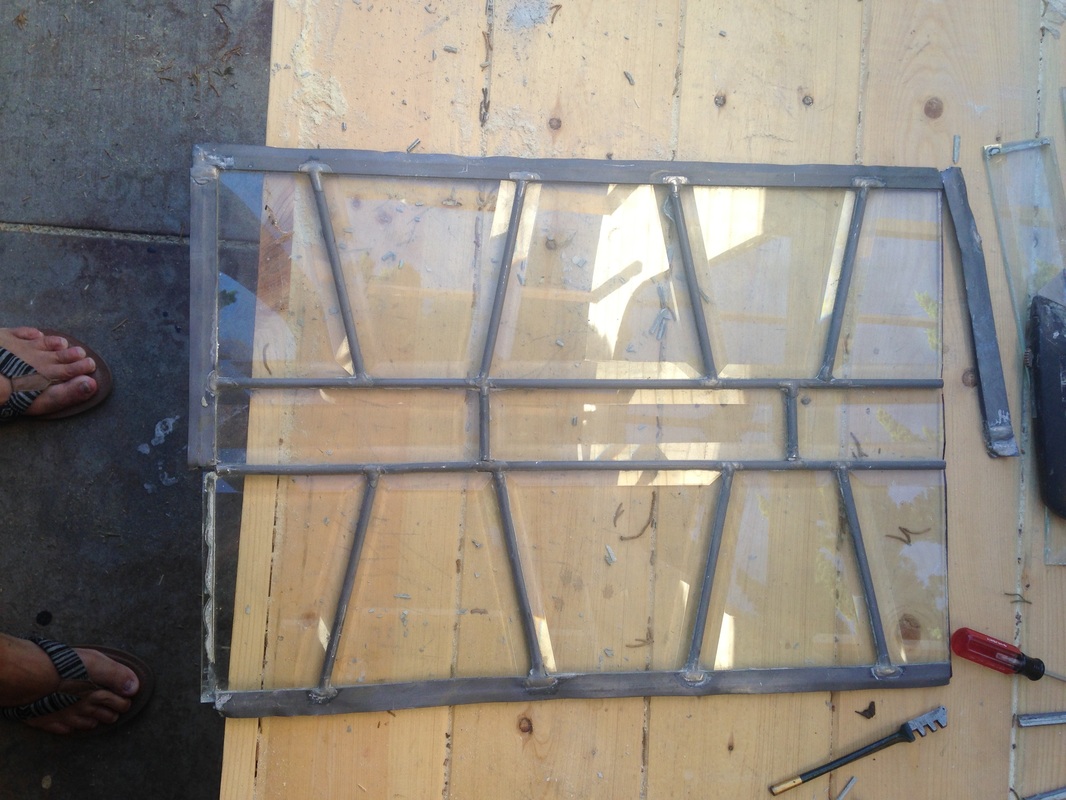
I removed the center rectangles from one piece, cleaned out the channel, then slid the two halves together.


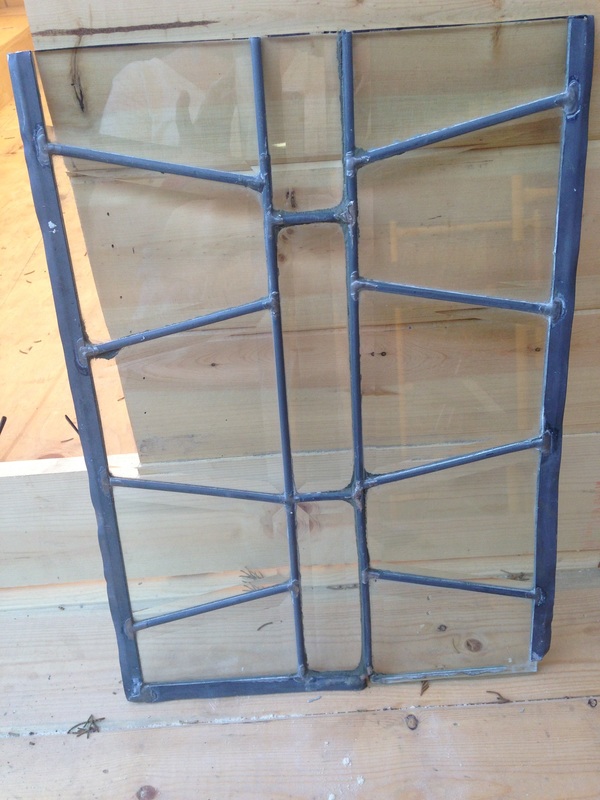
Then all I had to do was further clean up the lead, solder the joints and cement the new joins.  Then it was all ready to go!


So now I have a window for the door end of our little vardo!  I didn't show it here, but I also cut down that wide outer edge of lead channel, so I didn't have so much to hide in the window frame.


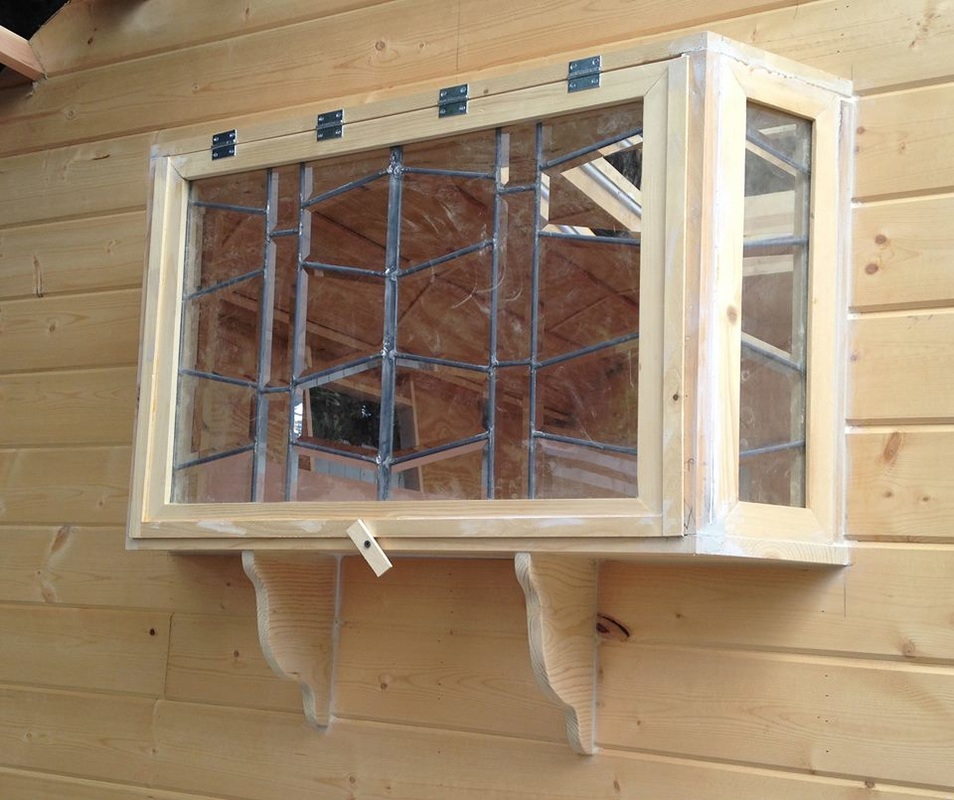
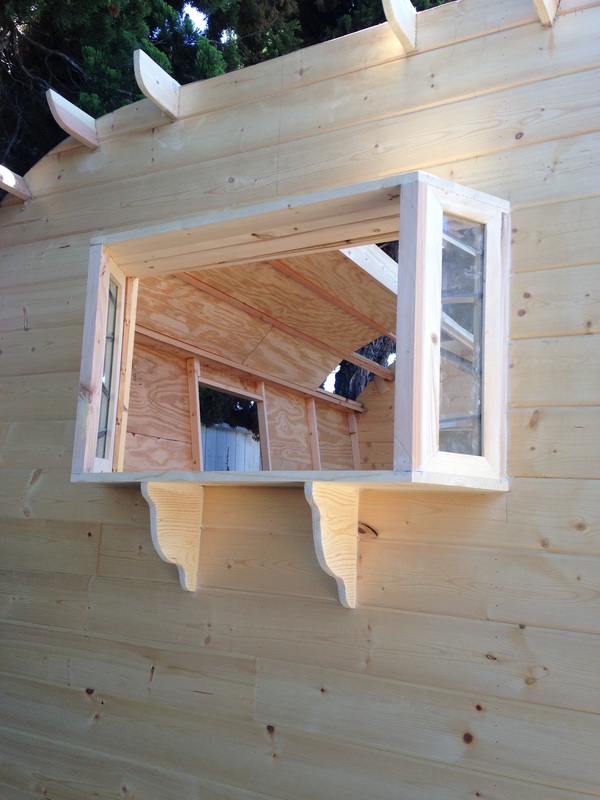
The other thing I did this week is get the bow window for the other end (mostly) finished.  I still need to put the last window in, but I needed to run out last night and pick up some hinges.  We still are working on ways to get it to prop open, but those are just little details to work on later.  Here's what it looks like so far:

I think I will make some kind of sloping roof for it -- it looks a little flat across the top.  A sloping roof will probably also make it a little aerodynamic, since this is the "leading edge" when we are towing it.  The window will be hinged at the top and open out from the bottom.  We'll also have to make shutters for this window so that the glass is protected while we haul it.  We're thinking something like this:

that, by the way is from a blog post here: http://paleotool.com/2012/03/12/travel-shutters/
There are a lot of great internet resources, including the blog above, instructables, other people's generous build journals and a wonderful site called Teardrops and Tiny Travel Trailers, which has a ton of resources on building methods.  We've gotten a lot of useful information there.

Finally, I also made frames for my two stained glass panels for the side windows:


These are ready to hang as well in their own window spaces, but I need to get the framing done around the holes before we hang them. 

We picked up the materials for the roof, so that's our next job in this project!

Saturday, August 01, 2015

Progress on the vardo

I thoroughly enjoyed teaching a workshop in Tennessee at the Tennessee Arts Academy - a first class job that was exciting and exhausting.  When I finished up my week there, I rented a car and drove from Nashville to Indianapolis to teach at the Indianapolis Museum of Art and also to spend some time with my grandson Parker.  We made lasagna:


He's such a lot of fun!

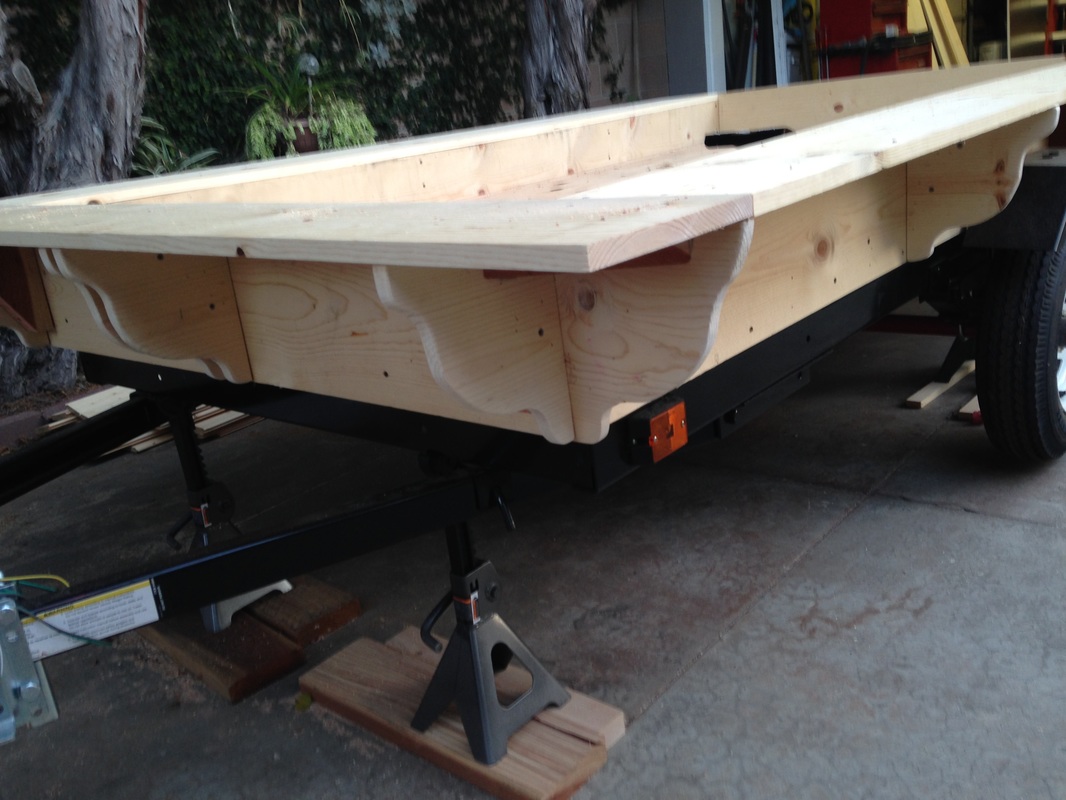
We got the basic box built for the vardo, and already we're altering our plans. Originally the ledge was going to be 12" -- but that looked large so we made it 10."  We also had put up some basic wedges to hold the ledge in place, but decided to cut out some curved wedges. 
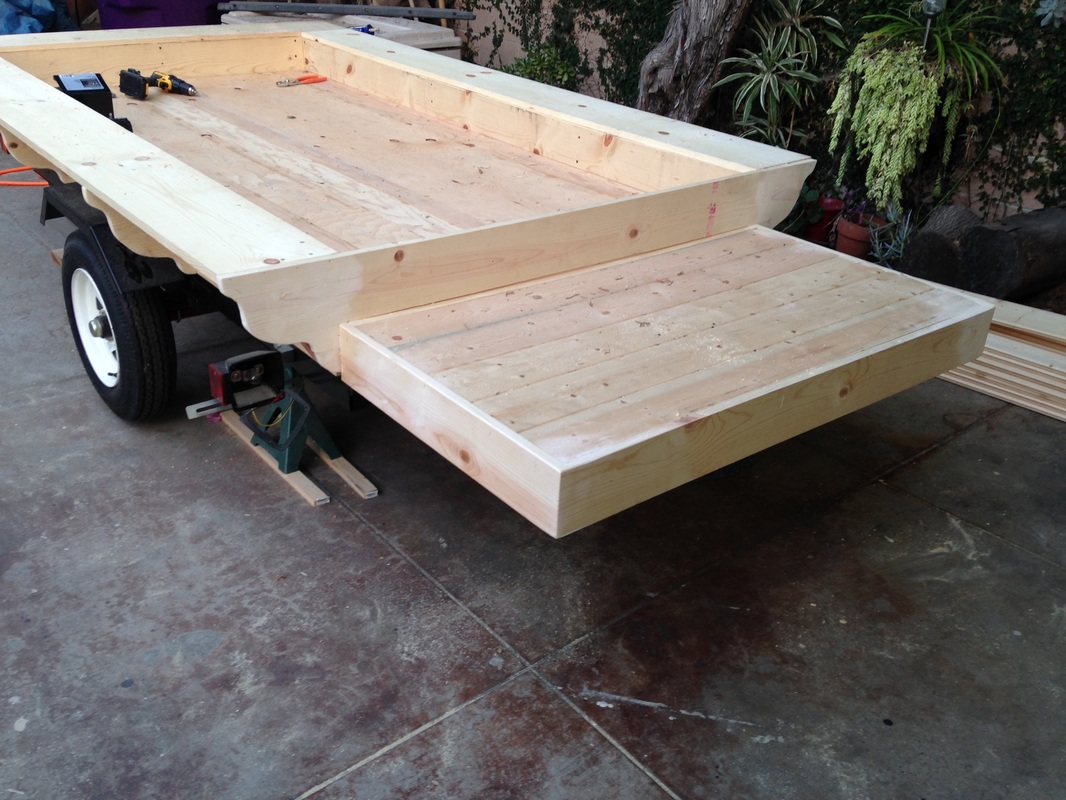
We got the box built and also the back deck.  This platform will help make a transition to entering, and also serve as a place to put our camp stove and any other equipment.  We'll have to move the lights and license plate later.
We set it up on jacks so it's level and stable while we're climbing all over it.  We are going to probably add some jacks welded on later but for now, these work fine.


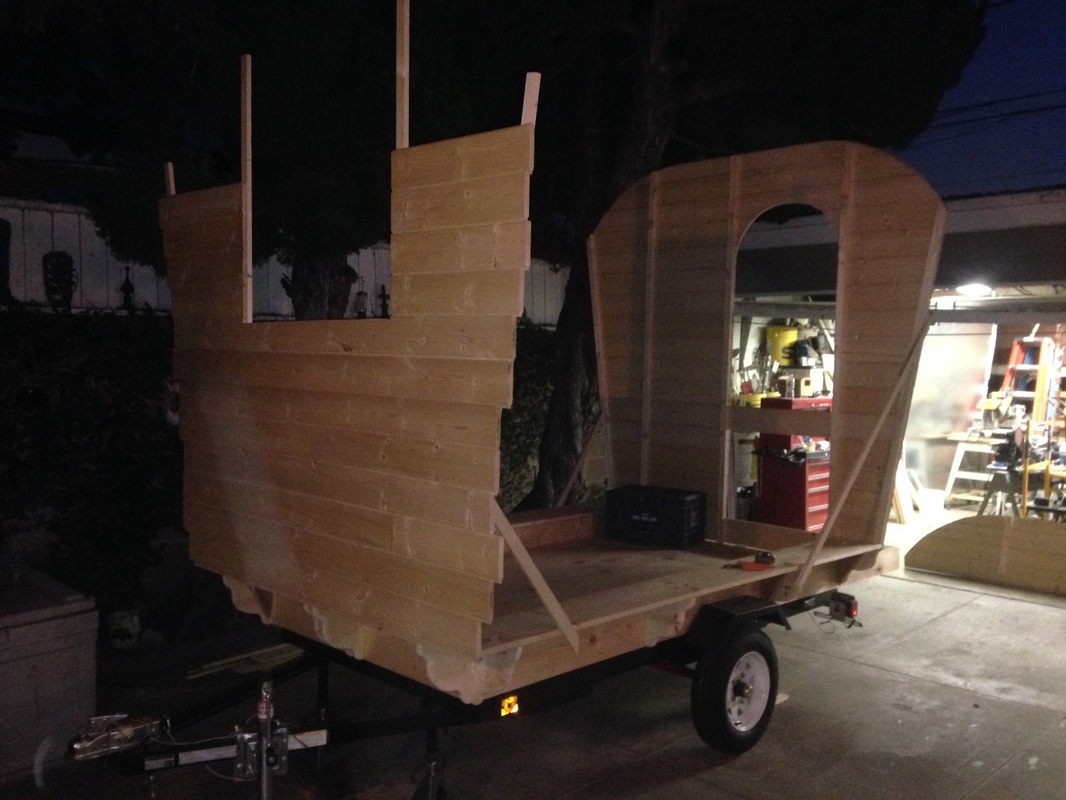
After we got the basic box and ledge done we started on the back wall.  This was exciting and kind of anxiety inducing -- all of a sudden, it seemed really huge!  Luckily, one of the online forums I joined to learn more about building these was super helpful, and it turns out we're right on track.  Right now the box and the one bar across the door are stabilizing until we get the sides put up.  We have the back end up -- or at least 75% of it - it got dark before we could finish.  It's cut, just need to get it attached.


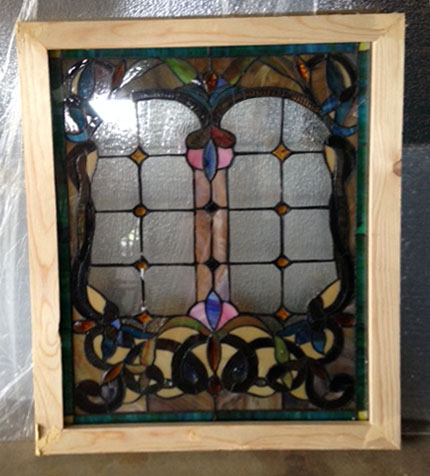
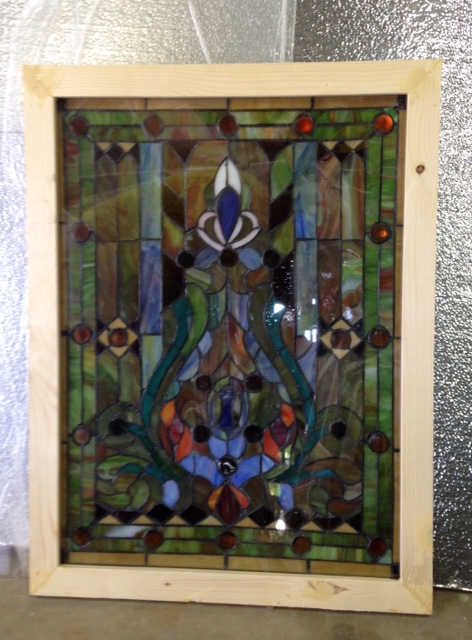
 We have a couple of things we want to splurge on, even as we try to keep costs/weight down. I bought two stained glass panels on wayfair.com for our side windows:


These were about $115 each, and I will build frames around them for our side windows. I also have a piece of leaded glass in the garage that I got off craigslist awhile back for about 10 dollars, and that will be the center of the bay window.  I'll see what I can do for the front door and I think I want to add a small window next to the door as well.

So we're having fun -- but we're not in any rush. I'll get the stained glass this week and then we'll know what size holes to leave for windows.  We're also rethinking some of the other parts -- maybe redesign the mollycroft so it blends more into the roof -- it's so tall, I don't want to have too much wind resistance!  I ran across this plan and I think we can do this instead:


On top of all that, I had gallbladder surgery yesterday == ouch, but I'm glad that thing is gone!  it was no fun dealing with that the past few months.  Easy laproscopic surgery but I'll be sore a few days.  We'll get back to business in no time, though!

Tuesday, July 07, 2015

Our new project - a vardo!

We really loved visiting Yosemite. Hard to believe some place that beautiful and breathtaking is so close to the busy city we live in - we're so fortunate! Every curve in the road gave us a new view of something incredibly stunning:


The hard part for us was driving back to our hotel each evening -- it's quite pricey to stay in the park hotels, and any hotels nearby are also really expensive, although we wish we had been able to get a room close!  As it was, we stayed in a city about 1.5 hours away, so although the drive was nice enough, it meant we had to leave earlier than we would have liked to, and by the time we got back to our room, we were beat.

We want to go back, but next time, we'd like to be able to spend more time wandering and exploring, and with Dale's medical problems, he can't go for long periods of time - it would have been great to take a break part way through the day to stop and relax, before going back out to explore more.  We talked about getting a travel trailer - I've loved the idea of campy, gypsy-style trailers and we helped my daughter work on hers (although it's not done, yet!).  So we thought we'd look for a fixer, since we like a good project, and we're kind of picky about how we want things done.  I wanted one small enough for just the two of us, but something we could pull with our truck and leave at a campsite.  We started checking craigslist, but only found "fixers" for about $3000 -- we wanted to spend around $500 since we knew we'd be doing lots of modifications and changes.  Dale had mentioned earlier that we should just build one (or more to the point, why don't we buy a junk one, tear it down and then just build it all over again?) -- so one morning a few weeks ago, I got looking at "home-made gypsy trailers" - and ran across a whole bunch of amazing photos and instructionals and tutorials, and oh dear, that did it!


The two main kind we liked were bow-top caravans like this:


 (I love the over-the-top painting on this one!  We plan on doing things like this for ours.)


and wagon-style vardos like this:


We decided to do something like this, but along the lines of a "ledge" style wagon -- it starts off with a small footprint, then has a ledge to expand the size --


This is from an amazing project - the frame is welded 1x1 square tubing, which is beyond what we want to do - but the basic shape is what we like.

We also like the cupola on the top, or what gypsy wagons call a "mollycroft roof."  It's a place to add some windows to brighten up the interior, which looks a little dark because of the small windows. In the picture to the right, the large opening is going to have a bay window inserted, which makes the opening appear much smaller when it's finished ---

These are built on a utility trailer.  We started looking for one of those on Craigslist, and new they run around $1200 -- we still wanted to stick with our $500 starting price, knowing we'd be throwing all kinds of money at it in wood and other materials.  So we looked at Harbor Freight trailers, read up on the pros and cons, and decided to go for it.  The trailer was on sale at Harbor Freight for $369, and we had a 20% off coupon, so for under $300 we had our start.


We began by assembling the trailer -- which took us a couple of evenings.  Crawling around on the floor is not so fun and neither one of us can do that well, but we got it put together.


 A zillion bolts, wires, nuts and bars - it weighs about 250 pounds now that it's done.  We are shooting for keeping it under 1500 lbs, the closer to 1000 the better.


I sprayed the frame black, so it won't have that Harbor Freight red/orange look.  I didn't spray the center bars, since they'll be under the vardo and it would be pointless, but I got all the showing parts black. 


This week, we worked on building a platform. We decided we'd extend the back side a little to add a 2' long deck, mostly for being able to get into it, and to set things on in camp.  The bed of the trailer as it comes is 4 x 8, which is the size of a sheet of plywood, which seems really little when you think about putting a bed, a kitchen and a dinette in it!  But it will grow fast enough.

I made a mock up cardboard model so we could talk about some of the features and have an idea on how to proceed:


I want a rounded top to the door, Dale wants the mollycroft, and you can see how small the deck will be.  The outside will be covered with tongue and groove boards, and the inside will have smooth walls.  Insulation is a necessary beast - both for keeping the camper warm in the winter, but also to keep it cool in the summer.  so we insulated the platform before building on top of it:


We're using two layers of foil-backed styrofoam sheets, with one side facing up and one foil side facing down.  the uninsulated part is what will be a deck.


Keeping in mind that all materials are adding weight, we're working our best to keep both costs and weight down. 


We would love to get the basic box built this week, although I am leaving to teach in Tennessee on Friday, and then I'm off to Indiana for a week, so Dale will be on his own. I don't know if he'll be able to make any progress without a helper to hand him stuff and hold things in place, so we may not make much progress until the end of July when I return, but we're not in a big rush.  It's fun to think of all the things we have to figure out -- the floor plan, the colors, the process -- we do love a good project.  Hopefully, we'll make good progress!
Blogging tips