Showing posts with label camper. Show all posts

Friday, July 22, 2016

More interiors

We've come a long way with the interior --shortly after I posted the last update, we went on a "shakedown trip" - usually these are a short camping trip of a weekend to see how things work - ours ended up being 1024 miles with friends.  But Stardust performed beautifully, and we found out a few things that we know we want to do.

First of all, we took the camper to get it weighed. We wanted to be sure we weren't overloading it - it came in at 1520#.  I was hoping for 1200#, so a little heavier than I wanted. But I was also thinking that we had a limit of 1720, which our camper payload is listed at.  Then I got reading, and realized that the trailer itself weighs around 270#, and our total can be closer to 2000# when you combine the payload + trailer weight.  So we are closer to our 1200# than I thought. So all is good.  Which was nice, because I still had things to add --

So in the time since we returned, I've wallpapered:
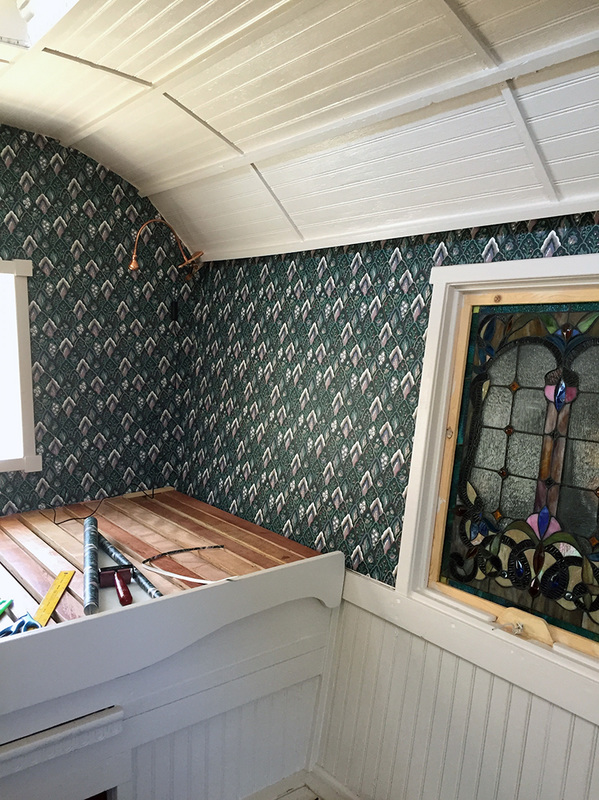
this was some 1990s wallpaper I got in Indiana at a thrift store.  It's a dark hunter green, which works well with our general theme.  It also keeps it from being overly bright inside -- since all the woodwork is a creamy off-white.

Then I built in some more cabinets.  We realized that it's nice to have things back near the door, and the refrigerator counter was becoming a catch-all.  Building in a shallower shelf there made sense, so I added that.  When it came time to put the door on, I was concerned that it would: a. hit the curtain rod (that I haven't put up yet) and b. cause us to clear off the counter every time we needed to open the cabinet door.  Dale suggested using a slide, which was a great idea.  So that's what I did:
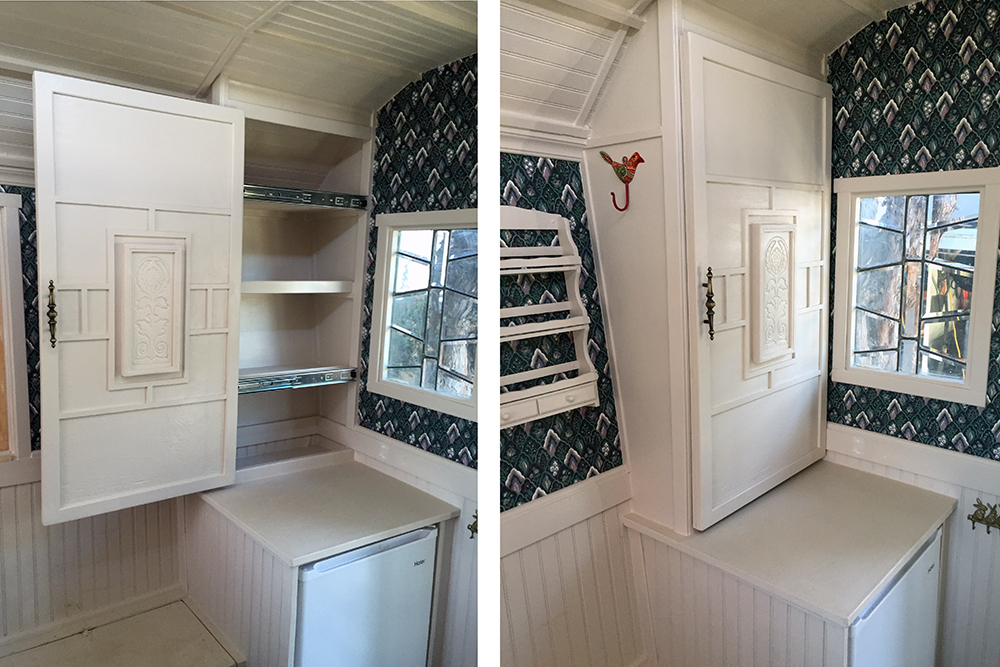
We had just changed out all the drawer slides under the sink - the wooden ones were not working well, even though we waxed them, they kept sticking, so we replaced them with drawer slides.  So we were happy with the slide action, and the new cabinet door works great.


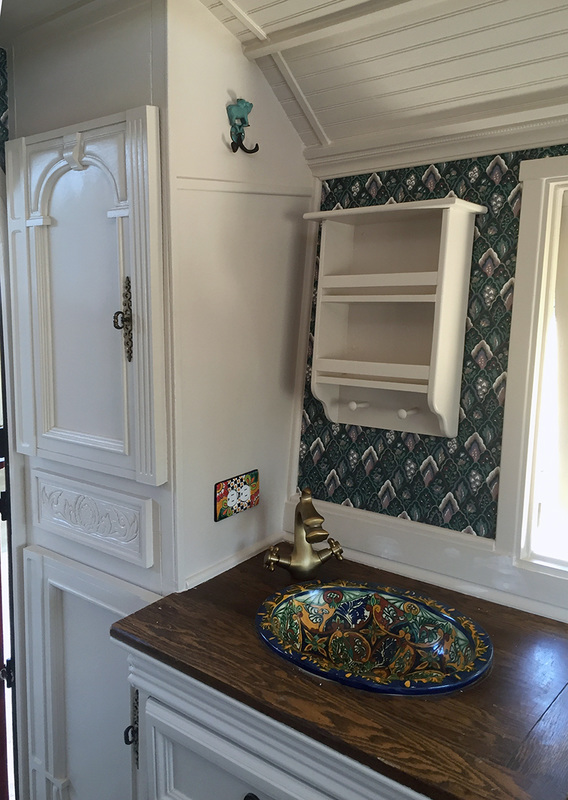
I also picked up some small shelves - one from my friend Stacy, pictured above -- that will hold small bottles of paint -- and the one  over the sink, from a thrift store in Utah.


The sink area looks good - the shelf will hold hand soap, washcloths, other 'sink stuff" or anything else I can think of. I like the hooks also, for holding a variety of hats, towels, etc.


We also added a hook inside the door to hold keys for all the locks - the battery box, the "bee box" lock, the lock for the hitch, etc. This way, they're all right there inside the door.  The door itself needs some detailing - I'm thinking of adding a couple of shallow long bins for misc. things that we can just reach over and get -- putting our phones in, things we don't want to climb all the way in for.


I got the doors under the bed made finally -- and now the cabinetry is pretty much complete.  I still need to add knobs and touch up the paint.  The benches are dirty from us climbing on them to get various bits painted, patched, nailed  - they need another coat of paint.  I picked up some foam to make seat cushions, and I got fabric this week so I can get those sewed up. The lids on both seats lift for more storage underneath.  Under the bed we will be putting in our water tank - it's small, I think only 5 gallons, and then we'll run plumbing.  Mostly, it will be used to store our major large items, like chairs, blankets, canopy, etc.  I want to get a piece of carpet to fit the floor under there so things won't slide around too much.  
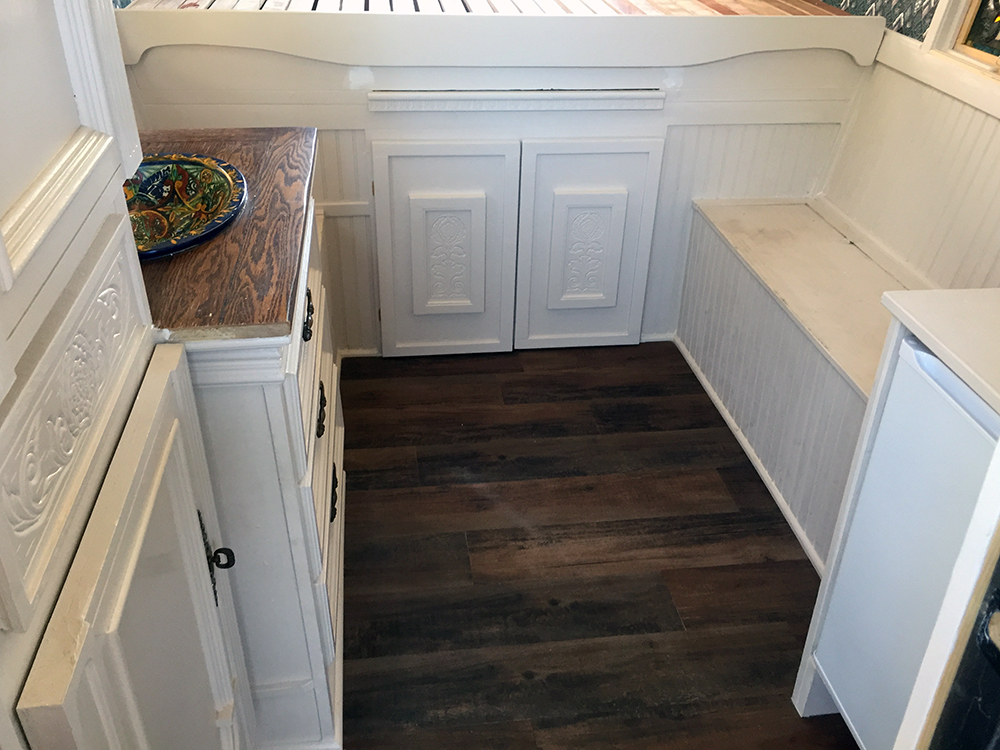

The view from the doorway is looking good:
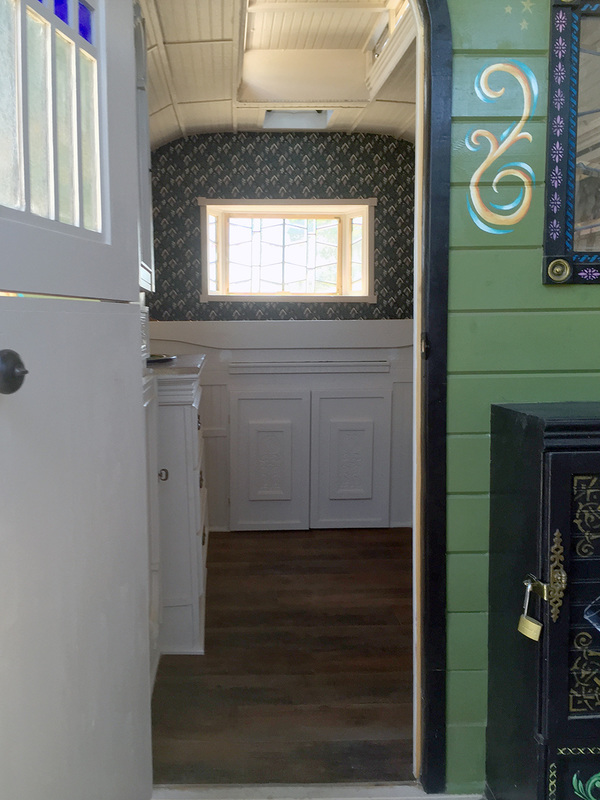


Still a bit to go. I have some shelves to make for over the back window and over each side of the bed, I need to paint the inside of the window frames and some trim around the back window  I need to add curtains on this window as well, as well as make screens for all the windows.  I also need to add a threshhold.


We also have more bits and pieces for the outside - I picked up bumper stickers at all of the places we've gone to so far, and they are above the electrical box outside.  I think that'll be fun to add to as we go.  I also picked up a carriage style lamp for the outside, and I have to get that wired for 12v.


And of course, I have a ton of flowers, butterflies, birds and other nature stuff to paint inside!  Now that everything is all clean and white, it's my perfect blank canvas.  The inside will get as decorated as the outside soon!

So the inside is coming along. I am looking forward to some trips with just Dale and I - it's really a great size for just the two of us!  Another thing we want to do is have an 'open house' - our neighbors have been wondering what the heck we have been working on in the backyard, and I think having it open for a tour would be a lot of fun!

Saturday, June 04, 2016

Interior progress

We have several big projects in getting the interior going:  getting the 'furniture' installed, getting the electrical working, and adding plumbing.  We're trying to do all 3 things at once, and while nothing's completely done, we're making good progress on most of it!

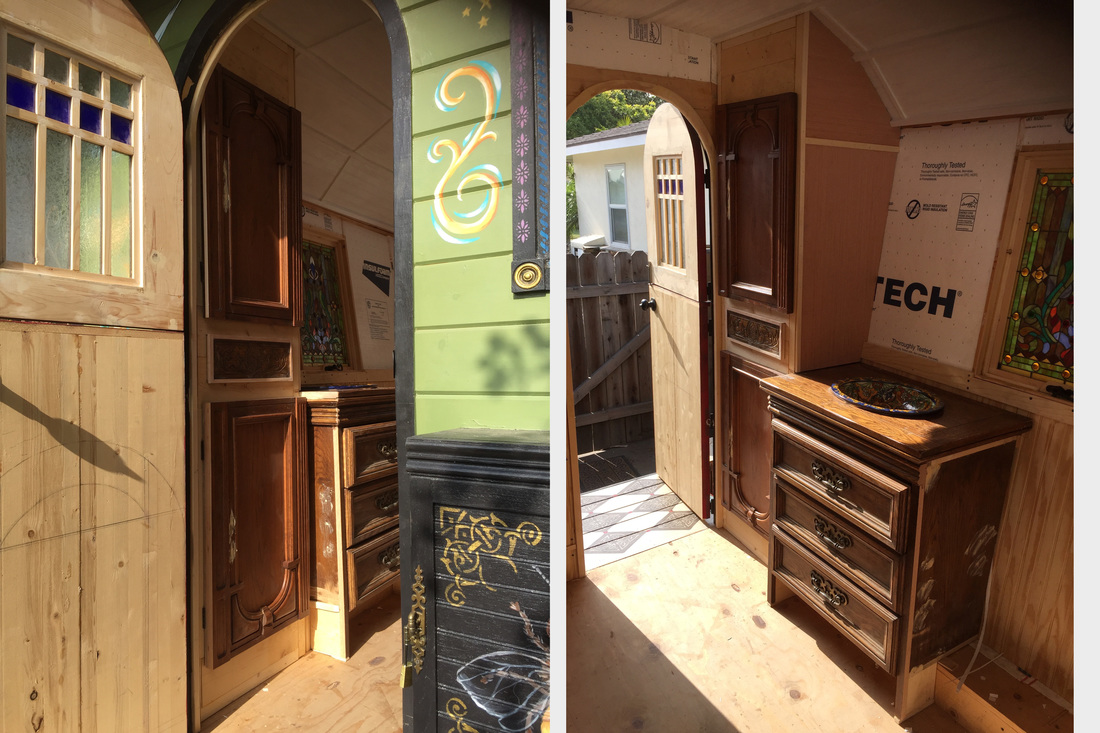
I started working on getting the cabinets and walls done at the tail end while Dale worked on the electrical from the other end.  That way we weren't tripping over each other.  First, I cut down some of the furniture we had picked up free off craigslist and built around it --
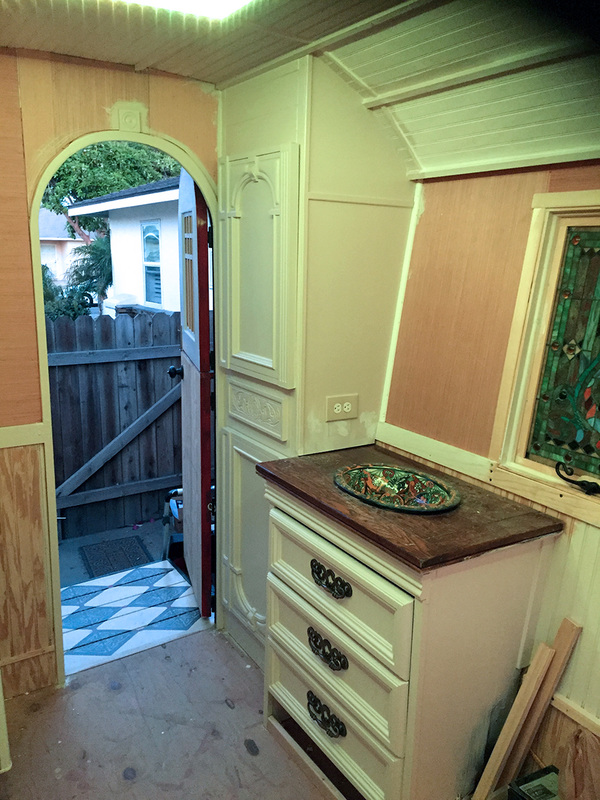
On the left is a storage cabinet with shelves, and then there is a sink built into a cabinet.  This is how I started off, then I got them mostly painted:


I started off with white primer, but the white looked a little too stark for me (Dale liked it, but he likes pretty bright colors), so I tinted the white more like an ivory, and I like it better.


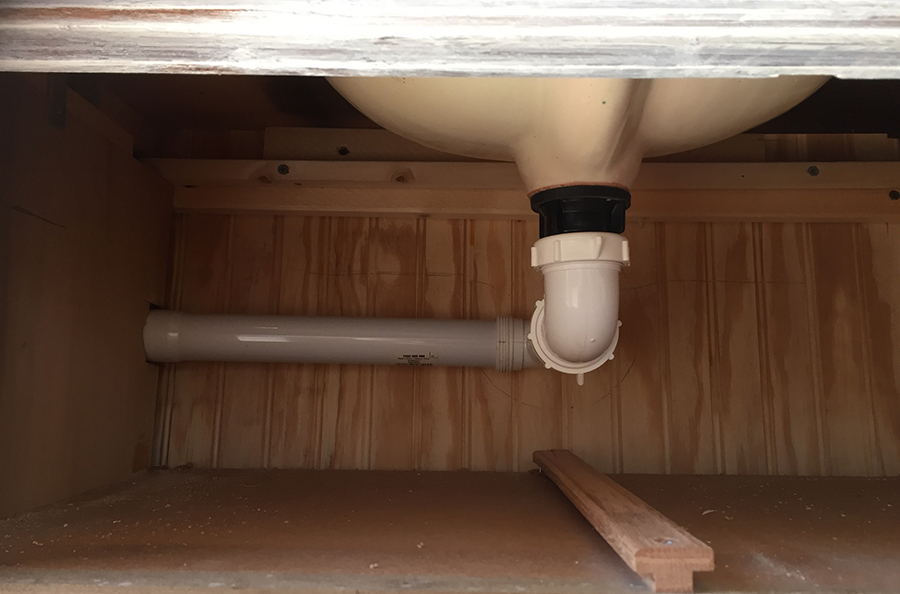
I got a hand-painted Mexican sink on Craigslist for $25, and so I set that into the cabinet top.  To run the plumbing, I ran the PVC pipes towards the rear of the cabinet and out the left side:


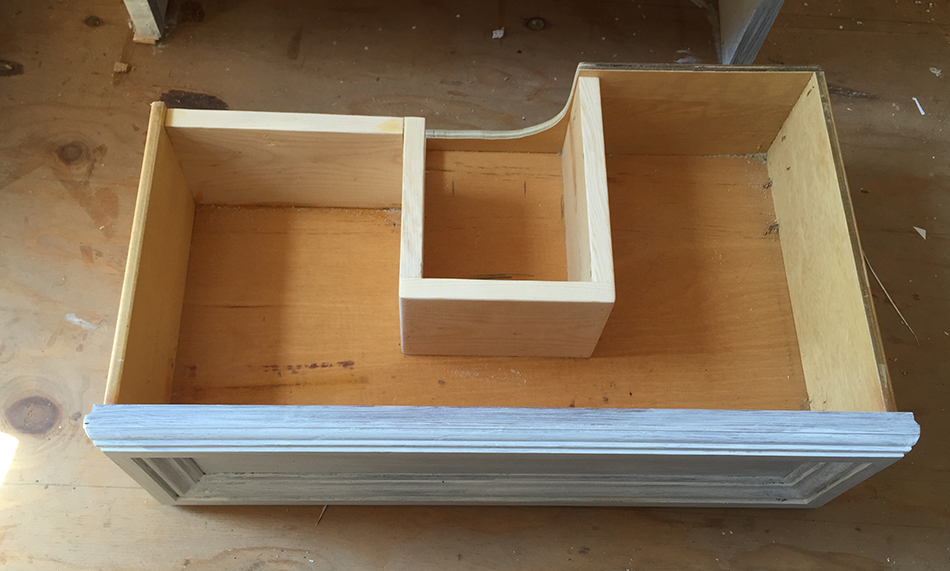
and then I cut down the top drawer so that it doesn't hit the piping.


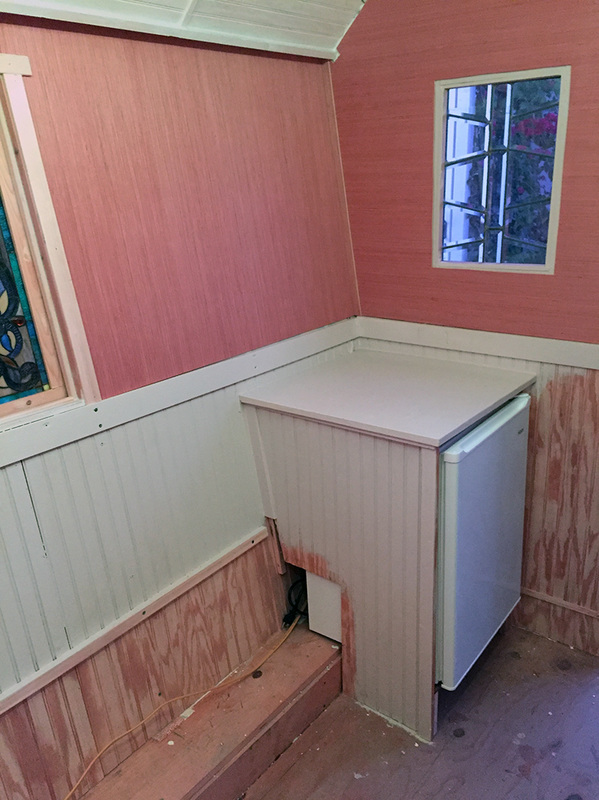
on the other side of the vardo, I built in a box for our mini-fridge, which we'll be able to use if we're hooked up to 'shore' power -- plugged in at a RV site or campground:


The opening at the bottom is to help circulate air for the fridge - it will go into a storage compartment that will serve as a bench.  You can see the part that is unpainted, it will be inside the bench.  I have the parts cut, but I have to get the bed cabinet installed first,  and then I'll get the two benches put in.


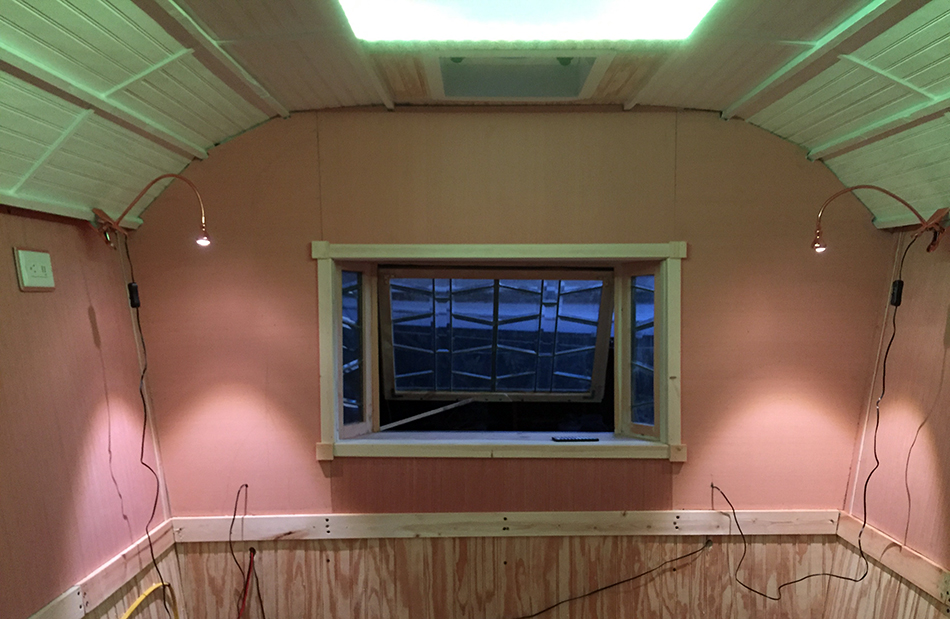
While I was working on woodworking, Dale was working on the electrical.  We got 4 outlets put in the 110v system, which will work when we are hooked up to shore power, and then we got the lights, fan and water pump, along with some USB charging ports, hooked into the 12v system.  We picked up a couple of 12v lights at IKEA - they came with a adapter for 110v, but we just threw that away and hard wired them into the panel.  We also added a LED row of lights along the top of the skylight -- they are programmable to run different colors and effects, and they have a remote to turn them on and off.


Here's the fan, it works great.  We had to modify the installation because it came in at an angle, but we made a nice adaptation, just needs a little caulk and it's complete.  It'll make sleeping great with a nice breeze that will blow down on us.  The outlet on the top left has a plug and 2 USB ports to charge our phones.  We're going to add a shelf there, so that's why it's up so high.  


So - that's where we are.  We're working hard to get it ready for a trip next week!


The wiring is kind of all over the place, but we'll get it corralled before we get the bed cabinet done.

So I have a lot of caulking and painting to do -- the walls will remain plywood until later int he summer when I have more time to work - I have wallpaper for the walls, and I want to build a lot of shelves and other features, but right now, we're just getting it ready to get out on the road!

Thursday, May 26, 2016

Back to the vardo -- and back to the garden!

We are working on our vardo again - - now that the school year is finished, I am looking forward to summer and going out exploring, and I want our little vardo complete.  We got the truck lights installed the other day, and this week I've been working on the outside, hoping to get the paint job finished and a few more outside details.  But first, juts got this ladder done this morning:
This is where our name for the vardo - "Stardust" - comes from.  It's a line from Joni Mitchell's song 'Woodstock' - and this is the refrain.  I also have Hoagy Carmichael's song "Stardust" in mind, but this is the one I think of first.

Besides this little ladder that will help us get in, I also built a couple of pieces this week for storage, first, a battery box that looks like a barrel:


It has a shelf that you can't see, and the batteries fit inside easily.  I want to get a couple of leather belts to make straps across the ends, and I've still got to get this one painted with some flowers and stencils, but it's good to go.

The other thing I made was a box on the deck for cooking supplies:  it'll hold a propane camp stove, a couple of bottles of propane, and some skillets and utensils.  Here's how that looks:

That one was made with leftover furniture parts.  It will hold a lot.

After I got that done, I decided to work on the paint job on the outside, and also the back deck.  Got that done this morning (the deck, the sides needs a couple more days).  So it looks pretty spiffy from the back:


(Luna enjoys laying on the deck)

The sides still need work but they're getting there:

The green man on both sides looked a little stark, so I gave them a green glaze and now they fit in much better, but this picture I took before that.  

So today, we begin working on the inside!  I need to get us a nice comfy place to sleep!

Tuesday, July 07, 2015

Our new project - a vardo!

We really loved visiting Yosemite. Hard to believe some place that beautiful and breathtaking is so close to the busy city we live in - we're so fortunate! Every curve in the road gave us a new view of something incredibly stunning:


The hard part for us was driving back to our hotel each evening -- it's quite pricey to stay in the park hotels, and any hotels nearby are also really expensive, although we wish we had been able to get a room close!  As it was, we stayed in a city about 1.5 hours away, so although the drive was nice enough, it meant we had to leave earlier than we would have liked to, and by the time we got back to our room, we were beat.

We want to go back, but next time, we'd like to be able to spend more time wandering and exploring, and with Dale's medical problems, he can't go for long periods of time - it would have been great to take a break part way through the day to stop and relax, before going back out to explore more.  We talked about getting a travel trailer - I've loved the idea of campy, gypsy-style trailers and we helped my daughter work on hers (although it's not done, yet!).  So we thought we'd look for a fixer, since we like a good project, and we're kind of picky about how we want things done.  I wanted one small enough for just the two of us, but something we could pull with our truck and leave at a campsite.  We started checking craigslist, but only found "fixers" for about $3000 -- we wanted to spend around $500 since we knew we'd be doing lots of modifications and changes.  Dale had mentioned earlier that we should just build one (or more to the point, why don't we buy a junk one, tear it down and then just build it all over again?) -- so one morning a few weeks ago, I got looking at "home-made gypsy trailers" - and ran across a whole bunch of amazing photos and instructionals and tutorials, and oh dear, that did it!


The two main kind we liked were bow-top caravans like this:


 (I love the over-the-top painting on this one!  We plan on doing things like this for ours.)


and wagon-style vardos like this:


We decided to do something like this, but along the lines of a "ledge" style wagon -- it starts off with a small footprint, then has a ledge to expand the size --


This is from an amazing project - the frame is welded 1x1 square tubing, which is beyond what we want to do - but the basic shape is what we like.

We also like the cupola on the top, or what gypsy wagons call a "mollycroft roof."  It's a place to add some windows to brighten up the interior, which looks a little dark because of the small windows. In the picture to the right, the large opening is going to have a bay window inserted, which makes the opening appear much smaller when it's finished ---

These are built on a utility trailer.  We started looking for one of those on Craigslist, and new they run around $1200 -- we still wanted to stick with our $500 starting price, knowing we'd be throwing all kinds of money at it in wood and other materials.  So we looked at Harbor Freight trailers, read up on the pros and cons, and decided to go for it.  The trailer was on sale at Harbor Freight for $369, and we had a 20% off coupon, so for under $300 we had our start.


We began by assembling the trailer -- which took us a couple of evenings.  Crawling around on the floor is not so fun and neither one of us can do that well, but we got it put together.


 A zillion bolts, wires, nuts and bars - it weighs about 250 pounds now that it's done.  We are shooting for keeping it under 1500 lbs, the closer to 1000 the better.


I sprayed the frame black, so it won't have that Harbor Freight red/orange look.  I didn't spray the center bars, since they'll be under the vardo and it would be pointless, but I got all the showing parts black. 


This week, we worked on building a platform. We decided we'd extend the back side a little to add a 2' long deck, mostly for being able to get into it, and to set things on in camp.  The bed of the trailer as it comes is 4 x 8, which is the size of a sheet of plywood, which seems really little when you think about putting a bed, a kitchen and a dinette in it!  But it will grow fast enough.

I made a mock up cardboard model so we could talk about some of the features and have an idea on how to proceed:


I want a rounded top to the door, Dale wants the mollycroft, and you can see how small the deck will be.  The outside will be covered with tongue and groove boards, and the inside will have smooth walls.  Insulation is a necessary beast - both for keeping the camper warm in the winter, but also to keep it cool in the summer.  so we insulated the platform before building on top of it:


We're using two layers of foil-backed styrofoam sheets, with one side facing up and one foil side facing down.  the uninsulated part is what will be a deck.


Keeping in mind that all materials are adding weight, we're working our best to keep both costs and weight down. 


We would love to get the basic box built this week, although I am leaving to teach in Tennessee on Friday, and then I'm off to Indiana for a week, so Dale will be on his own. I don't know if he'll be able to make any progress without a helper to hand him stuff and hold things in place, so we may not make much progress until the end of July when I return, but we're not in a big rush.  It's fun to think of all the things we have to figure out -- the floor plan, the colors, the process -- we do love a good project.  Hopefully, we'll make good progress!

Wednesday, November 30, 2011

Gypsy Camper update

We spent the Thanksgiving holiday week with my daughter, with our main project being working on the Gypsy Camper.  We were hoping to get it all done, but like all other projects, lots of unforseen complications arose and we didn't quite finish - which was disappointing, because we wanted to get it all decorated!  Here's a picture of the outside, which we did finish - along with a before/after shot:
My daughter is a big fan of pink.  We picked up all the polka dot colors from remainders/mis-mixes at the hardware store and the Habitat Re-store.  it took 2 coats of paint - the fun part was trying to carefully go over all the edges of the circles while people were inside, jostling about.  At one point, I heard my daughter laughing behind me as I am trying to carefully outline a turquoise dot and the whole trailer jumps as someone steps out.  It looks fabulous, eh? Hahaha..like a Barbie circus trailer!

We also got a lot of the inside work done - redid the little kitchen for the most part, although I'd like to replace the doors on the cabinets, they're pretty warped and rough.  They're going to get another coat of paint as well for now.  We removed the stove and painted it with appliance high-heat spray - hopefully it will hold up well.  We also replaced the counter top, and the broken glass in the front window was replaced with a screen and an awning for ventilation.
The awning flips u  but in this picture, it's down. 

We also spent a lot of time doing the fabric items - curtains, pillows and futon cover.  But we coudln't get them placed inside, because there's still work to be done on the walls.  We found out that most of the electrical was non-functioning, so we had to rip out some wall areas to run new electrical all throughout. 


So here's the couch area, ready for the mattress, but you can see the side where we started to put up our map wallpaper, which then got ripped down when they had to get access to the wiring.  We are planning on doing white beadboard halfway up the walls, with the map collage covering the walls up to the ceiling.  The little bits we got done looked great -- right up until they found out they'd have to rip into them to get to the wiring. The window frames are all painted black, and it looks great to set off the map wallpaper.


I have lots of fabrics in my stash, so we went through them all and picked out the ones they liked, then pieced together a cover for the futon.  Boy, was that fun to get put on!


Daisy the Canyon Dog (a.k.a. Troublemaker, Bad Dog, Naughty Girl, Escape Artist, etc -- also, Sweetie Pie, Mouse, Snuggle Bug) is overseeing our work. 


I wish we had some finished pictures!  One more day and we would have had the whole thing all fancied up!
Blogging tips